Abandon Ship is the easter egg achievement/trophy for the map Voyage of Despair, in which the characters of the Chaos Story must complete the trial set out by the Sentinel Artifact.
Requirements
- Activate the Sentinel Artifact
- Activate the Pack-a-Punch
- Acquire the Kraken (Wonder Weapon)
- Buld the Kraken Distillation Kit
Recommended
- Pack-a-Punched and re-PAPd weapons
- Ballistic Shield and or Svalinn Guard (Upgraded Ballistic Shield)
- Homunculus (at least two players)
- Kraken Elementally upgraded with Grip of Akkorokamui (Cryofreeze)
- Kraken Elementally upgraded with Jörmungandr's Fang (Brain Rot / Poison)
- Hellion Salvo PAP'd and re-PAPd with any upgrade (highly recommended weapon against the Sky-Eye Boss)
- Recommended Perks: Quick Revive, Stamin-Up, Mule Kick, Dying Wish (Odin Modifier), and or Time Slip. (You're only allowed 4 Perks total.)
Easter Egg Steps (11-21-2018)
Step 1: The Sentinel Artifact is yours for the Taking
You will need to go to the Poop Deck and activate the Sentinel Artifact. This will open the red door areas of the map. It will also open the Portals and reveal the Pack-a-Punch Pedestals at the Poop Deck, Turbine Room, Lower Grand Staircase, and Cargo Hold.
Step 2: For the Elements are Four and Must be Attuned
Now you can activate the Pack-a-Punch pedestals (4 total). Remember that the last pedestal activated is where the Pack-a-Punch will spawn. Once all 4 Pedestals have been activated, and the Pack-a-Punch appears, you will hear a sound consisting of a "ding" and chorus. Players usually prefer the Pack-a-Punch to begin at the Lower Grand Staircase. By this time it usually appears in the Turbine Room, depending on how fast the Easter Egg steps are completed, by the time that the Sentinel Artifact needs to be Pack-a-Punched. During this time, players will want to have built the Ballistic Shield (3 parts total) and have acquired it. Also, be sure to have collected all 3 Kraken Distillation Kit parts, and build it at the Engine Room Workbench. The 4th part to the Distillation Kit will be a part from a Catalyst Zombie. After you kill a Catalyst Zombie (Poison, Water, Electric, or Fire) it will drop a body part that you can use to Elementally Upgrade your Kraken. You will first need the Poison Zombie Heart for the Easter Egg.
Step 3: To Change the Agents of Change is to Change Everything
For this step, you will need to locate 4 Chalk Symbols and their 4 corresponding Clocks.
(This lists all possible spawn locations of the Symbols / Clocks)
Notate the Symbols and what numbers the minute and hour hands are on the Clocks. You might want to notate which area the Symbols and Clocks are located, in case you need to go back and check the Symbols or numbers, in order to save time. These can be found in any order. You do not need to notate the actual time on the Clocks, but if either the minute or hour hands is not exactly on a number, notate which number they are nearest. There will be 4 Symbols and Clocks total, out of 6 possible locations.
- Mail Rooms: Symbol - Beneath a metal stairway. Clock - Directly opposite of the stairs, on the wall, near a doorway (back right, if you're facing the stairway).
- Bridge: Symbol - On a desk. Clock - In the Bridge, on the wall in front of the Captain's Wheel.
- Upper Grand Staircase: Symbol - Above a doorway, opposite the decorative Clock (back right doorway, if facing the Clock). Clock - Upper Grand Staircase, at the top of the stairway.
- 1st Class Lounge (Zeus Perk Room): Symbol: Beneath a candle mount on a wall (right corner, if facing the fireplace with the Clock). Clock - 1st Class Lounge, on a mantelpiece, above a fireplace.
- Galley: Symbol - On a cabinet beneath a counter. Clock - Galley, on a wall, about the 10 o'clock position from the cabinet with the Symbol, if facing the Symbol.
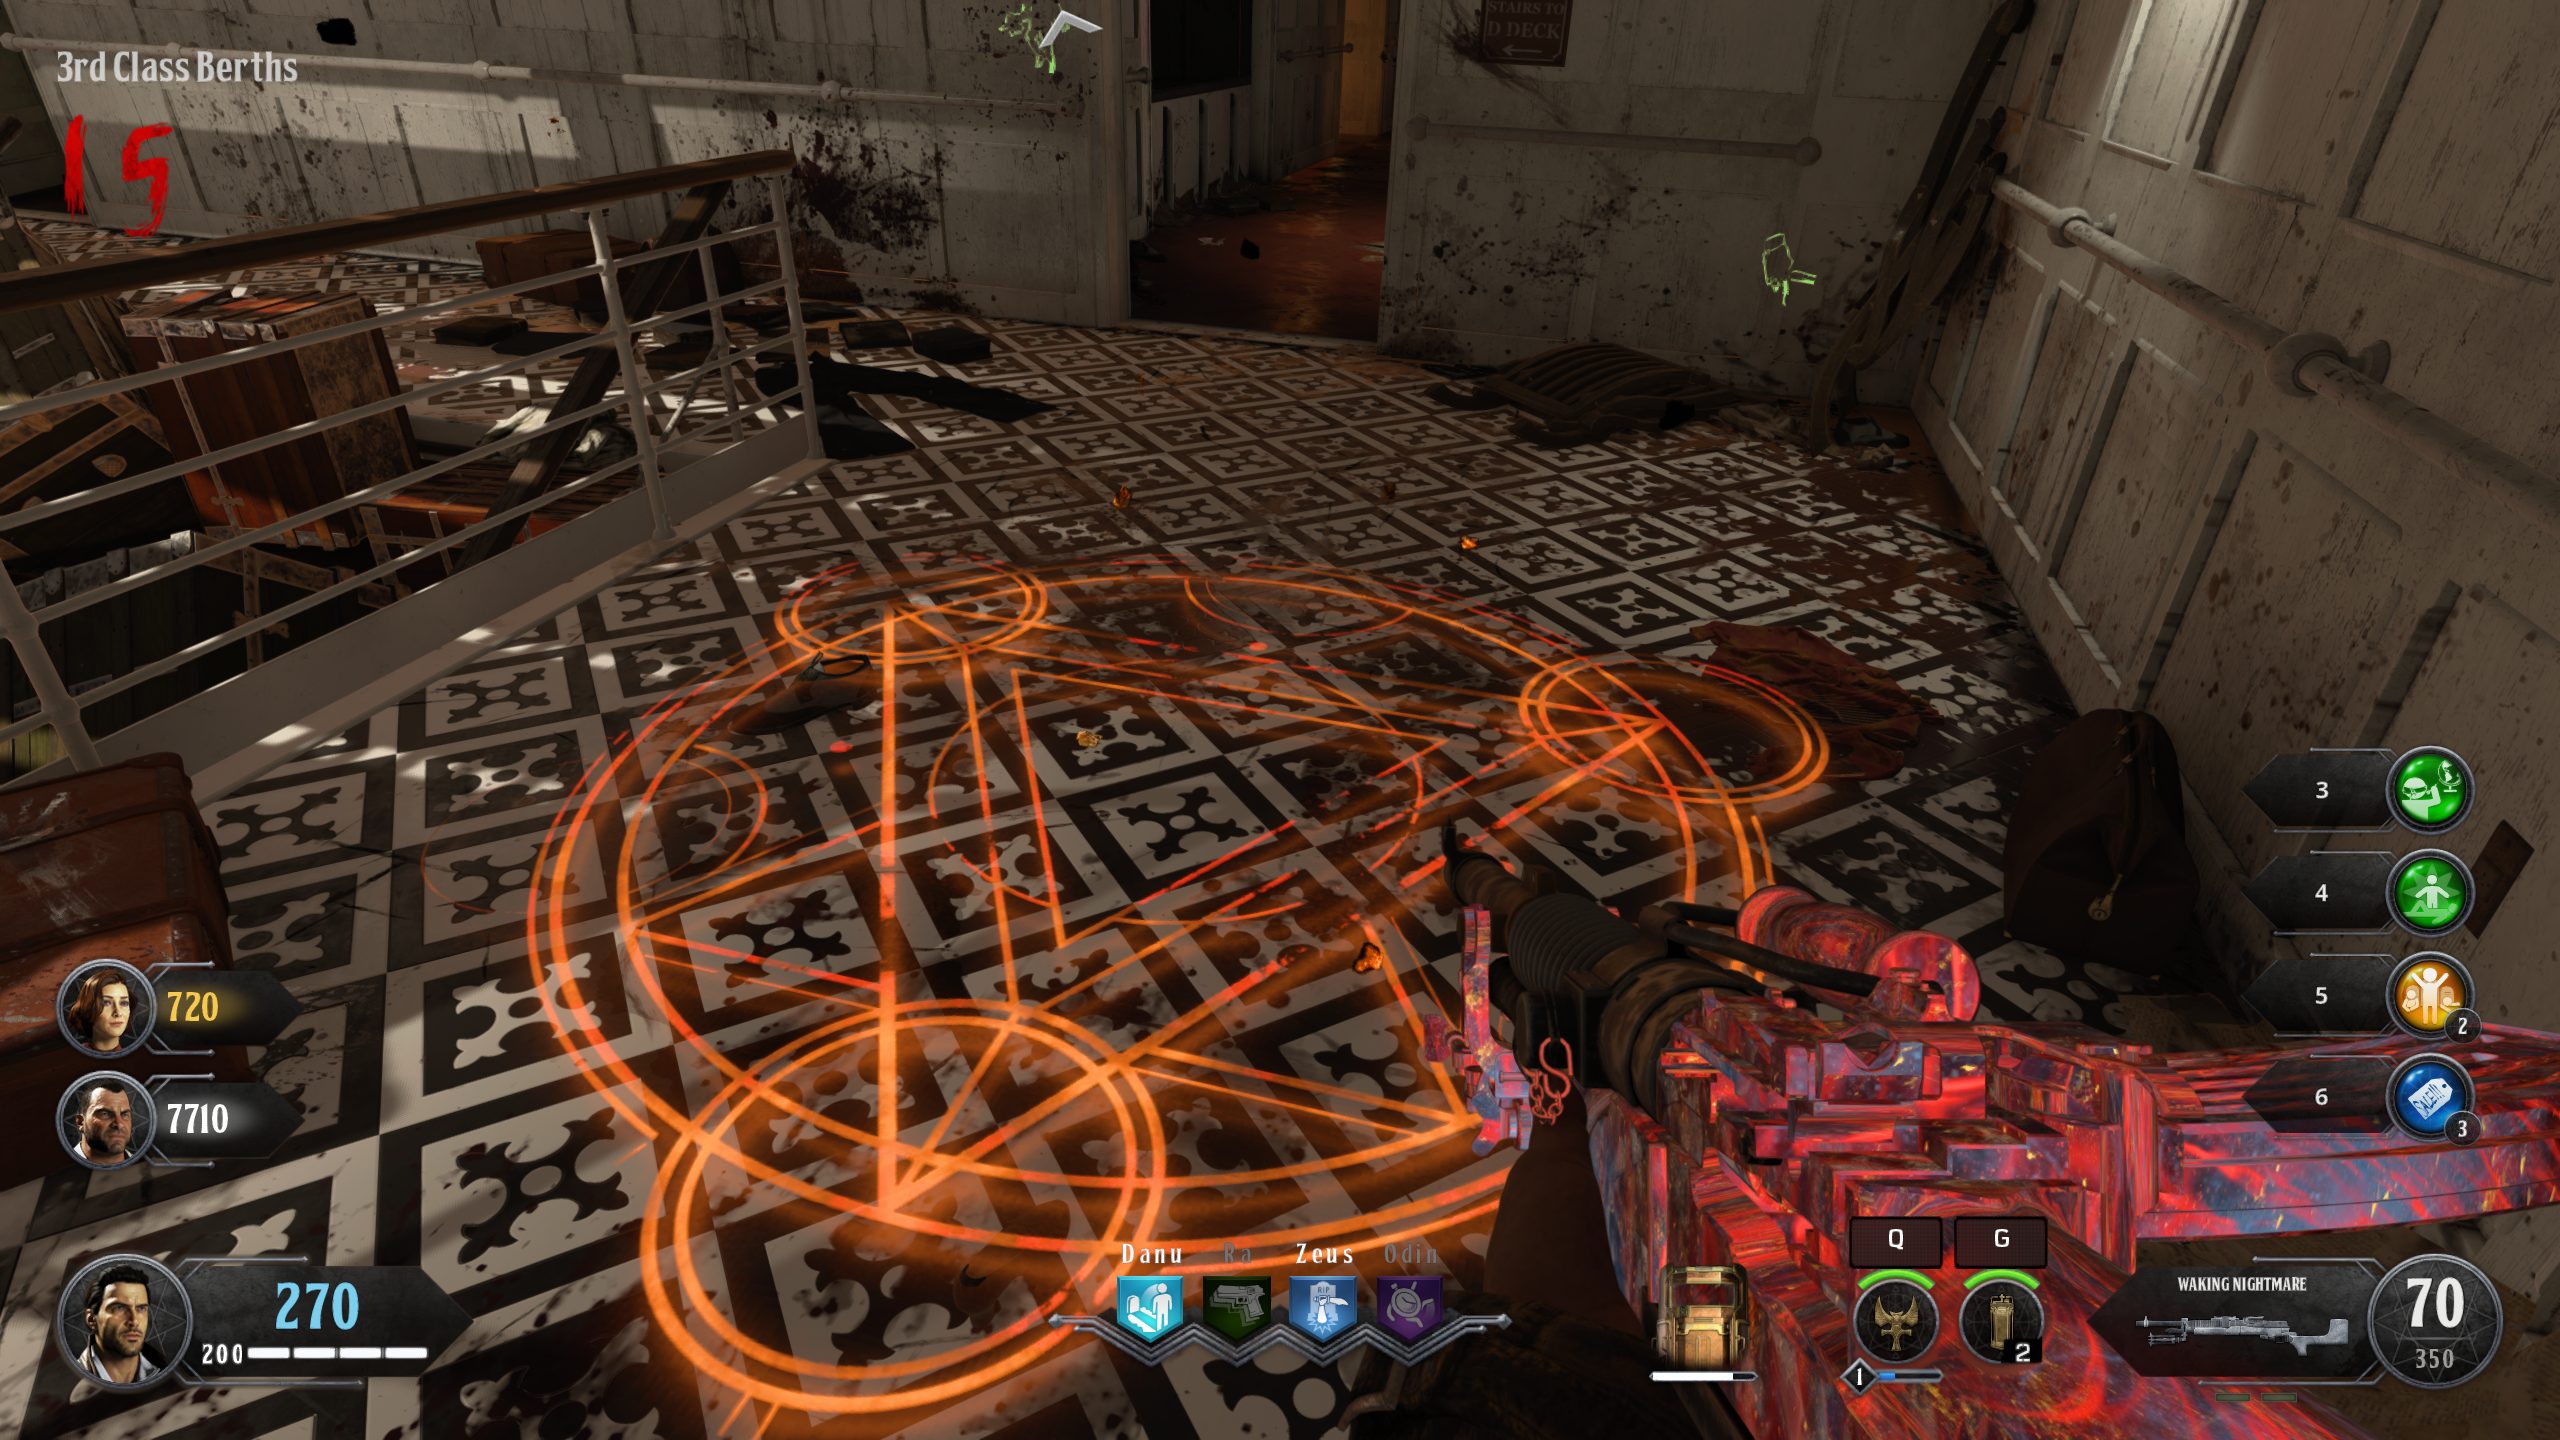
- 3rd Class Berths: Symbol - At the base of the wooden staircase. Clock - 3rd Class Berths, on wall opposite the wooden staircase, where the Symbol can be located.
After you have located the 4 Symbols and their corresponding Clocks, return to the Bridge where the 4 Levers are located. The Levers will have 1 Symbol, each, on them. The Symbols consist of the following:
Right Side Up Triangle, Upside Down Triangle, Up Dash Triangle, and Down Dash Triangle.
There are 4 Bridge Levers in all. Each Lever will have one of the 4 Symbols on them. You will need to move them to the "minutes" position. Example: If one of the Clocks showed 2:50 as the time, move the Lever two spaces to the left. Think of the Lever as a clock. On a clock, the number 10 signifies 50 in minutes. The top of the Lever would be 12. Just aim at the Lever and then press the "Use" button to move the Lever. Aim toward the right side of the Lever if you want it to move right, and aim toward the left side of the Lever if you want it to move left. Note: There is a small clock hand, on the Levers at the Bridge, that stands for the "hour hand".
After you finish placing the Bridge Levers in the correct minute positions that you found on the Clocks near the Symbols, you will need to go to the Poop Deck and do the same, except for the "hours" this time. There are 2 Levers by where the Sentinel Artifact was activated. If you are facing the Levers, with the steering wheel in between them, the left Lever is for the Up Dash Triangle and the right Lever is for the Down Dash Triangle. Note: The Poop Deck and Engine Room Levers are for the Clock hour hand numbers. Place both Poop Deck Levers on the correct hour positions and then go to the Engine Room and do the same for those two Levers. (The Poop Deck and Engine Room Lever Symbols do not appear on the Levers. Note: Engine Room Levers are "Up Triangle" for the bottom left Lever and "Down Triangle" for the top right Lever, if you are facing the Levers and the Odin Perk Statue is up the stairs behind you. There are 4 Levers total, in the Engine Room, but only 2 of them work.) Once all 8 of the Levers are in the correct positions, you will hear a sound consisting of a "ding" and chorus.
Step 4: Within the Chain of Phases all is Conceived
You will need to find 4 Electrical Outlets that will be sparking or leaking the 4 different Elemental substances (Poison, Water, Electric, & Fire).
")
")
")
")
")
The following locations are where the Outlets can be found:
- State Rooms: First accessible room on the far left, if coming from the Forecastle. The Outlet is located on a wall near a doorway.
- Upper Grand Staircase: On the top floor, on the right wall, if facing the Clock.
- 1st Class Lounge: To the left of the Zeus Perk Statue, if facing the Statue. Outlet is on a wooden beam.
- Dining Hall: Left of the Ra Perk Statue, on a wall by a table and chair. Face the Statue area to see the outlet.
- Aft Decks: Within a buildable barrier window, opposite the Mystery Box spawn location.
- 3rd Class Berths: Outlet is located by the staircase. Black and white design floor tile is on this floor of the ship.
After you locate the Outlets with Elemental substances, bring the corresponding Catalyst Zombie to the Outlet and kill it close to the Outlet. Example: If the Poison Outlet is at the Upper Grand Staircase, lure a Poison Zombie to the Outlet, and then kill it. This will create a Symbol on the floor. The Symbol will act as a teleporter pad. Only one Catalyst Zombie can be killed near an Outlet per round. Example: Electric Zombie for round 9, Water Zombie for round 10, etc. After all 4 Teleporter Symbols have been created, they need to be activated in a specific order. Correct order: Poison, Water, Electric, and Fire. Teleporter Symbols can be created in any order but MUST be used in the correct order. If you perform the challenges out of order, you will waste time and ammunition.

Teleporter Symbol that appears near an Outlet after the correct Catalyst Zombie has been killed near it.
Note: To teleport, all players need to stand on the Teleporter Symbols. The pad will light up after everyone is on it. Hold the "Activate" / "Use" button and it will teleport everyone to a specific location on the map. Complete each challenge by killing Zombies, Catalyst Zombies, Stokers, and Blightfathers. Fairly often, a challenge will be completed after the last Stoker or Blightfather has been defeated.
POISON CHALLENGE: You will be at the Poop Deck for this Challenge. First you will see a White Sentinel Artifact float up in midair. There will also be a Max Ammo Powerup at the very front of the Poop Deck. It is suggested to save this until you have completed the Challenge. The Max Ammo will not disappear throughout the Challenge. During this time, you will face Zombies, Poison Zombies and Blightfathers. Utilize the Ballistic Shield firemode, and or the Hellion Salvo, against the Blightfathers to take them down faster. Once you've successfully completed the Poison Challenge, you will see a flash of white light and the White Sentinel Artifact will float back down near the Pack-a-Punch spawn location. Press the "Use" button to acquire the White Sentinel Artifact. Rinse and Repeat for the next 3 Challenges. (Note: If you do not re-acquire the Sentinel Artifact, you will not be able to teleport to the next Challenge. Also, after these Challenges, you will return to the "normal" Voyage of Despair world. So, if you left two Zombies alive before teleporting to the Poison Challenge, they will return after completion of the Challenge. It is suggested to keep them alive and attempt to complete all 4 Challenges to save time.
WATER CHALLENGE: You will be in the Cargo Hold for this Challenge. The Cargo Hold will fill up with water. The White Sentinel Artifact will float up into the air. There will be no Max Ammo for this Challenge. Have your Special Weapons and high powered weapons ready. It is recommended that you have a Pack-a-Punched weapon, and Homunculus, for this Challenge. Duirng this time, you will face Zombies, Water Zombies and Blightfathers. After the Challenge has been successfully completed, you will see a flash of white light accross your screen. You are now in the "normal" world. The White Sentinel Artifact will float back down into the water. Grab the White Sentinel Artifact and hurry out of the Cargo Hold before the Zombies return.
ELECTRIC CHALLENGE: You will be on the Boat Deck for this Challenge. There will be a Max Ammo floating near the center area. Save it for after you complete the Challenge. During this time, you will face Zombies, Electric Zombies and Blightfathers. After the Challenge has been successfully completed, you will see a flash of white light across your screen. You have once again returned to the "normal" world. The White Sentinel Artifact will float back down, where you can reach it. Grab the White Sentinel Artifact and head over to the final Elemental Challenge.
FIRE CHALLENGE: You will be in the Boiler Room for this Challenge. The White Sentinel Artifact will float up into the air, out of reach, again. During this time, you will face Zombies, Fire Zombies and Stokers. Be sure to have your Special Weapons ready and take out all of the Stokers as quickly as possible. Hold up on the catwalk and watch the stairways on each side. After this 4th and final challenge has been completed, you will see a flash of white light across your screen. You're back in the "normal" world again. Now grab the Gold Sentinel Artifact that has floated down, beneath the catwalk, where you originally spawned. Get out of the Boiler Room as fast as you can, before the Zombies return.
Template:CoD15 Achievements