(→Trivia) |
Aldo012345 (talk | contribs) No edit summary |
||
| (96 intermediate revisions by 57 users not shown) | |||
| Line 1: | Line 1: | ||
| + | {{game|cod1|codc}} |
||
| − | {{ |
+ | {{Infobox/level |
| ⚫ | |||
| ⚫ | |||
| ⚫ | |||
| ⚫ | |||
| ⚫ | |||
| ⚫ | |||
| ⚫ | |||
| ⚫ | |||
| ⚫ | |||
| ⚫ | |||
| − | |game |
+ | |game = ''[[Call of Duty]]''<br>''[[Call of Duty: Classic]]'' |
| − | |character = Sgt. [[Evans]] |
||
| − | | |
+ | |character = [[Evans|Sgt. Evans]] |
| + | |team = [[SAS]] |
||
| − | |weapons = None to start |
||
| ⚫ | |||
| − | |enemyweapons= [[MP40]], [[Kar98k]], [[Luger]], [[Stielhandgranate]] grenades, [[MP44]] (unusable) |
||
| ⚫ | |||
| ⚫ | |||
| ⚫ | |||
| ⚫ | |||
| + | |enemies = [[German Military]] |
||
| ⚫ | |||
| − | | |
+ | |multiplayer = [[Ship (map)|Ship]] |
| − | |multiplayer = [[Ship (Map)|mp_ship]] |
||
}} |
}} |
||
| + | {{for|the actual battleship|Battleship Tirpitz}} |
||
| ⚫ | |||
| ⚫ | |||
| + | ==Characters== |
||
| + | *[[Evans]] (playable) |
||
| + | *[[Price (Call of Duty)|Price]] (K.I.A) |
||
| + | *[[Waters]] |
||
| + | *[[Schmidt]] (K.I.A) |
||
| + | ==Walkthrough== |
||
| + | ===Boarding the Boat=== |
||
| + | The player will spawn in a boat. [[Price (Call of Duty)|Captain Price]] will be dumping bodies off the side of the boat. When that is over, [[Waters|Sgt. Waters]] will drive the boat over to the large battleship in the distance. The boat will pull up to a staircase on the side of the ship. Price will ask permission to come aboard and hop out onto the stair case. The player will follow Price up the stairs. Price will be asked to show his identification. He will show it to the guard and be on his way to the hangar. The player will follow Price to the hangar, then go down the stairs. The player will follow Price through a series of rooms. They will eventually get to the Armory, where there will be two guards. Price will kill them when the next officer checks Price's ID. When he does this, go into the room behind them and grab all of the weapons inside. |
||
| + | <gallery> |
||
| + | Shipspawn.png|Spawn. |
||
| ⚫ | |||
| + | Shiptrouble.png|Price killing the two guards in the Armory. |
||
| + | Shipsupply.png|The Armory. |
||
| + | </gallery> |
||
| ⚫ | |||
| ⚫ | From the supply room, the player will need to turn around and enter the room that an enemy came from. Once there, turn left, but do not go into the rooms. Instead, the player should get near the wall, crouch, take out the [[Kar98k]], and lean right. This allows the player to take out enemies in a much safer way than simply rushing them. Rushing in this area is suicide because quite a few enemies have [[MP40]]s, which work very well in tight places. |
||
| ⚫ | |||
| − | {{quote |
||
| ⚫ | |||
| − | |2 = [[Evans|Sgt. Evans]]' notes |
||
| ⚫ | |||
| ⚫ | |||
| ⚫ | |||
| ⚫ | |||
| − | The following sections are a walkthrough. |
||
| − | |||
| ⚫ | |||
| − | |||
| − | You'll spawn in a boat. Watch what happens, then board the battleship. Follow [[Price]] to the hangar, then go down. At the bottom is a troop and a captain. When Price kills them, go into the room behind them and grab a [[Kar98k]], [[MP40]], grenades and explosives. |
||
| − | |||
| ⚫ | From the supply room, |
||
| − | |||
| ⚫ | |||
| − | |||
| ⚫ | |||
| − | |||
| ⚫ | |||
| − | |||
| ⚫ | |||
| − | |||
| ⚫ | |||
| ⚫ | The player will be back in the Armory. The player will go through the door to the room where Price was, but now he's dead. Turn right to the door the player came to the Armory through at the beginning of the level and take a left. Go through the hallway until the sound of a grenade bouncing is heard, then go back into the previous hall. After the explosion, go back to the surface. |
||
| ⚫ | |||
<gallery> |
<gallery> |
||
| ⚫ | |||
| − | Image:shipspawn.png|Spawn |
||
| ⚫ | |||
| − | Image:shiptrouble.png|Price shoots the guys near the supply room. |
||
| − | Image:shipsupply.png|The supply room. Make sure to grab the bombs! |
||
| ⚫ | |||
Image:shipbomb1.png|Bomb 1 |
Image:shipbomb1.png|Bomb 1 |
||
Image:shipbomb2.png|Bomb 2 |
Image:shipbomb2.png|Bomb 2 |
||
| Line 54: | Line 51: | ||
Image:shipbomb3.png|Bomb 3 |
Image:shipbomb3.png|Bomb 3 |
||
Image:shipbomb4.png|Bomb 4 |
Image:shipbomb4.png|Bomb 4 |
||
| − | Image:shipgren.png|The grenade that's thrown at |
+ | Image:shipgren.png|The grenade that's thrown at the player when he tries to get out of the lower decks. |
Image:shiphangar.png|The inner hangar. Enemies like to come from the right part of the entrance. |
Image:shiphangar.png|The inner hangar. Enemies like to come from the right part of the entrance. |
||
| − | Image:shipsniper.png|the sniper that's just |
+ | Image:shipsniper.png|the sniper that's just above the hangar. |
</gallery> |
</gallery> |
||
| ⚫ | |||
| ⚫ | |||
| ⚫ | |||
| ⚫ | |||
| ⚫ | Take another staircase up, the first radar will be here. When getting near the end of the stairs, throw a grenade into the room. With any luck, it will take out the troop and the radar. Once the grenade goes off, go into the area and finish off any survivors. The room in the upper left contains another radar and a staircase to the next level. Destroy the radar. |
||
| ⚫ | |||
| − | |||
| ⚫ | |||
| − | |||
| ⚫ | Take another staircase up, |
||
| − | |||
| ⚫ | |||
| − | |||
| ⚫ | This set of stairs leads to the last radar and the naval charts. Throw a grenade into the room to the right, and it'll take out the enemy on board and the radar. Once |
||
| ⚫ | |||
| ⚫ | This set of stairs leads to the last radar and the naval charts. Throw a grenade into the room to the right, and it'll take out the enemy on board and the radar. Once the explosion goes off, go in and take out the troop that's pointing out of the windows. After that, grab the logs, then go back down. Take the right path. It's an easier way to get out. |
||
<gallery> |
<gallery> |
||
Image:shipleft.png|The left entrance |
Image:shipleft.png|The left entrance |
||
| Line 82: | Line 75: | ||
Image:shiplog.png|The log. |
Image:shiplog.png|The log. |
||
</gallery> |
</gallery> |
||
| ⚫ | |||
| − | |||
| ⚫ | After returning, lean past the door and take out anybody nearby. When there's nobody left, start moving until the player gets to the hangar. There's a sniper on a perch on top of the left or right entrance to the radar area. When the enemy is down, the player can go down the stairs of their choice and make way to the exit, which is Waters' boat. There's usually a troop or two near the exit, so be careful. |
||
| ⚫ | |||
| − | |||
| ⚫ | |||
Go down and board Waters' ship to exit the level. |
Go down and board Waters' ship to exit the level. |
||
| − | |||
<gallery> |
<gallery> |
||
| − | Image:shipsniper2.png| |
+ | Image:shipsniper2.png|The second sniper. This one is on the faraway upper deck. |
Image:shipexit.png|Exit. |
Image:shipexit.png|Exit. |
||
</gallery> |
</gallery> |
||
| + | ==Weapon Loadout== |
||
| + | {|class= "wikitable collapsible autocollapse" style= "background: transparent;" |
||
| + | ! style= "background: transparent;" | Obtainable |
||
| + | |- |
||
| + | | style= "background: transparent; border: 1px solid transparent;" | |
||
| + | <gallery widths="120" bordercolor="transparent"> |
||
| + | Kar98k menu icon CoD1.png|[[Kar98k]] |
||
| + | Luger menu icon CoD1.png|[[Luger]] |
||
| + | MP40 menu icon CoD1.png|[[MP40]] |
||
| + | </gallery> |
||
| ⚫ | |||
| + | {|class= "wikitable collapsible autocollapse" style= "background: transparent;" |
||
| + | ! style= "background: transparent;" | Seen in Level |
||
| + | |- |
||
| + | | style= "background: transparent; border: 1px solid transparent;" | |
||
| + | <gallery widths="120" bordercolor="transparent"> |
||
| + | MP44 menu icon CoD1.png|[[MP44]] |
||
| + | Kar98k menu icon CoD1.png|[[Kar98k]] |
||
| + | MP40 menu icon CoD1.png|[[MP40]] |
||
| + | </gallery> |
||
| + | |} |
||
| + | ==Vehicles== |
||
| + | *Boat |
||
| + | *''[[Tirpitz]]'' |
||
| + | ==Miscellaneous== |
||
| + | *Explosives |
||
==Trivia== |
==Trivia== |
||
| ⚫ | |||
| − | *According to this mission, Waters has black hair. |
||
| + | *In the ship's control room (where the naval logs are found) the glass on the windows can be shot and broken. This is one of the very few areas in the game featuring breakable glass. |
||
| ⚫ | |||
| + | *The first soldier you see beside the captain who Price talks to has a [[STG-44|MP44]] and it's the only one in the level. This soldier cannot be found again and neither is his MP44. |
||
| − | |||
| + | *The player can see until the very end of the border on this map, which appears as just black mass. To see it, go to the top most balconies over looking the rest of the ship when the player has to retrieve the logs for the ship and then look out in the open sea. |
||
| − | *You cannot acquire a pistol here, like the levels Camp Toccoa, Stalingrad, and Red Square.[[File:Prices_documentz.jpg|thumb|294px|Captain Price's clearly fake "documents".]] |
||
| − | *This is the first mission in the whole Call of Duty series where a main character is scripted to die |
||
| − | |||
== Video == |
== Video == |
||
| + | [[File:Call of Duty - Mission 14 - Ship|425px]] |
||
| − | <youtube>http://www.youtube.com/watch?v=hgNd9rIkizI&feature=PlayList&p=26F63F2CBE593B8D&index=16</youtube> |
||
| + | {{Clear}} |
||
| − | |||
| + | ==Transcript== |
||
| ⚫ | |||
| + | {{Main|Battleship Tirpitz (level)/Transcript}} |
||
| − | [[Category:Levels]] |
||
| ⚫ | |||
| − | [[Category:Call of Duty]] |
||
[[Category:Call of Duty Single Player Levels]] |
[[Category:Call of Duty Single Player Levels]] |
||
Revision as of 14:39, 31 October 2019
- For the actual battleship, see Battleship Tirpitz.
- "Price and I are going on board. If we are captured, the Geneva Convention won't help us. There's little doubt that we will be executed as spies."
- — Sgt. Evans' notes
"Battleship Tirpitz" is the fourteenth campaign mission in Call of Duty. The player starts as Sgt. Evans, and has been ordered to infiltrate the Tirpitz, plant charges, destroy the AA radar, and grab the naval log in preparation of RAF bombing raids on the ship.
Characters
Walkthrough
Boarding the Boat
The player will spawn in a boat. Captain Price will be dumping bodies off the side of the boat. When that is over, Sgt. Waters will drive the boat over to the large battleship in the distance. The boat will pull up to a staircase on the side of the ship. Price will ask permission to come aboard and hop out onto the stair case. The player will follow Price up the stairs. Price will be asked to show his identification. He will show it to the guard and be on his way to the hangar. The player will follow Price to the hangar, then go down the stairs. The player will follow Price through a series of rooms. They will eventually get to the Armory, where there will be two guards. Price will kill them when the next officer checks Price's ID. When he does this, go into the room behind them and grab all of the weapons inside.
")
")
")
")
Destroy the Engines
From the supply room, the player will need to turn around and enter the room that an enemy came from. Once there, turn left, but do not go into the rooms. Instead, the player should get near the wall, crouch, take out the Kar98k, and lean right. This allows the player to take out enemies in a much safer way than simply rushing them. Rushing in this area is suicide because quite a few enemies have MP40s, which work very well in tight places.
Once all of the enemies in this area are down, walk up to the engines and press "use" on each of the glowing bomb silhouettes. Once they are done go forward, then take a left.
An enemy will come out of the room to the right. Eliminate the target with the MP40 or melee attacks. The room he came from has a large medikit, take it if needed.
Go forward, then take a left, but do not go into the new hallway, as a lot of enemies with weapons will come out of the door on the other end. The player should use the crouch and lean strategy again. Once the room is cleared, place the bombs on the engines, and go forward, then left.
The player will be back in the Armory. The player will go through the door to the room where Price was, but now he's dead. Turn right to the door the player came to the Armory through at the beginning of the level and take a left. Go through the hallway until the sound of a grenade bouncing is heard, then go back into the previous hall. After the explosion, go back to the surface.
On the surface, enemies will ambush from the right side of the hangar's exit. Take out a few, then look up. There should be one more threat to take care of.
")
")
")
")
")
")
")
")
")
Destroy the Radar System
The player can either go to the left or right (NOT on the nearby stairs) to access the radar area.
Once inside, go up two sets of stairs and throw a grenade at the opening. An enemy on that level will home in on the player's position and choose the staircase the player has chosen. A grenade will usually take him out. If not, the MP40 will work fine.
Take another staircase up, the first radar will be here. When getting near the end of the stairs, throw a grenade into the room. With any luck, it will take out the troop and the radar. Once the grenade goes off, go into the area and finish off any survivors. The room in the upper left contains another radar and a staircase to the next level. Destroy the radar.
Once near the top of the stairs, throw a grenade to the left. An enemy comes out near there, and he might get caught in the blast. If not, his relocation will make him unable to react to the player right away. Take him out, then turn right and face the next set of stairs.
This set of stairs leads to the last radar and the naval charts. Throw a grenade into the room to the right, and it'll take out the enemy on board and the radar. Once the explosion goes off, go in and take out the troop that's pointing out of the windows. After that, grab the logs, then go back down. Take the right path. It's an easier way to get out.
")
")
")
")
")
")
")
")
To the Exit
After returning, lean past the door and take out anybody nearby. When there's nobody left, start moving until the player gets to the hangar. There's a sniper on a perch on top of the left or right entrance to the radar area. When the enemy is down, the player can go down the stairs of their choice and make way to the exit, which is Waters' boat. There's usually a troop or two near the exit, so be careful.
Go down and board Waters' ship to exit the level.
")
")
Weapon Loadout
| Obtainable |
|---|
| Seen in Level |
|---|
Vehicles
- Boat
- Tirpitz
Miscellaneous
- Explosives
Trivia
- After Price kills the officer in the supply room, when looking closely at Price's "documents", they are clearly fake.


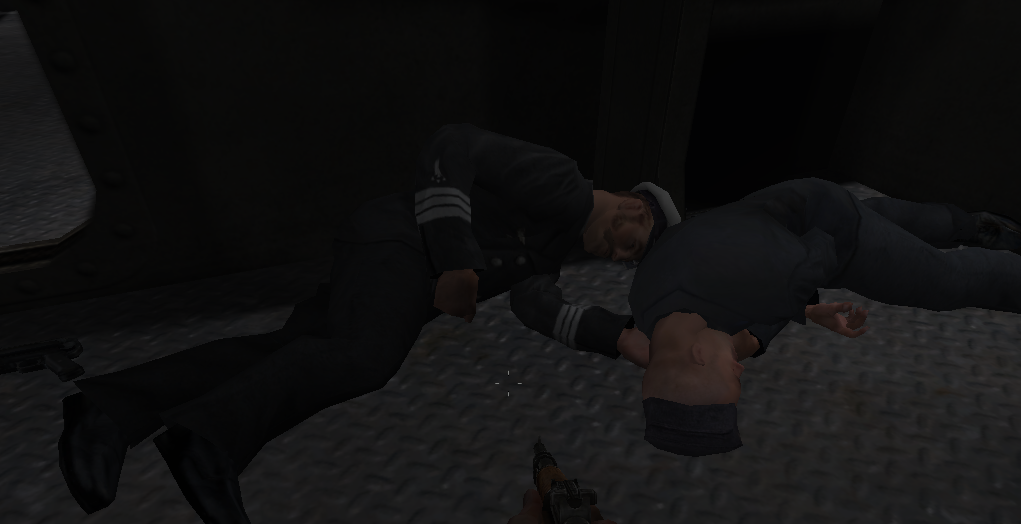
Price's corpse, along with an German soldier
- In the ship's control room (where the naval logs are found) the glass on the windows can be shot and broken. This is one of the very few areas in the game featuring breakable glass.
- The first soldier you see beside the captain who Price talks to has a MP44 and it's the only one in the level. This soldier cannot be found again and neither is his MP44.
- The player can see until the very end of the border on this map, which appears as just black mass. To see it, go to the top most balconies over looking the rest of the ship when the player has to retrieve the logs for the ship and then look out in the open sea.
Video

_CoD1.png)
Transcript
- Main article: Battleship Tirpitz (level)/Transcript
| ||||||||||||||