No edit summary Tag: Visual edit |
ScarletTwig (talk | contribs) m (It's player determined, meaning your choice can be different.) |
||
| (45 intermediate revisions by 24 users not shown) | |||
| Line 1: | Line 1: | ||
{{game|waw}} |
{{game|waw}} |
||
| − | |||
{{Infobox/level |
{{Infobox/level |
||
|prev = [[Blowtorch & Corkscrew]] |
|prev = [[Blowtorch & Corkscrew]] |
||
| − | |next = [[Heart of the Reich]] |
+ | |next = [[Heart of the Reich]] (in-game)<br>[[Project Nova]] (chronologically) |
|name = Breaking Point |
|name = Breaking Point |
||
|image = [[File:Breaking Point WaW.png|300px]] |
|image = [[File:Breaking Point WaW.png|300px]] |
||
| Line 10: | Line 9: | ||
|character = [[C. Miller|Private Miller]] |
|character = [[C. Miller|Private Miller]] |
||
|team = [[1st Marine Division]] |
|team = [[1st Marine Division]] |
||
| − | |place = [[Shuri Castle]], [[Okinawa]], |
+ | |place = [[Shuri Castle]], [[Okinawa]], {{w|Okinawa Prefecture}}, Japan |
|date = May 29, 1945 |
|date = May 29, 1945 |
||
|enemies = [[Imperial Japanese Army]] |
|enemies = [[Imperial Japanese Army]] |
||
|console = <tt>oki3</tt> |
|console = <tt>oki3</tt> |
||
|multiplayer = [[Courtyard (World at War)|Courtyard]], [[Castle]]}} |
|multiplayer = [[Courtyard (World at War)|Courtyard]], [[Castle]]}} |
||
| − | {{quote|This is the enemy's last stand. When we take Shuri Castle, we go home. All of us.|[[Roebuck|Sgt. Roebuck]]}} |
+ | {{quote|This is the enemy's last stand. When we take Shuri Castle, we go home. All of us.|[[Roebuck|Sgt. Roebuck]]}} |
| + | [[File:Home Roebuck WaW.ogg|115px|noicon|center]] |
||
"'''Breaking Point'''" is the thirteenth mission in ''[[Call of Duty: World at War]]''. It takes place in and around [[Wikipedia:Shuri Castle|Shuri Castle]] on Okinawa Island, Japan. It is the last mission in the Pacific theater. |
"'''Breaking Point'''" is the thirteenth mission in ''[[Call of Duty: World at War]]''. It takes place in and around [[Wikipedia:Shuri Castle|Shuri Castle]] on Okinawa Island, Japan. It is the last mission in the Pacific theater. |
||
| Line 26: | Line 26: | ||
==Plot== |
==Plot== |
||
=== Starting Point === |
=== Starting Point === |
||
| − | Upon starting the level, the player will notice there is no ammo in the M1 Garand given, but a parachute containing ammo will drop. Sprint to the spot and choose a weapon - the guns are: [[Thompson]], [[M1 Garand]], [[ |
+ | Upon starting the level, the player will notice there is no ammo in the M1 Garand given, but a parachute containing ammo will drop. Sprint to the spot and choose a weapon - the guns are: [[Thompson]], [[M1 Garand]], [[Browning M1919]] machine gun and a [[Sniper Scope|Scoped]] [[Springfield]]. The Browning M1919 is mostly recommended, as later in the level, in the room with two waiting banzai soldiers in the East building there will be a Type 100 and a Browning M1919 with a good amount of ammo. The Scoped Springfield is recommended as a backup, as the campaign level mostly consists of medium-to-far ranged fighting and the M1 Garand is not always a 1 hit kill, whereas the Scoped Springfield is always with a head or body shot. There are also a few MGs in the level and enemies at a distance which are best killed with a sniper rifle. |
The crate has infinite ammo, but it is not recommended to run back and forth after wasting some ammo, as the enemies can mow the player down quickly. After choosing a loadout and reloading, a Japanese ambush squad surrounding the area starts a fight with the US marines. Snipers will appear in the trees, and soon after, enemy mortars will be fired at the player's squad. Quickly, follow Roebuck and Polonsky to cover. Roebuck says that there must be spotters underground as the Japanese knew of the team's position almost immediately. The player is told to go inside and clear it of Japanese forces. |
The crate has infinite ammo, but it is not recommended to run back and forth after wasting some ammo, as the enemies can mow the player down quickly. After choosing a loadout and reloading, a Japanese ambush squad surrounding the area starts a fight with the US marines. Snipers will appear in the trees, and soon after, enemy mortars will be fired at the player's squad. Quickly, follow Roebuck and Polonsky to cover. Roebuck says that there must be spotters underground as the Japanese knew of the team's position almost immediately. The player is told to go inside and clear it of Japanese forces. |
||
| Line 43: | Line 43: | ||
Still, many Banzai chargers will be spawned frequently, so take care. This time, the building takes two airstrikes to be destroyed. Either snipe the enemies from a far side, or take cover and wait for Banzai Chargers. After calling in the airstrikes on the buildings, the battle ends, and the surviving one of the two (Roebuck or Polonsky) will give the player the other's tag, hinting that they do not deserve his death and are extremely upset and feel guilty of the other's death, even though they could not do anything. But whatever the scenario, it is extremely emotional, compared to the Soviet's campaign's ending, which gives it the better sense of victory. |
Still, many Banzai chargers will be spawned frequently, so take care. This time, the building takes two airstrikes to be destroyed. Either snipe the enemies from a far side, or take cover and wait for Banzai Chargers. After calling in the airstrikes on the buildings, the battle ends, and the surviving one of the two (Roebuck or Polonsky) will give the player the other's tag, hinting that they do not deserve his death and are extremely upset and feel guilty of the other's death, even though they could not do anything. But whatever the scenario, it is extremely emotional, compared to the Soviet's campaign's ending, which gives it the better sense of victory. |
||
| − | If the player |
+ | If the player does save Roebuck, the Xbox achievement/PS3 trophy [[Guardian Angel]] is rewarded. On the Xbox it is worth 10 Gamerscore, and on the PS3 it is a Bronze trophy. |
==Video Walkthrough== |
==Video Walkthrough== |
||
| + | <gallery> |
||
| − | {{VideoTitle|"Breaking Point" Walkthrough}} |
||
| ⚫ | |||
| − | |||
| + | </gallery> |
||
| ⚫ | |||
==Weapon Loadout== |
==Weapon Loadout== |
||
| − | {|class= |
+ | {| class="wikitable collapsible autocollapse" style="background: transparent;" |
| − | ! style= |
+ | ! style="background: transparent;" | Starting loadout |
|- |
|- |
||
| − | | style= |
+ | | style="background: transparent; border: 1px solid transparent;" | |
<gallery widths="120" captionalign="left" bordercolor="transparent"> |
<gallery widths="120" captionalign="left" bordercolor="transparent"> |
||
M1 Garand menu icon WaW.png|[[M1 Garand]]. |
M1 Garand menu icon WaW.png|[[M1 Garand]]. |
||
| Line 60: | Line 60: | ||
|} |
|} |
||
| − | {|class= |
+ | {| class="wikitable collapsible autocollapse" style="background: transparent;" |
| − | ! style= |
+ | ! style="background: transparent;" | Air drop |
|- |
|- |
||
| − | | style= |
+ | | style="background: transparent; border: 1px solid transparent;" | |
<gallery widths="120" bordercolor="transparent"> |
<gallery widths="120" bordercolor="transparent"> |
||
| − | + | Browning M1919 menu icon WaW.png|[[Browning M1919]]. |
|
M1 Garand menu icon WaW.png|[[M1 Garand]]. |
M1 Garand menu icon WaW.png|[[M1 Garand]]. |
||
Springfield menu icon WaW.png|Scoped [[Springfield]]. |
Springfield menu icon WaW.png|Scoped [[Springfield]]. |
||
| Line 72: | Line 72: | ||
|} |
|} |
||
| − | {|class= |
+ | {| class="wikitable collapsible autocollapse" style="background: transparent;" |
| − | ! style= |
+ | ! style="background: transparent;" | Found in level |
|- |
|- |
||
| − | | style= |
+ | | style="background: transparent; border: 1px solid transparent;" | |
<gallery widths="120" bordercolor="transparent"> |
<gallery widths="120" bordercolor="transparent"> |
||
Arisaka menu icon WaW.png|Scoped and Un-scoped [[Arisaka]]. Used by the IJA |
Arisaka menu icon WaW.png|Scoped and Un-scoped [[Arisaka]]. Used by the IJA |
||
M1A1 Carbine menu icon WaW.png|[[M1 Carbine]]. Used by Marines |
M1A1 Carbine menu icon WaW.png|[[M1 Carbine]]. Used by Marines |
||
M1 Garand menu icon WaW.png|[[M1 Garand]]. Used by Marines and Polonsky |
M1 Garand menu icon WaW.png|[[M1 Garand]]. Used by Marines and Polonsky |
||
| − | Mortarj.png|[[Mortar Round]]. Picked up off the ground |
+ | Mortarj.png|[[Mortar Round]]. Picked up off the ground and also used to hold off pursuing IJAs |
Type 92 WaW.jpg|[[Type 92|Mounted Type 92]] |
Type 92 WaW.jpg|[[Type 92|Mounted Type 92]] |
||
Nambu menu icon WaW.png|[[Nambu]]. Dropped by enemies in Last Stand |
Nambu menu icon WaW.png|[[Nambu]]. Dropped by enemies in Last Stand |
||
Thompson menu icon WaW.png|[[Thompson]]. Used by Roebuck and Marines |
Thompson menu icon WaW.png|[[Thompson]]. Used by Roebuck and Marines |
||
Type 100 menu icon WaW.png|[[Type 100]]. Used by the IJA |
Type 100 menu icon WaW.png|[[Type 100]]. Used by the IJA |
||
| − | + | Browning M1919 menu icon WaW.png|[[Browning M1919]]. Used by Marines |
|
</gallery> |
</gallery> |
||
|} |
|} |
||
| Line 100: | Line 100: | ||
==Trivia== |
==Trivia== |
||
| + | *Chronologically, this is the final level of ''Call of Duty: World at War'', as it takes place after the events of "[[Downfall (campaign)|Downfall]]". |
||
| − | *During the sniper shot that kills the soldier at the beginning of the level, the ammo drop will sometimes come out of midair. |
||
| − | *If the player does not try to save Polonsky or Roebuck, Polonsky will push down and beat up his opponent and the grenade will explode, causing Roebuck to die. |
+ | *If the player does not try to save Polonsky or Roebuck, Polonsky will push down and beat up his opponent and the grenade will explode, causing Roebuck to die. If Polonsky dies, the player can take the [[M1 Garand]] to use; but if Roebuck dies, the player cannot take his Thompson. |
| − | * |
+ | *After the player climbs out of the bunker, an random Marine throws a [[Satchel Charge]] into the bunker even if the player have already killed everyone inside. |
| + | *A mortar round is supposed to be primed by knocking its back on a hard surface. However, if the priming animation is started before the player changes his facing to a spot where no hard surface is beneath, the round will still be primed, with the sound of metal impact, despite the fact that the round is only swinged in the air. |
||
| − | *After the player climbs out of the bunker, an anonymous marine throws a [[Satchel Charge]] in the bunker though the player killed everyone before. |
||
| + | *Oddly, the mortar rounds captured from Japanese mortar pits have American designation printed on them. |
||
| − | *When the player primes the mortars, the object is to hit them on a hard surface. However, the player can turn around and the mortars will still make the sound of it hitting something, but there is nothing but air directly beneath it. |
||
| − | *Sometimes, if Roebuck is killed, his body will disappear before Polonsky even gets to him. |
||
| − | *If Polonsky is killed, at the end of the mission when Roebuck collects his dogtags, it will show Polonsky wearing a helmet even though it is shot off earlier in the mission. |
||
*If planes are not called in for some time, live grenades will spawn under the player, first every few seconds, then every one second. |
*If planes are not called in for some time, live grenades will spawn under the player, first every few seconds, then every one second. |
||
| + | *Japanese soldiers wearing glasses are first seen during this level. This implies that situation is so dire for the Japanese that even non-combatent personnels have to be put to front line battle to make their last stand. Historically, IJA has strict vision requirement for its infantry: at least 0.8 (equivalent of American 20/25) for both naked eyes is required for enlisting. |
||
| − | * It's possible to destroy the temple where the player first finds the mortar rounds; this aids in getting the achievement "Mortar-dom", as there are multiple Japanese soldiers in the temple. The machine gun nest the player finds later can also be destroyed with a mortar shell. |
||
| + | * A temple and a machine gun nest can be destroyed with mortar shells. |
||
==Achievements/Trophies== |
==Achievements/Trophies== |
||
| Line 117: | Line 116: | ||
'''[[The Setting of the Sun]]''' (30 [[File:Gamerscore.png|15px]]/ Bronze Trophy [[File:Bronze Trophy PS3 icon.png|15px]]) - Complete "Breaking Point" on Veteran. |
'''[[The Setting of the Sun]]''' (30 [[File:Gamerscore.png|15px]]/ Bronze Trophy [[File:Bronze Trophy PS3 icon.png|15px]]) - Complete "Breaking Point" on Veteran. |
||
| − | [[The Last Stand]] (20 |
+ | '''[[The Last Stand]]''' (20 [[File:Gamerscore.png|15px]]/ Silver Trophy) - Complete ''Breaking Point'' on any difficulty. |
==Transcript== |
==Transcript== |
||
{{Main|Breaking Point/Transcript}} |
{{Main|Breaking Point/Transcript}} |
||
| + | |||
{{CoD5 Campaign}} |
{{CoD5 Campaign}} |
||
[[Category:Call of Duty: World at War Single Player Levels]] |
[[Category:Call of Duty: World at War Single Player Levels]] |
||
Revision as of 00:05, 26 March 2020
- "This is the enemy's last stand. When we take Shuri Castle, we go home. All of us."
- — Sgt. Roebuck
"Breaking Point" is the thirteenth mission in Call of Duty: World at War. It takes place in and around Shuri Castle on Okinawa Island, Japan. It is the last mission in the Pacific theater.
Characters
- Miller (playable)
- Roebuck (Alive/K.I.A.) (player-determined)
- Polonsky (Alive/K.I.A.) (player-determined)
Plot
Starting Point
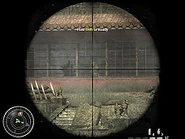
Upon starting the level, the player will notice there is no ammo in the M1 Garand given, but a parachute containing ammo will drop. Sprint to the spot and choose a weapon - the guns are: Thompson, M1 Garand, Browning M1919 machine gun and a Scoped Springfield. The Browning M1919 is mostly recommended, as later in the level, in the room with two waiting banzai soldiers in the East building there will be a Type 100 and a Browning M1919 with a good amount of ammo. The Scoped Springfield is recommended as a backup, as the campaign level mostly consists of medium-to-far ranged fighting and the M1 Garand is not always a 1 hit kill, whereas the Scoped Springfield is always with a head or body shot. There are also a few MGs in the level and enemies at a distance which are best killed with a sniper rifle.
The crate has infinite ammo, but it is not recommended to run back and forth after wasting some ammo, as the enemies can mow the player down quickly. After choosing a loadout and reloading, a Japanese ambush squad surrounding the area starts a fight with the US marines. Snipers will appear in the trees, and soon after, enemy mortars will be fired at the player's squad. Quickly, follow Roebuck and Polonsky to cover. Roebuck says that there must be spotters underground as the Japanese knew of the team's position almost immediately. The player is told to go inside and clear it of Japanese forces.
After getting past the part where the player must crouch and walk, cook a grenade and throw it at the group of Japanese who have not noticed the player yet - this will take care of most of them. Use any automatic weapons to gun the rest down. After getting out of it, there will be a large firefight and after this the player will have to destroy Japanese mortar positions. Before the player can pickup and throw mortar rounds, there is a high up MG the player must kill, and many enemies will come out of spider holes and either throw grenades, banzai charge, or spray their weapon.
Be careful if the player chooses one side to just fight on since enemies will only come out of spider holes when the player is near, and Japanese throwing grenades will most always kill the player if they are in range when the grenade lands. Once the player wipes out these forces, go up the set of stairs and prepare for the rest of the battle. Use mortar rounds on tables scattered around the place and in the pits themselves to ease the work. Try to throw them on groups of enemies, into the pits, or just freelance throwing, but beware they are very, very powerful. Throwing one too close will cause the player to die, or get seriously injured. After this, the player will enter what resembles the multiplayer map Courtyard, finally the player will go into a large open field with the courtyard buildings and some sandbags, and this is where the real twist of the knife is.
The Twist
Some Japanese soldiers will appear to be surrendering, but it is a trap. As Polonsky goes to one and Roebuck goes to the other two to check for weapons, they lash out and activate grenades, and the player must save one of them. If the player saves Roebuck, Polonsky will die, and vice versa. Saving Roebuck is harder, as there are two soldiers, and a grenade is scripted to go off. When saving Roebuck, he is distraught at Polonsky's death and turns into what Reznov is, ordering the player to show no mercy and kill all enemy soldiers. If the player saves Polonsky, similar things will happen, Polonsky will go into a rage and order to show no mercy and starts cursing at the charging attackers.
The player can choose to skip the 'moaning' part and choose between some automatic weapon or the Scoped Arisaka if the player is out of Scoped Springfield ammo. Be aware that the Scope on the Arisaka is unusual and does not use typical crosshairs, and after each shot when the bolt is moved the scope will dramatically sway down and up. Since the Japanese throw smoke and since there are many of them, scoped weaponry is not recommended at this point. An M1 Garand and Browning or Thompson are better weapons at this point.
Many smoke grenades will pour out, and Japanese Banzai Chargers will scream and rush towards the player. Be careful, as it is impossible to see the Japanese soldiers, so stay in cover and prepare to kill any Banzai chargers that will soon run to the player's position. After the smoke grenades are gone, take out a long-ranged weapon (recommended the Scoped Springfield or Scoped Arisaka) and snipe Japanese soldiers until the radio is available. Call in the airstrikes on the building, and look to the right. Similarly, smoke grenades will pour out, but now the player can use the mortar rounds to bring down the enemies.
Still, many Banzai chargers will be spawned frequently, so take care. This time, the building takes two airstrikes to be destroyed. Either snipe the enemies from a far side, or take cover and wait for Banzai Chargers. After calling in the airstrikes on the buildings, the battle ends, and the surviving one of the two (Roebuck or Polonsky) will give the player the other's tag, hinting that they do not deserve his death and are extremely upset and feel guilty of the other's death, even though they could not do anything. But whatever the scenario, it is extremely emotional, compared to the Soviet's campaign's ending, which gives it the better sense of victory.
If the player does save Roebuck, the Xbox achievement/PS3 trophy Guardian Angel is rewarded. On the Xbox it is worth 10 Gamerscore, and on the PS3 it is a Bronze trophy.
Video Walkthrough
Weapon Loadout
| Starting loadout |
|---|
| Air drop |
|---|
| Found in level |
|---|
|
Scoped and Un-scoped Arisaka. Used by the IJA M1 Carbine. Used by Marines M1 Garand. Used by Marines and Polonsky Mortar Round. Picked up off the ground and also used to hold off pursuing IJAs Nambu. Dropped by enemies in Last Stand Thompson. Used by Roebuck and Marines Type 100. Used by the IJA Browning M1919. Used by Marines |
Gallery
Trivia
- Chronologically, this is the final level of Call of Duty: World at War, as it takes place after the events of "Downfall".
- If the player does not try to save Polonsky or Roebuck, Polonsky will push down and beat up his opponent and the grenade will explode, causing Roebuck to die. If Polonsky dies, the player can take the M1 Garand to use; but if Roebuck dies, the player cannot take his Thompson.
- After the player climbs out of the bunker, an random Marine throws a Satchel Charge into the bunker even if the player have already killed everyone inside.
- A mortar round is supposed to be primed by knocking its back on a hard surface. However, if the priming animation is started before the player changes his facing to a spot where no hard surface is beneath, the round will still be primed, with the sound of metal impact, despite the fact that the round is only swinged in the air.
- Oddly, the mortar rounds captured from Japanese mortar pits have American designation printed on them.
- If planes are not called in for some time, live grenades will spawn under the player, first every few seconds, then every one second.
- Japanese soldiers wearing glasses are first seen during this level. This implies that situation is so dire for the Japanese that even non-combatent personnels have to be put to front line battle to make their last stand. Historically, IJA has strict vision requirement for its infantry: at least 0.8 (equivalent of American 20/25) for both naked eyes is required for enlisting.
- A temple and a machine gun nest can be destroyed with mortar shells.
Achievements/Trophies
Guardian Angel (10 ![]() / Bronze Trophy
/ Bronze Trophy ![]() ) - In the final battle for Okinawa, Save Sgt. Roebuck.
) - In the final battle for Okinawa, Save Sgt. Roebuck.
Mortar-dom (10 ![]() / Bronze Trophy
/ Bronze Trophy ![]() ) - Kill 8 Japanese infantry with thrown mortar shells.
) - Kill 8 Japanese infantry with thrown mortar shells.
The Setting of the Sun (30 ![]() / Bronze Trophy
/ Bronze Trophy ![]() ) - Complete "Breaking Point" on Veteran.
) - Complete "Breaking Point" on Veteran.
The Last Stand (20 ![]() / Silver Trophy) - Complete Breaking Point on any difficulty.
/ Silver Trophy) - Complete Breaking Point on any difficulty.
Transcript
- Main article: Breaking Point/Transcript
| |||||||||||


