No edit summary Tags: Visual edit apiedit |
No edit summary |
||
| (14 intermediate revisions by 14 users not shown) | |||
| Line 1: | Line 1: | ||
| − | {{game|bo2}} |
+ | {{game|bo2}}{{For|the faction|Cordis Die (faction)}} |
| + | |||
| − | {{For|the faction|Cordis Die (faction)}} |
||
{{Infobox/level |
{{Infobox/level |
||
| ⚫ | |||
| ⚫ | |||
|name = Cordis Die |
|name = Cordis Die |
||
|image = [[File:Cordis Die Menu BOII.png|275px]] |
|image = [[File:Cordis Die Menu BOII.png|275px]] |
||
| ⚫ | |||
| ⚫ | |||
|game = ''[[Call of Duty: Black Ops II]]'' |
|game = ''[[Call of Duty: Black Ops II]]'' |
||
| − | |character =[[David Mason]] |
+ | |character = [[David Mason]] |
| − | |team = [[Joint Special Operations Command|J-SOC]] with [[LAPD]] |
+ | |team = [[Joint Special Operations Command|J-SOC]] with [[LAPD]] and [[Secret Service]] |
|place = [[Los Angeles]], {{w|California}}, [[United States of America]] |
|place = [[Los Angeles]], {{w|California}}, [[United States of America]] |
||
|date = June 19th, 2025 |
|date = June 19th, 2025 |
||
| Line 22: | Line 22: | ||
Follow Harper's van<br /> |
Follow Harper's van<br /> |
||
Destroy the drones<br /> |
Destroy the drones<br /> |
||
| − | |enemies =[[Cordis Die (faction)|Cordis Die]], [[Mercs |
+ | |enemies = [[Cordis Die (faction)|Cordis Die]], [[Mercs]] |
| − | |console = <tt>la_1</tt><br><tt>la_2</tt> |
+ | |console = <tt>la_1</tt><br><tt>la_2</tt> |
| + | |multiplayer = [[Aftermath (map)|Aftermath]], [[Express (map)|Express]] |
||
| + | }} |
||
{{quote|Marine One is shot down over Los Angeles, and David Mason must escort President Bosworth to safety as US drones under Menendez' control destroy the city.|Mission description}} |
{{quote|Marine One is shot down over Los Angeles, and David Mason must escort President Bosworth to safety as US drones under Menendez' control destroy the city.|Mission description}} |
||
| + | |||
| − | "'''Cordis Die'''" is the tenth and penultimate mission in ''[[Call of Duty: Black Ops II]]''. The mission criteria consists of the player controlling primary protagonist, [[David Mason]] as he escorts the [[President Bosworth|President]] through a war-torn downtown Los Angeles by using [[SAM |
+ | "'''Cordis Die'''" is the tenth and penultimate mission in ''[[Call of Duty: Black Ops II]]''. The mission criteria consists of the player controlling primary protagonist, [[David Mason]] as he escorts the [[President Bosworth|President]] through a war-torn downtown Los Angeles by using [[SAM|SAM Turrets]], [[Dragonfire]]s and an [[FA38]] to his advantage. |
==Characters== |
==Characters== |
||
| Line 44: | Line 47: | ||
==Plot== |
==Plot== |
||
| − | David starts out in a MRAP cruising through [[wikipedia:Interstate 110 and State Route 110 (California)|Highway 110]] under siege by drones. He sits opposite of a heavily wounded person (labelled 'secretary' without capitals) being attended to by [[Harper]]. To his right is the U.S. President, concerned about the city's condition. Mason checks his Wrist Pad, readies his [[KAP-40]] and looks through the window. As they are passing through traffic, citizens are being evacuated by a police helicopter hovering overhead while drones invade Los Angeles. An incoming missile hits the helicopter, causing it to crash onto a military convoy entering the city below. Debris flies towards the truck, causing it along with most of the convoy to crash. David blacks out and when he comes to, he sees Harper giving orders to the agents, telling them to stay down. David climbs out of the wreckage as Harper tells him about a mobile [[SAM]] turret that they could use that had crashed on the other end of the road. They make their way to it. David jumps onto the hood of the car and nearly falls off, he regains his footing and mans the turret. He takes down the drones that attempt to circle the president's location. Once they are taken down a missile hits the SAM, disabling it and breaking the ground beneath. Mason jumps out and watches it fall, he turns back around and sees a drone coming for him. It was then shot down by [[Anderson (Black Ops II)|Anderson]], crashing down and narrowly missing him. Anderson arrives and provides close air support. Mason gets up and regroups with his squad at the end of the highway, he can choose whether to snipe from the highway or to rappel down. Either way, he picks up a [[Storm PSR]] and fires at enemies hiding within a crashed truck, behind a column and approaching enemies. As they reach the second convoy, Mason regroups with the team. He drives the president out of there while the freeway falls apart, running down any opposition. Anderson takes down the drones trying to get near them, and blasts the debris blocking the tunnel. As they travel through the destroyed roads, Harper mentions Menendez's attack on the Pentagon, Washington, and Wall Street from the previous days. As David turns to reply, a truck is seen rushing towards the two. The screen blacks out. |
+ | David starts out in a [[MRAP]] cruising through [[wikipedia:Interstate 110 and State Route 110 (California)|Highway 110]] under siege by drones. He sits opposite of a heavily wounded person (labelled 'secretary' without capitals) being attended to by [[Harper]]. To his right is the U.S. President, concerned about the city's condition. Mason checks his Wrist Pad, readies his [[KAP-40]] and looks through the window. As they are passing through traffic, citizens are being evacuated by a police helicopter hovering overhead while drones invade Los Angeles. An incoming missile hits the helicopter, causing it to crash onto a military convoy entering the city below. Debris flies towards the truck, causing it along with most of the convoy to crash. David blacks out and when he comes to, he sees Harper giving orders to the agents, telling them to stay down. David climbs out of the wreckage as Harper tells him about a mobile [[SAM]] turret that they could use that had crashed on the other end of the road. They make their way to it. David jumps onto the hood of the car and nearly falls off, he regains his footing and mans the turret. He takes down the drones that attempt to circle the president's location. Once they are taken down a missile hits the SAM, disabling it and breaking the ground beneath. Mason jumps out and watches it fall, he turns back around and sees a drone coming for him. It was then shot down by [[Anderson (Black Ops II)|Anderson]], crashing down and narrowly missing him. Anderson arrives and provides close air support. Mason gets up and regroups with his squad at the end of the highway, he can choose whether to snipe from the highway or to rappel down. Either way, he picks up a [[Storm PSR]] and fires at enemies hiding within a crashed truck, behind a column and approaching enemies. As they reach the second convoy, Mason regroups with the team. He drives the president out of there while the freeway falls apart, running down any opposition. Anderson takes down the drones trying to get near them, and blasts the debris blocking the tunnel. As they travel through the destroyed roads, Harper mentions Menendez's attack on the Pentagon, Washington, and Wall Street from the previous days. As David turns to reply, a truck is seen rushing towards the two. The screen blacks out. |
The screen fades back to David recovering from the impact of the truck, and he climbs out of a hatch in the roof and fights his way down the street with Anderson still providing cover fire, destroying C.L.A.W.s along the way. At the end of the road he reaches a plaza in downtown with [[LAPD]] officers and his [[SEAL Team Six|SEAL]] team, machine gun nests have them pinned down so they decide to bypass them through a mall to the right. Quadrotor drones arrive and David uses them to distract the machine gun nests and help clear out the mall. They come out onto the balcony and kill the enemy snipers and gunners in the nest. Anderson gets on the radio and asks for help, her last wingman is dead and the presidential convoy is taking heavy fire from all sides. David promises relief and advances down an alley, and onto a road with his squad. Anderson says she is hit and has to set the jet down. They advance down the street while taking out tangos towards Anderson but a building falls down to their immediate front. Mason blacks out for another time and gets up. Anderson is no longer talking. |
The screen fades back to David recovering from the impact of the truck, and he climbs out of a hatch in the roof and fights his way down the street with Anderson still providing cover fire, destroying C.L.A.W.s along the way. At the end of the road he reaches a plaza in downtown with [[LAPD]] officers and his [[SEAL Team Six|SEAL]] team, machine gun nests have them pinned down so they decide to bypass them through a mall to the right. Quadrotor drones arrive and David uses them to distract the machine gun nests and help clear out the mall. They come out onto the balcony and kill the enemy snipers and gunners in the nest. Anderson gets on the radio and asks for help, her last wingman is dead and the presidential convoy is taking heavy fire from all sides. David promises relief and advances down an alley, and onto a road with his squad. Anderson says she is hit and has to set the jet down. They advance down the street while taking out tangos towards Anderson but a building falls down to their immediate front. Mason blacks out for another time and gets up. Anderson is no longer talking. |
||
| Line 51: | Line 54: | ||
==Video Walkthrough== |
==Video Walkthrough== |
||
| + | <gallery> |
||
| − | + | Call of Duty Black Ops II - Cordis Die |
|
| + | </gallery> |
||
==Challenges== |
==Challenges== |
||
| Line 75: | Line 80: | ||
===Found in level=== |
===Found in level=== |
||
| − | |||
<gallery widths="75" bordercolor="transparent"> |
<gallery widths="75" bordercolor="transparent"> |
||
RPG Menu Icon BOII.png|[[RPG]] |
RPG Menu Icon BOII.png|[[RPG]] |
||
| − | M8A1 Menu Icon BOII.png|[[M8A1]] (used by [[Secret Service]] and [[Harper]]) |
+ | M8A1 Menu Icon BOII.png|[[M8A1]] (used by [[Secret Service]] and [[Harper]] if present) |
| − | + | M27 Menu Icon BOII.png|[[M27]] |
|
| + | Storm PSR Menu Icon BOII.png|[[Storm PSR]] (used by [[Harper]] if present) |
||
Chicom CQB Menu Icon BOII.png|[[Chicom CQB]] |
Chicom CQB Menu Icon BOII.png|[[Chicom CQB]] |
||
Vector K10 Menu Icon BOII.png|[[Vector K10]] |
Vector K10 Menu Icon BOII.png|[[Vector K10]] |
||
| Line 88: | Line 93: | ||
Five-seven Menu Icon BOII.png|[[Five Seven]] (used by [[Secret Service]]) |
Five-seven Menu Icon BOII.png|[[Five Seven]] (used by [[Secret Service]]) |
||
LSAT Menu Icon BOII.png|[[LSAT]] |
LSAT Menu Icon BOII.png|[[LSAT]] |
||
| + | M9 menu icon MW2.png|[[M9]] (seen in Section's holster) |
||
</gallery> |
</gallery> |
||
==Access Kit Usage== |
==Access Kit Usage== |
||
[[File:Three Secret Service Agents Coming Out From MRAP BOII.png|thumb|176px|Saving three Secret Service Agents.]] |
[[File:Three Secret Service Agents Coming Out From MRAP BOII.png|thumb|176px|Saving three Secret Service Agents.]] |
||
| + | |||
*[[Dragonfire]] drones that fire rockets are available inside the overturned container, near where the player engaged the first enemy CLAW. |
*[[Dragonfire]] drones that fire rockets are available inside the overturned container, near where the player engaged the first enemy CLAW. |
||
*Before the player enter the plaza, there's a flipped MRAP just outside and is catching fire, Secret Service agents will be heard calling for help if the player gets close. |
*Before the player enter the plaza, there's a flipped MRAP just outside and is catching fire, Secret Service agents will be heard calling for help if the player gets close. |
||
| Line 97: | Line 104: | ||
==Gallery== |
==Gallery== |
||
| − | |||
<gallery> |
<gallery> |
||
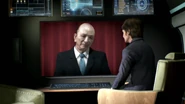
| + | Premier Chen Relieved BOII.png|President Bosworth speaking with [[Chen]], relieved. |
||
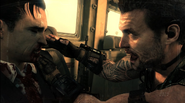
| + | Wounded Secretary Cordis Die BOII.png|Harper treating the Secretary. |
||
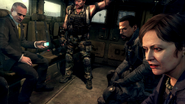
Car Cordis Die BOII.png|Inside the MRAP. |
Car Cordis Die BOII.png|Inside the MRAP. |
||
David's Reflection BOII.png|David looking at himself before looking out the window. |
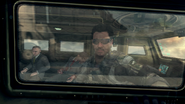
David's Reflection BOII.png|David looking at himself before looking out the window. |
||
| + | Jones Cordis Die BOII.png |
||
| + | Bosworth Cordis Die BOII.png |
||
| + | Samuels KAP-40 BOII.png |
||
Windshield BOII.png|Looking out at the helicopter falling down. |
Windshield BOII.png|Looking out at the helicopter falling down. |
||
To the SAM BOII.png|Getting to the SAM turret. |
To the SAM BOII.png|Getting to the SAM turret. |
||
| Line 110: | Line 121: | ||
Driving Cordis Die BOII.png|Driving through the streets. |
Driving Cordis Die BOII.png|Driving through the streets. |
||
Climb Cordis Die BOII.png|Climbing out of the vehicle only to see Anderson get hit. |
Climb Cordis Die BOII.png|Climbing out of the vehicle only to see Anderson get hit. |
||
| + | Harper using Storm PSR BOII.png |
||
CLAW Fight BOII.png|Attacking enemy CLAWs. |
CLAW Fight BOII.png|Attacking enemy CLAWs. |
||
French President BOII.png|Reaching the French President's convoy. |
French President BOII.png|Reaching the French President's convoy. |
||
| + | Crashed FA38 Cordis Die BOII.png |
||
| − | Flight Helmet BOII.png|Settling in the FA38 and putting on the helmet. |
||
Flying Cordis Die BOII.png|Getting into the air. |
Flying Cordis Die BOII.png|Getting into the air. |
||
Drone Chase BOII.png|Chasing the drones. |
Drone Chase BOII.png|Chasing the drones. |
||
Ejection BOII.png|Ejecting. |
Ejection BOII.png|Ejecting. |
||
Harper Smiling BOII.png|Harper, smiling at David at the end of the mission. |
Harper Smiling BOII.png|Harper, smiling at David at the end of the mission. |
||
| + | Samuels Cordis Die.jpg|Samuels talking to David if Harper didn't survive. |
||
</gallery> |
</gallery> |
||
| + | |||
| ⚫ | |||
| ⚫ | |||
| + | |||
| ⚫ | |||
| ⚫ | |||
| + | |||
==Trivia== |
==Trivia== |
||
*The [[M8A1]] appeared as the starting weapon in the E3 demo instead of the [[Type 25]]. |
*The [[M8A1]] appeared as the starting weapon in the E3 demo instead of the [[Type 25]]. |
||
| Line 132: | Line 152: | ||
*Rarely, one of the paramedics that carries [[Anderson (Black Ops II)|Anderson]] can be named Officer Anderson. |
*Rarely, one of the paramedics that carries [[Anderson (Black Ops II)|Anderson]] can be named Officer Anderson. |
||
*In the intro, if subtitle is enabled, [[Jones (Black Ops II)|Jones]] is just referred as "Agent". |
*In the intro, if subtitle is enabled, [[Jones (Black Ops II)|Jones]] is just referred as "Agent". |
||
| − | *At the beginning of the level, after taking down all the drones with the SAM turret and getting down off the truck, on the wall is pink graffiti of the words "DIE YOUNG". |
+ | *At the beginning of the level, after taking down all the drones with the SAM turret and getting down off the truck, on the wall is pink graffiti of the words "DIE YOUNG". |
*If Graphic Content Filter is enabled, in the beginning, the man that has major injuries will not be shown, the screen of the game will simply remain black. |
*If Graphic Content Filter is enabled, in the beginning, the man that has major injuries will not be shown, the screen of the game will simply remain black. |
||
*The LAPD uses semi-automatic [[KAP-40]]s, while the [[Mercs]] use fully-automatic KAP-40s. |
*The LAPD uses semi-automatic [[KAP-40]]s, while the [[Mercs]] use fully-automatic KAP-40s. |
||
| + | *If Harper is present in this mission, after the player and Harper recover from being hit by the truck, he will destroy the CLAW in front of them by himself with a few grenades from his M8A1's undermounted grenade launcher, but if you look closely at his gun, you will see that there is no grenade launcher attached to it. |
||
| − | |||
| + | *Interestingly enough, in the E3 Demo, it clearly shows David wielding an M8A1 at the beginning, but once he rappels down the broken highway after covering the president with the Storm PSR he is equipped with a Type 25. |
||
| ⚫ | |||
| + | *The title picture of the mission is a shot of Aftermath. |
||
| ⚫ | |||
| + | *The trucks when Section jumps onto the front of the missile truck and nearly falls off in the E3 Demo were the LAVs that have the G20 leaders, while in the final version of the game they were red semi trucks. This likely means the LAPD were using them to transport CLAWs and Quad drones. |
||
| − | |||
| ⚫ | |||
| ⚫ | |||
==References== |
==References== |
||
{{Reflist}} |
{{Reflist}} |
||
| − | |||
{{CoD9 Campaign}} |
{{CoD9 Campaign}} |
||
[[Category:Call of Duty: Black Ops II Single Player Levels]] |
[[Category:Call of Duty: Black Ops II Single Player Levels]] |
||
Revision as of 10:25, 2 November 2019
- For the faction, see Cordis Die (faction).
- "Marine One is shot down over Los Angeles, and David Mason must escort President Bosworth to safety as US drones under Menendez' control destroy the city."
- — Mission description
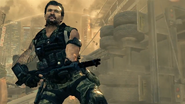
"Cordis Die" is the tenth and penultimate mission in Call of Duty: Black Ops II. The mission criteria consists of the player controlling primary protagonist, David Mason as he escorts the President through a war-torn downtown Los Angeles by using SAM Turrets, Dragonfires and an FA38 to his advantage.
Characters
- David Mason (playable)
- Mike Harper (Alive/not present) (player-determined)
- Marion Bosworth
- Chen (on-screen only)
- David Petraeus
- Jones
- Samuels
- Johnson (K.I.A.)
- Secretary (K.I.A.)
- Anderson (W.I.A./K.I.A.) (player-determined)
- Raul Menendez (mentioned only)
- Officer Jannsen
- Officer Barnes
- Agent Smith (Alive/K.I.A.) (player-determined)
Plot
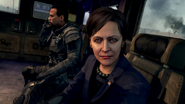
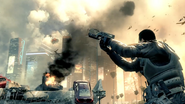
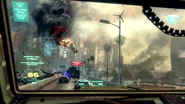
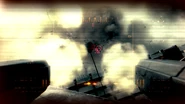
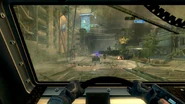
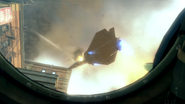
David starts out in a MRAP cruising through Highway 110 under siege by drones. He sits opposite of a heavily wounded person (labelled 'secretary' without capitals) being attended to by Harper. To his right is the U.S. President, concerned about the city's condition. Mason checks his Wrist Pad, readies his KAP-40 and looks through the window. As they are passing through traffic, citizens are being evacuated by a police helicopter hovering overhead while drones invade Los Angeles. An incoming missile hits the helicopter, causing it to crash onto a military convoy entering the city below. Debris flies towards the truck, causing it along with most of the convoy to crash. David blacks out and when he comes to, he sees Harper giving orders to the agents, telling them to stay down. David climbs out of the wreckage as Harper tells him about a mobile SAM turret that they could use that had crashed on the other end of the road. They make their way to it. David jumps onto the hood of the car and nearly falls off, he regains his footing and mans the turret. He takes down the drones that attempt to circle the president's location. Once they are taken down a missile hits the SAM, disabling it and breaking the ground beneath. Mason jumps out and watches it fall, he turns back around and sees a drone coming for him. It was then shot down by Anderson, crashing down and narrowly missing him. Anderson arrives and provides close air support. Mason gets up and regroups with his squad at the end of the highway, he can choose whether to snipe from the highway or to rappel down. Either way, he picks up a Storm PSR and fires at enemies hiding within a crashed truck, behind a column and approaching enemies. As they reach the second convoy, Mason regroups with the team. He drives the president out of there while the freeway falls apart, running down any opposition. Anderson takes down the drones trying to get near them, and blasts the debris blocking the tunnel. As they travel through the destroyed roads, Harper mentions Menendez's attack on the Pentagon, Washington, and Wall Street from the previous days. As David turns to reply, a truck is seen rushing towards the two. The screen blacks out.
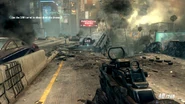
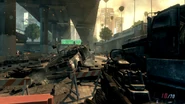
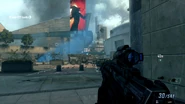
The screen fades back to David recovering from the impact of the truck, and he climbs out of a hatch in the roof and fights his way down the street with Anderson still providing cover fire, destroying C.L.A.W.s along the way. At the end of the road he reaches a plaza in downtown with LAPD officers and his SEAL team, machine gun nests have them pinned down so they decide to bypass them through a mall to the right. Quadrotor drones arrive and David uses them to distract the machine gun nests and help clear out the mall. They come out onto the balcony and kill the enemy snipers and gunners in the nest. Anderson gets on the radio and asks for help, her last wingman is dead and the presidential convoy is taking heavy fire from all sides. David promises relief and advances down an alley, and onto a road with his squad. Anderson says she is hit and has to set the jet down. They advance down the street while taking out tangos towards Anderson but a building falls down to their immediate front. Mason blacks out for another time and gets up. Anderson is no longer talking.
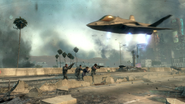
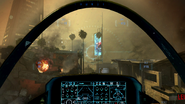
They reach her FA38 to see her unconscious body next to it. LAPD arrive, protecting her as paramedics bring Anderson to an ambulance. Harper follows inside while David, not even knowing how to pilot it, mans the FA38 and follows the ambulance. They head towards the president's convoy and take down enemy troops, drones, armor and emplacements that threaten it. A drone garrison attacks the convoy and David detaches from the convoy to chase them down, locking on and firing. The president reaches the evacuation point and the mission ends.
Video Walkthrough
Challenges
Completing 2 challenges in the Cordis Die mission will unlock the Throwback perk for use in Single Player. Completing 5 challenges in the mission will unlock the Ammo Pickup perk for use in Single Player.
- 100% impact ratio with SAM engagement on highway.
- Perform headshot (x10) sniper kills from the upper freeway.
- Direct quad drones to eliminate enemy personnel (x8).
- Rescue trapped SSA in damaged vehicle.
- Destroy enemy drone (x30) using SAM on roof.
- Protect G20 cougar at the intersection.
- Destroy drones (x3) with one shot.
- Protect all G20 vehicles.
- Collect intel (x3).
- 100% survivability rating.
Weapon Loadout
Recommended Loadout
Found in level
Access Kit Usage
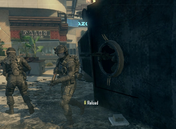
Saving three Secret Service Agents.
- Dragonfire drones that fire rockets are available inside the overturned container, near where the player engaged the first enemy CLAW.
- Before the player enter the plaza, there's a flipped MRAP just outside and is catching fire, Secret Service agents will be heard calling for help if the player gets close.
- Take the left route into the mall and after taking the escalator to the floor above, there's a locked glass door to the roof, up there is a SAM turrets that the player can use to take out some of the drones.
Gallery
Achievements/Trophies
- Late for the Prom (20
 / Bronze Trophy
  ) - Escort the president to the secure location in downtown LA.
Transcript
- Main article: Cordis Die (mission)/Transcript
Trivia
- The M8A1 appeared as the starting weapon in the E3 demo instead of the Type 25.
- Section's Wrist Pad in the E3 Demo says that the mission took place on October 3, while the mission itself says differently.
- The E3 demo had David looking at his reflection without his HUD glasses, but in the actual release, he was wearing them.
- In the E3 demo, Jones says that the soldiers attacking Los Angeles were Cordis Die sleeper cells, but in the final game he says they are mercenaries instead.
- If the player's loadout does not contain the PSR or a sniper rifle, they will be forced to rappel down the highway since the option to snipe will not appear.
- If Anderson dies in the ambulance during the escort, the player will not have access to the Sky Buster Missiles during the dogfight with the drones. She will live if Section protects the ambulance while escorting the convoy.
- In the E3 demo, the drone initially shot down by Anderson was an Avenger. However, in the final version it is a Lodestar.
- At the very start of the level, if one looks back into the crashed truck at the Secretary the name will read "secretary" without proper capitalization.
- After the player gets hit by the truck while driving, one can find a semi-automatic KAP-40 with no attachments, dropped by an ally near the small hole in the road. The player can pick up another fully-automatic KAP-40, and hold both weapons simultaneously.
- After the building falls down, the KAP-40 will become fully-automatic as usual. If both variants were held, then the semi-automatic one will be lost.
- Before the player chooses to rappel or to snipe, there's a typo in the subtitles. Samuels will say "PMCs", but the subtitles read "PCMs".
- Rarely, one of the paramedics that carries Anderson can be named Officer Anderson.
- In the intro, if subtitle is enabled, Jones is just referred as "Agent".
- At the beginning of the level, after taking down all the drones with the SAM turret and getting down off the truck, on the wall is pink graffiti of the words "DIE YOUNG".
- If Graphic Content Filter is enabled, in the beginning, the man that has major injuries will not be shown, the screen of the game will simply remain black.
- The LAPD uses semi-automatic KAP-40s, while the Mercs use fully-automatic KAP-40s.
- If Harper is present in this mission, after the player and Harper recover from being hit by the truck, he will destroy the CLAW in front of them by himself with a few grenades from his M8A1's undermounted grenade launcher, but if you look closely at his gun, you will see that there is no grenade launcher attached to it.
- Interestingly enough, in the E3 Demo, it clearly shows David wielding an M8A1 at the beginning, but once he rappels down the broken highway after covering the president with the Storm PSR he is equipped with a Type 25.
- The title picture of the mission is a shot of Aftermath.
- The trucks when Section jumps onto the front of the missile truck and nearly falls off in the E3 Demo were the LAVs that have the G20 leaders, while in the final version of the game they were red semi trucks. This likely means the LAPD were using them to transport CLAWs and Quad drones.
References
| ||||||||


