- For the weapon attachment in Call of Duty: Black Ops 4 and Call of Duty: Mobile, see High Explosive (attachment).
- "Kill all ten Juggernauts using only explosives and a knife. You'd be insane to even try this."
- — Special Ops description.
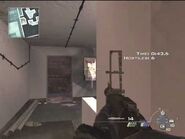
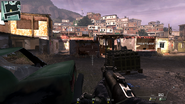
High Explosive is the second mission of the Echo tier in Special Ops, and the twenty-second mission overall in Call of Duty: Modern Warfare 2. It takes place in a Favela of Rio De Janeiro in Brazil, from Takedown. The objective is to kill ten Juggernauts using only explosive weaponry and a knife. The player, however, can briefly use the M9 pistol when they are downed.
The Infinity Ward best time for High Explosive is 2:47:7.
Overview[]
In High Explosive, the player(s) must neutralize all ten Juggernauts using only explosive weaponry; the player can't pick up or use non-explosive weapons, both in solo play and co-op mode, aside from the M9 if one is downed in co-op. The player is given a knife, a Thumper, an RPG, Frag Grenades, Flashbangs, Claymores, and C4. As is the case in O Cristo Redentor, three supply crates are placed throughout the level for replenishing ammo: one at the starting point, one in the center, and one to the north-east at an inaccessible exit to the map. Neither claymores nor C4 will be replenished by said crates; and simialarly, Juggernauts will not drop their weapons when killed.
Both weapons will kill a Juggernaut with one headshot. This can be extremely useful considering the Thumper's ammo capacity, consistency and reload speed compared to RPG-7, though the player should still take care as the grenade arc can be difficult to always get right, and flinching from the Juggernauts' fire can be hazardous while aiming. It is also not suitable at close quarters due to its safe distance mechanism.
There are a few viable ways to complete this mission rather easily:
- It is possible to get on the rooftops and kill Juggernauts from there as seen in this video; the main problem is reloading. However, the player can simply aim for the Juggernaut's head. 10 blocks of C4 will kill a Juggernaut fairly swiftly.
- It is possible to force the AI of the Juggernauts to force them to stand still as seen in this video, by getting into the truck at the start of this level. However, one will have to eventually exit the vehicle to trigger more Juggernauts and to reload, which makes this method a little risky. This method is not entirely fool-proof, since some Juggernauts may proceed towards the player anyway even if they are hiding in the truck bed.
- In co-op, it is possible to get one player to constantly kill Juggernauts by knifing (and using M9 when downed) while the other can safely keep reviving them indefinitely. This is done by using the small building in the northwestern house or the house to the northeast of the player's starting position which is where the first Juggernaut might sometimes spawn (or, indeed, any other house with a single entrance), with the Juggernaut-killing player blocking the doorway to prevent them from entering the room. The reviving player can be prone next to the dressers so the Juggernaut gunfire will not reach them, since it is possible to revive teammates even through a wall. This method is slow but consistent.
Weapon Loadout[]
| Starting Loadout |
|---|
Gallery[]
| |||||||||||||||||


