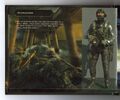
- "Infiltrate an oilrig captured by the Russians. Free the hostages and neutralize enemy forces to allow U.S. troops to disable the SAM sites, clearing the route to the Gulag."
- — Call of Duty: Modern Warfare 2 Campaign Remastered level description
"The Only Easy Day... Was Yesterday" is the ninth mission of Call of Duty: Modern Warfare 2 and Call of Duty: Modern Warfare 2 Campaign Remastered. The player controls Gary "Roach" Sanderson. The objective of the mission is to eliminate hostiles and rescue three rooms full of hostages on an oil rig being used as a SAM site in order to allow Task Force 141 to infiltrate The Gulag and extract Prisoner 627.
Characters[]
- Gary "Roach" Sanderson (playable)
- John "Soap" MacTavish
- Simon "Ghost" Riley
- Peasant (Alive/K.I.A.) (player-determined)
- Zach
- Robot
- Sub Commander
- Hunter Actual
- Hunter Two-One
- Punisher (heard only)
- Phoenix One-One (heard only)
- Hunter Two-Three (mentioned only)
- Vladimir Makarov (mentioned only in the cutscene)
Plot[]
After escaping the favela, General Shepherd tells John "Soap" MacTavish that he and his group are now heading for "Prisoner six-two-seven (627)" in a joint ops with Navy SEALs to get a step closer to getting to Vladimir Makarov. However, SAM sites are preventing them from getting to the gulag where he is held, so they have to take out the SAM sites first. The SAM sites are located at oil rigs held down by Russian forces. As the Russians have civilian hostages, they have to neutralize the oil rig carefully. They stealthily assault the least defended oil rig with 6th Fleet. After a small submarine ride, the group will arrive at the bottom of the rig, where Gary "Roach" Sanderson and Soap take down two guards. After going one floor up, they breach a room with five hostages, saving them. Then they move up and breach another room, again saving a few hostages. However, as a Russian radio voice can be heard, Soap tells others to set up a Plan B by putting C4 on the bodies in the room. Soap and Roach then go to a construction balcony and watch Russian forces enter the room, only for them to notice their killed men and alert others. At this moment, Roach will detonate the C4. They will then go loud, and everyone have also removed their silencers. They proceed step by step two floors up, until they notice that Russians are using smoke grenades, as well as thermal optics to see through the smoke. Soap will tell others to use thermals as well. After taking down the enemies, the group will breach a final room of enemies, where there is also barrels with C4 around them. After saving the hostages, Soap will report to Overlord that the rig is now clear. They then go to a helipad, where an MH-6 Little Bird is waiting. After leaving on it towards the gulag, Roach sees Marines taking control of the rig. Then the level ends.
Walkthrough[]
Infiltrating the oil rig[]
The player will begin the level by riding on a SEAL Delivery Vehicle (also known as SDV) from the USS Chicago, a Los Angeles-class submarine, to the oil rig. The player passes by the USS Dallas, in a reference to The Hunt For Red October. Once the SDV reaches the oil rig, the player and Soap will perform coordinated execution of two guards. By the time the guard is disposed of, two friendlies will assist the player in getting up onto the platform and the team will move out to the first deck.
Deck One[]
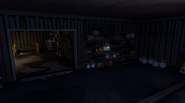
The second enemy the player comes across, is the guy smoking with his back turned. He has one health point and can be killed by a shot anywhere with any weapon. Soap will tell the player to use a suppressed weapon but both the SCAR-H and the M4A1 are already suppressed so it does not matter which one the player uses. Take him out, then move past him and breach one of the two doors ahead. There are no explosives in this room and few enemies, so it's hard not to kill everyone. Mind the hostage in the back right corner; dead ahead if one breaches the far door. There's an enemy using him as a human shield. Once the hostages are secure, follow MacTavish to deck two.
Deck Two[]
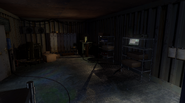
A helo goes past; if the player is a good shot, it is possible to destroy it with the M203. Keep in mind that this does not affect the presence of the helicopter later in the mission, although later on the M203 also comes in handy if the player does not want to pick up a rocket launcher. There are no guards in this area until the player breaches; once the player has cleared the room, plant C4 on the bodies and retreat to the scaffolding where Soap sets up. The detonator will be in the player's hand, and once the player get their weapons back they will notice that the suppressors have disappeared. If the player really cares, they can swap their silenced M4A1 and SCAR-H for other weapons before placing the C4, and then get them back after detonating it. That way, the silencers will stay on them and can be used for the remainder of the level.
Once the enemies move into the room the player just breached, follow MacTavish's order and detonate the C4. It is advisable to grab the Dragunov next to the player and use it to dispatch everyone else; the SCAR-H also works well because of the Thermal Scope. Once the player has taken out all the guards, he/she must continue through the next area and up the stairs.
Deck Three[]
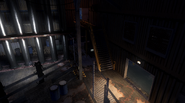
Mind the two guys at the top of the stairs; Soap and Simon "Ghost" Riley will drop them if the player waits. Then move up and take a position behind the first piece of cover. A whole pile of enemies will now spawn and fan out. Use the huge tanks to blow up the first wave as they rappel in, then pick the rest off as they come. Mind the fragmentation grenades getting thrown and the enemies carrying shotguns that will flank the player through the warehouse area on the right. Soon, the MH-6 Little Bird from before shows up. Try to hit it with the M203 before its guns spin up; if the player misses, just grab an AT4 either from outside or from the warehouse and take it out. Once all hostiles have been eliminated, move around the corner and find the first weapon stash—two F2000s and an Intervention, all with Thermal Sights. Then follow Soap up the stairs to another weapon stash. Grab the Claymore mines from here. The player can choose to follow MacTavish down a second set of stairs, essentially flanking all the hostiles. A close quarters weapon will take them out at this range. The alternative is retreating down the stairs after grabbing the Claymores and helping Ghost take them out at a distance. Either way, clear the area and move up the final set of stairs to the fourth and final deck.
Deck Four[]
Before reaching this deck, there's another set of F2000s and another Intervention. Thermal PP2000s can also be found on the deck itself. Take whichever and move up to the top deck. At this point the enemy will deploy a smokescreen. This part of the mission, if handled incorrectly, can be the hardest firefight of the entire campaign on harder difficulties. There are several approaches. The first is to take out the enemies with machine guns and RPG-7s in the windows, then set up Claymores around the containers and sit back, picking off the incoming hostiles with the Thermal Sight (be it the SCAR-H, F2000, PP2000 or Intervention) before moving in to breach. In this case, the player is defending a lot of ground and it is difficult not to be flanked and overcome by rushing enemies, especially on Veteran.
The alternative seems impossible but is actually simple. As the smoke is being deployed, make sure the player has a close quarters weapon such as the Vector, AA-12 or M1014. Move in behind the container on the extreme right and basically, move blindly through the smoke to the breaching door as quickly as possible. Soap and Ghost will follow suit. Regroup in the room adjacent to the breach and, if needed, arm up from the weapons there before breaching. The player has now bypassed the majority of the enemies in the level. Occasionally the "Clear All Enemies Before Breaching" text will appear, in which case the player should use the Thermal weapon that he/she should still have and take out any enemies within line of sight of the doorway. Once they are out of the picture, breach the door. Be especially careful on this one as not only are there many hostages, but also explosive barrels strapped with C4. Try to use a more precise weapon such as the UMP45 that's leaning against the shelf outside. Take care of the enemy that rushes, then carefully aim at all the other enemies, one by one.
Extraction[]
Once the hostages are secure, move out onto the helipad, then enter the chopper. The player will now be carrying an M14 EBR, as it is the main weapon of the next mission. The chopper will take off, carrying the player, Soap, Ghost and other Task Force 141 operatives to the Gulag as U.S. forces sweep and clear the oil rig.
Gallery[]
Weapon Loadout[]
| Starting Loadout |
|---|
|
Note: after placing C4 on the dead bodies, the silencer will be removed from the M4A1 and the SCAR-H. However, if the player swaps these weapons before the C4 sequence and gets them back after it, they will retain their suppressor. |
| Found in level |
|---|
|
These weapons can be found with and without attachments. AA-12 (with Red Dot Sight) AUG HBAR (with Red Dot Sight) F2000 (with Thermal Scope) Intervention (with Thermal Scope) MP5K with Red Dot Sight PP2000 (with Thermal Scope) TAR-21 (with MARS Sight) UMP45 (with Red Dot Sight) USP .45 (with Tactical Knife) RPD (Unobtainable outside of cheats) |
| Extraction |
|---|
|
Weapon loadout after boarding the Little Bird chopper: |
Intel Items[]
- Intel No. 22: (1/3 Intel) After 1st breach, go up 2 flights of stairs. A room just before outside, a middle shelf facing South.
- Intel No. 23: (2/3 Intel) When the guards open the gate go into the room on the right and the intel is on some shelves to the right.
- Intel No. 24: (3/3 Intel) On 2nd level, near and before the long stairs that lead to upper level for 3rd breach. Enter the building facing west, then turn North.
Transcript[]
- Main article: The Only Easy Day... Was Yesterday/Transcript
Achievements/Trophies[]
Knock-knock (10 ![]() / Bronze Trophy
/ Bronze Trophy ![]() ) - Obtained after shooting 4 bullets to kill 4 people in a slow-mo breach.
) - Obtained after shooting 4 bullets to kill 4 people in a slow-mo breach.
Prisoner 627 (25 ![]() / Silver Trophy
/ Silver Trophy ![]() ) - Obtained after beating "The Only Easy Day... Was Yesterday" and "The Gulag" on Veteran difficulty.
) - Obtained after beating "The Only Easy Day... Was Yesterday" and "The Gulag" on Veteran difficulty.
Trivia[]
- Main article: The Only Easy Day... Was Yesterday/Trivia
| |||||||||||||||||


