- For the Call of Duty: Black Ops II mission, see Pyrrhic Victory.
Pyrrhic Victory is the main quest of the Call of Duty: Black Ops Cold War Zombies map Forsaken. It involves the Requiem Strike Team having to successfully preform "Operation First Domino" before Omega Group can successfully rescue Kazimir Zykov and capture The Forsaken.
The Chrysalax is required for sections for the quest.
Step 1[]
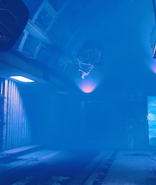
Upon lifting the lockdown in the facility an additional button within the Observation Tower, between the Bunker Teleport and the Centre console room can be pressed. Pressing this button starts a cutscene revealing that Omegas plan of rescuing Zykov has succeeded. In turn, Zykov reveals that he is in fact The Forsaken as the forty years that it has been in the normal world, four CENTURIES have passed within the Dark Aether. Samantha phases in and starts battling with The Forsaken as the facility plunges into a Dark Aether infused version of itself.
Step 2[]
With The Forsaken now in the world and with Maxis temporarily holding him at bay, the Strike Team are asked by Sam to get to the Town Square where the two are facing. However, the path to the Town Square is blocked by the Phase, meaning that an Aetherium Neutralizer is required to safely travel through the it.
A field crafted version of the Neutralizer can be crafted via items around the Zakarpatska Oblast and can be found in any order.
Housing Unit[]
The buoy that the Housing Unit can be found within is located in the Bunker, floating within the corner of the Board Room. Having an Abomination charge and impact in the corner where the buoy is will have it be dislodged and fall to the floor, allowing the Strike Team to take it.
An Abomination will spawn within the Office section when a Strike Team member enters the Board Room after the map as been affected by The Forsaken.
Monitoring Device[]
A spare monitor that can function as the Monitoring Device can be found within the backroom of the TV Shop. Accessing it requires rebooting an arcade cabinet of the 1982 game Grand Prix, doing so requires a zombie to be affected by an electric elemental effect, such as Tesla Storm or Dead Wire. Doing so will cause the electrical effect to arc to the cabinet and re-activate it, allowing it's use for 2,000 Essence.
Using it will spawn an ARC-XD in-between the arcade cabinets. This ARC-XD also produces an orange energy pulse, rather than the standard one. This ARC-XD can be driven to the TV Store and to behind the counter where the energy pulse will knock down an ajar vent covering, leading into the backroom. Detonating within the backroom will knockdown the shelving and put the Monitoring Device through the wall enough to allow the Strike Team to collect it.
If the ARC-XD is destroyed, another can be brought at the Grand Prix cabinet for the same cost.
Fuel Tank[]
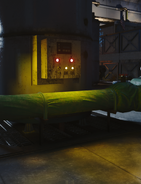
The Fuel Tank can be collected within the Fuel Processing area by activating any of the four processing tanks. Doing so will set the area into a lockdown state until the processing tanks are full. Upon the completion of the process, the machine will suffer a failure and drop the central tank from the connective pipes, which the Strike Team can collect for use in the Neutralizer.
Catalyzed Crystal Shards[]
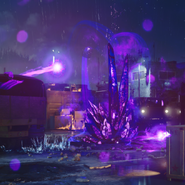
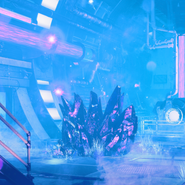
Upon activating the first step of Pyrrhic Victory, three giant Aetherium Crystals will be spawned within the Staging Area, Main Street - Storage Zone 5 Rooftops and Bunker - The Amplifier. They are protected by three orbs that can be destroyed by any damage, however in response will start increasing the amount of enemies that spawn by including additional spawns that have a purple haze and award no Essence upon death.
When the orbs are destroyed, the crystals can be destroyed by the Savager configuration of the Chrysalax, spawning a Crystal Shard Tactical item on the remains of it alongside a Abomination. Throwing the Crystal Shard at the maws of the Abomination will have it swallow the shard and transmute it into a catalyzed state, which functions as fuel for the Neutralizer. The Catalyzed Shards require the Fuel Tank to be stored properly as they are both hazardous and self destruct after some time.
Destroying all three crystals and catalyzing all three shards will provide enough fuel to start up the Neutralizer.
Step 3[]
With the parts and fuel collected, the Aetherium Neutralizer can be built on the Workbench within the Main Street facing collapsed walkway and Phase Wall. When built, a minor boot sequence is required before it can be used and a final order from the Requiem Director is given. If The Forsaken cannot be killed, utilizing the Containment Chamber built by Omega, capture it.
Interacting with the Aetherium Neutralizer after the boot sequence will start the point of no return.
Step 4[]
Within the Phase, due to the nature of how the Aetherium Neutralizer was built, it will require constant refilling of fuel. Which can be noted via the fuel tanks, the monitor screen changing statuses and sound alerts for various percentage states. Catalyzed Crystal Shards can be obtained from catalyzed crystals within the Phase itself, however only one can be carried at a time.
Upon arriving to the Town Square's Containment Door, the Aetherium Neutralizer will go offline and the Der Wunderfizz, Pack-a-Punch Machine, Ammo Cache, Arsenal and Crafting Table will spawn. Interacting with the Containment Door will open it and allow the Strike Team to confront The Forsaken.
Step 5[]
During the battle with The Forsaken, Samantha will float around the area and create a zone under her that she can collect essence from slain zombies from, with enough allowing her to charge one of the Aetherium Gun Turrets with power. These are utilized to deal damage to the weak points of The Forsaken during each phase of the fight after the crystals covering them have been destroyed.
Phase 1[]
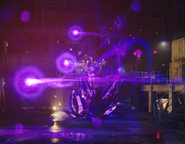
During the first phase, The Forsaken will have the shoulders as his weak points and will only attack with shockwaves until one of them is destroyed. Depending on which arm is destroyed, an additional attack is added in. Destroying his left arm will have him produce tracking energy orbs that deal area damage whilst destroying his right arm will have him utilize an attack similar to Frost Blast, spawning two areas of frost that slow Strike Team members within it.
Phase 2[]
When both arms are destroyed, The Forsaken will teleport the Strike Team into a vision of the "future" where they succeed at their goal with all four of the Requiem Head officers dead. Samantha screams at The Forsaken to leave them alone, opening a portal back to the Town Square, allowing the Strike Team to return.
The Forsaken remarks that he should just kill them instead and starts Phase 2 which an eye laser attack that tracks a Strike Team member, dealing continuous damage if they're in the area. The crystal on The Forsaken becomes his weak point and upon destroying it, opens up a vortex to the Dark Aether.
During this section, Krasny Soldat will start to spawn in.
Phase 3[]
The Forsaken will start to recount the countless victories he has had, affirming that the Strike Team are nothing. With the final weak point being the one upon his head. Upon destroying the final weak point, The Forsaken states that he's through playing games and five giant Aether Crystals descend into the area and constant damage starts affecting the Strike Team whilst the Phase outside The Zakarpatska Oblast starts expanding alongside a rapid increase of Outbreak zones. Samantha apologizes, stating that she is a good person and this is the only way, entering the vortex created by the Strike Team and forcing The Forsaken into the Containment Chamber, at the cost of being locked within the Dark Aether. Completing Pyrrhic Victory.
Gallery[]
Trivia[]
- The song We'll Meet Again by English singer Vera Lynn can be heard during the outro cutscene.
- During the cutscene on The Director's desk, a snow-globe of Doctor Monty's house in Agartha can be seen. The snow-globe also appeared in a trailer for Zombies Chronicles, where it was in the possession of Samantha Maxis.
| ||||||||||||||||||||||||||||||||||||||||||||||||||||||||||||||

