No edit summary |
mNo edit summary Tag: rte-wysiwyg |
||
| (33 intermediate revisions by 24 users not shown) | |||
| Line 2: | Line 2: | ||
{{Infobox/level |
{{Infobox/level |
||
|name = Firewall |
|name = Firewall |
||
| − | |image = [[File: |
+ | |image = [[File:Loading Screen Firewall MW3.png|300px]] |
|game = ''[[Call of Duty: Modern Warfare 3]]'' |
|game = ''[[Call of Duty: Modern Warfare 3]]'' |
||
|prev = [[Toxic Paradise]] |
|prev = [[Toxic Paradise]] |
||
|next = [[Fatal Extraction]] |
|next = [[Fatal Extraction]] |
||
| + | |campaign = "[[Mind the Gap]]"|place = Canary Wharf, London, England, United Kingdom |
||
| − | |weapons = [[MP5]], [[SPAS-12]] |
||
| + | |score = ·Difficulty<br>·Time<br>·Kills|team = [[SAS]]|character = Unknown [[SAS]] Operator|enemies = [[Inner Circle]]|objective = Get to the extraction point |
||
| − | |singleplayer = "[[Mind the Gap]]"}} |
||
| + | Hack defense systems along the way}} |
||
{{Quote|Hack into enemy security sentries and reach the subway in time.|Level Description}} |
{{Quote|Hack into enemy security sentries and reach the subway in time.|Level Description}} |
||
'''Firewall''' is a two-player [[Special Ops]] [[Mission Mode]] challenge in ''[[Call of Duty: Modern Warfare 3]]''. It takes place in [[London]], and is based off "[[Mind The Gap]]". |
'''Firewall''' is a two-player [[Special Ops]] [[Mission Mode]] challenge in ''[[Call of Duty: Modern Warfare 3]]''. It takes place in [[London]], and is based off "[[Mind The Gap]]". |
||
==Overview== |
==Overview== |
||
| − | This mission can |
+ | This mission can ONLY be played with two players. One player will be on foot, while the other will be in control of multiple security sentries which are laid out across the map. The player on foot must reach the subway in four minutes, while the other player provides cover with mounted [[Sentry Gun]]s that are strategically placed throughout the escape route. The covering player can view two different camera angles at a time, and the player on foot must use computers at four different checkpoints to be able to proceed, as well as let the other player change camera view. However, on two points the player on foot must clear an area without covering fire, as the Sentry Gun's view cannot reach those areas. |
==Walkthrough== |
==Walkthrough== |
||
This mission is accessible only with two players. The first player must reach the extraction point within four minutes, hacking the defense system along the way. The other player has control of the sentry camera system, which gives him access to several automated turrets. |
This mission is accessible only with two players. The first player must reach the extraction point within four minutes, hacking the defense system along the way. The other player has control of the sentry camera system, which gives him access to several automated turrets. |
||
| − | The first player's path is the same one |
+ | The first player's path is the same one that is used in the beginning of "Mind the Gap" to reach the subway. The other player uses the sentries to protect him. Although the first player is the one putting his life on the line, the second player enjoys a much higher kill count. |
Through the beginning alleys, duck inside the buildings while the sentry clears out the path. At the doors to the warehouse, hack the computer to gain access. |
Through the beginning alleys, duck inside the buildings while the sentry clears out the path. At the doors to the warehouse, hack the computer to gain access. |
||
| − | Let the turrets clear out the inside |
+ | Let the turrets clear out the inside while climbing to the top floor. After the first player runs past the windows on the second floor, the turret should look to the right as more enemies approach from behind. |
| − | The next floor is not visible to the camera system, so the first player is on his own. Take down the two foes there, and hack into the defense system at another laptop. |
+ | The next floor is not visible to the camera system, so the first player is on his own. Take down the two foes that are present there, and hack into the defense system at another laptop. |
| − | Burst through the window and slide into the |
+ | Burst through the window and slide into the dockyard. The second player has a wide area to look after here. Rotate to the left and let the player with the sentry turrets take down the two choppers that drop off more guards. |
| − | Run through the gate toward |
+ | Run through the gate toward the objective marker and then past the forklift on the right to find the third computer. Hack it and hop down to the street. A sentry camera on the street and another at the extraction point help the player complete this mission. |
| − | == |
+ | ==Weapon Loadout== |
| + | {|class= "wikitable collapsible autocollapse" style= "background: transparent;" |
||
| − | === Starting Loadout === |
||
| + | ! style= "background: transparent;" | Starting Loadout |
||
| ⚫ | |||
| + | |- |
||
| ⚫ | |||
| + | | style= "background: transparent; border: 1px solid transparent;" | |
||
| ⚫ | |||
| ⚫ | |||
| ⚫ | |||
| ⚫ | |||
</gallery> |
</gallery> |
||
| + | |} |
||
| + | {|class= "wikitable collapsible autocollapse" style= "background: transparent;" |
||
| − | === Found in Level === |
||
| + | ! style= "background: transparent;" | Found in level |
||
| − | The following weapons can be found with or without attachments. |
||
| + | |- |
||
| ⚫ | |||
| + | | style= "background: transparent; border: 1px solid transparent;" | |
||
| − | File:Weapon pp90m1 large.png|[[PP90M1]] |
||
| ⚫ | |||
| − | File:Weapon p90 large.png|[[P90]] |
||
| − | + | PP90M1 Menu Icon MW3.png|[[PP90M1]] |
|
| − | + | P90 Menu Icon MW3.png|[[P90]] |
|
| + | SPAS-12 menu icon MW3.png|[[SPAS-12]] |
||
| + | Five Seven menu icon MW3.png|[[Five Seven]] |
||
</gallery> |
</gallery> |
||
| + | |} |
||
| + | ==Gallery== |
||
| + | <gallery captionalign="left"> |
||
| + | MW3 Firewall1.jpg |
||
| + | MW3 Firewall2.jpg |
||
| + | MW3 Firewall3.jpg |
||
| + | MW3 Firewall4.jpg |
||
| + | </gallery> |
||
==Trivia== |
==Trivia== |
||
| − | *Along with the mission [[Fire Mission]], this is one of the only two mission that can only be played with two players. |
||
*It is possible to complete the mission in four minutes and a fraction of a second. Doing this will say the mission was failed, but the score table will say the mission was a success. |
*It is possible to complete the mission in four minutes and a fraction of a second. Doing this will say the mission was failed, but the score table will say the mission was a success. |
||
| − | *The silenced [[SPAS-12]] uses the ''Call of Duty: Modern Warfare 2'' model. |
||
| − | *This mission, [[Hit and Run]], [[Invisible Threat]], [[Fire Mission]], and [[Black Ice]] are the only [[Mission Mode]] challenges where the players have different starting loadouts. |
||
{{Cod8specops}} |
{{Cod8specops}} |
||
[[Category:Call of Duty: Modern Warfare 3 Special Ops Levels]] |
[[Category:Call of Duty: Modern Warfare 3 Special Ops Levels]] |
||
| − | [[Category:Levels]] |
||
[[Category:Special Ops]] |
[[Category:Special Ops]] |
||
Revision as of 18:49, 16 February 2015
- "Hack into enemy security sentries and reach the subway in time."
- — Level Description
Firewall is a two-player Special Ops Mission Mode challenge in Call of Duty: Modern Warfare 3. It takes place in London, and is based off "Mind The Gap".
Overview
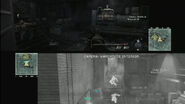
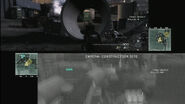
This mission can ONLY be played with two players. One player will be on foot, while the other will be in control of multiple security sentries which are laid out across the map. The player on foot must reach the subway in four minutes, while the other player provides cover with mounted Sentry Guns that are strategically placed throughout the escape route. The covering player can view two different camera angles at a time, and the player on foot must use computers at four different checkpoints to be able to proceed, as well as let the other player change camera view. However, on two points the player on foot must clear an area without covering fire, as the Sentry Gun's view cannot reach those areas.
Walkthrough
This mission is accessible only with two players. The first player must reach the extraction point within four minutes, hacking the defense system along the way. The other player has control of the sentry camera system, which gives him access to several automated turrets.
The first player's path is the same one that is used in the beginning of "Mind the Gap" to reach the subway. The other player uses the sentries to protect him. Although the first player is the one putting his life on the line, the second player enjoys a much higher kill count.
Through the beginning alleys, duck inside the buildings while the sentry clears out the path. At the doors to the warehouse, hack the computer to gain access.
Let the turrets clear out the inside while climbing to the top floor. After the first player runs past the windows on the second floor, the turret should look to the right as more enemies approach from behind.
The next floor is not visible to the camera system, so the first player is on his own. Take down the two foes that are present there, and hack into the defense system at another laptop.
Burst through the window and slide into the dockyard. The second player has a wide area to look after here. Rotate to the left and let the player with the sentry turrets take down the two choppers that drop off more guards.
Run through the gate toward the objective marker and then past the forklift on the right to find the third computer. Hack it and hop down to the street. A sentry camera on the street and another at the extraction point help the player complete this mission.
Weapon Loadout
| Starting Loadout |
|---|
|
The SPAS-12 from Modern Warfare 2 |
| Found in level |
|---|
Gallery
Trivia
- It is possible to complete the mission in four minutes and a fraction of a second. Doing this will say the mission was failed, but the score table will say the mission was a success.
| |||||||||||


