No edit summary |
Tag: sourceedit |
||
| (16 intermediate revisions by 10 users not shown) | |||
| Line 8: | Line 8: | ||
|character = [[Chuck Walker]] |
|character = [[Chuck Walker]] |
||
|team = American Army |
|team = American Army |
||
| − | |weapons = [[Thompson]]<br />[[M1 Garand]]<br />[[BAR]] |
||
| − | |enemyweapons = [[MP40]]<br />[[Kar 98k]]<br />[[Panzershreck]]<br />[[MG42]] |
||
|place = {{w|Aachen}}, Germany |
|place = {{w|Aachen}}, Germany |
||
| + | |date = October 21, 1944 |
||
|objective = Capture Aachen |
|objective = Capture Aachen |
||
|enemies = German Army |
|enemies = German Army |
||
| Line 16: | Line 15: | ||
{{Quote|This is it, we're taking Aachen today.|[[Chuck Walker]]}} |
{{Quote|This is it, we're taking Aachen today.|[[Chuck Walker]]}} |
||
==Characters== |
==Characters== |
||
| − | *[[ |
+ | *[[Chuck Walker]] (playable) |
*[[Parker (Able)|Parker]] |
*[[Parker (Able)|Parker]] |
||
| − | *[[Rickerson]] |
+ | *[[Rickerson]] (KIA) |
| − | *[[Pvt. Johnson (Able)|Johnson]] |
+ | *[[Pvt. Johnson (Able)|Johnson]] (KIA) |
| + | *[[Benny Church]] |
||
| + | |||
== Briefing == |
== Briefing == |
||
| − | A cutscene begins with the character [[Chuck Walker]] telling the seven troops under his command that they have to take Aachen. The Germans are surrounded and cut off from their command and control, but |
+ | A cutscene begins with the character [[Chuck Walker]] telling the seven troops under his command that they have to take Aachen. The Germans are surrounded and cut off from their command and control, but the buildings they're hold up in are solid enough to resist shelling. Their orders are to escort the [[M12]] to the town square, clearing the buildings of German resistance. Once they're inside of City Hall, the M12 will "blow the son of a bitch to pieces". They have to stay close behind the [[Sherman]] tanks for cover and protect them from Anti-Armor threats. If they lose the [[Sherman]]s, they're all dead. Corporal [[Benny Church]] states that some the buildings are too fortified for the tanks to take out and asks Walker what they're going to do about them. Walker assures him that they're going to "knock 'em all down". |
== The Battle == |
== The Battle == |
||
When Walker moves and the tanks and the men start to move, the player automatically losses two men, Pvt. Johnson and Pvt. Rickerson, due to machine gun fire because they expose themselves by not taking cover behind the tanks. There is no way the player can stop their deaths. Seconds before they are cut down, Cpl. Church says "Where are you going? Stay behind the tanks!". The player goes around a corner and sees a machine gunner in a building to the left, perched in an arc, firing at the player. Do not go in front of the tanks until they take the gunner out.staying behind the tanks when they get to the corner the building to the left, with a fire in it has a med kit. In the building on the right, there is an anti-armor man in the window, one of the tanks fires at him, but misses and hits below him, opening a way in the building. Now you have to clear the building. There are seven Germans inside the building, including the anti-armor man on the second floor. There are enemies in two rooms with shut doors, so be ready when you open the doors. There are two med kits inside the building, one on the second floor and one on the first floor. |
When Walker moves and the tanks and the men start to move, the player automatically losses two men, Pvt. Johnson and Pvt. Rickerson, due to machine gun fire because they expose themselves by not taking cover behind the tanks. There is no way the player can stop their deaths. Seconds before they are cut down, Cpl. Church says "Where are you going? Stay behind the tanks!". The player goes around a corner and sees a machine gunner in a building to the left, perched in an arc, firing at the player. Do not go in front of the tanks until they take the gunner out.staying behind the tanks when they get to the corner the building to the left, with a fire in it has a med kit. In the building on the right, there is an anti-armor man in the window, one of the tanks fires at him, but misses and hits below him, opening a way in the building. Now you have to clear the building. There are seven Germans inside the building, including the anti-armor man on the second floor. There are enemies in two rooms with shut doors, so be ready when you open the doors. There are two med kits inside the building, one on the second floor and one on the first floor. |
||
| − | Then the Shermans and the M12 are attacked by two machine gunners in the church, and by five more [[Panzerschreck]] men and dozens of Germans outside the church. This is a tricky part on Hard difficulty. The enemies will throw a lot of grenades at the tanks, so stay away from the tanks. Stick to the left and take out all |
+ | Then the Shermans and the M12 are attacked by two machine gunners in the church, and by five more [[Panzerschreck]] men and dozens of Germans outside the church. This is a tricky part on Hard difficulty. The enemies will throw a lot of grenades at the tanks, so stay away from the tanks. Stick to the left and take out all Panzerschreck troops you see. If the M12 gets hit by a Panzerschreck troop, look at the smoke left by the projectile and locate the Panzerschreck troops. There is a [[Medical Kits|medkit]] and an [[M1 Garand]] in a room by the rubble on the right. You can walk over the huge pile of rubble in front of you to surprise the enemies behind the pile. There is another medkit by the barbwires on the left. After the firefight, follow the tanks and there are some enemies on the right by the big pile of rubble that had been mentioned earlier. You can take them out quicker if you surprise them by walking over the rubble. Follow the tanks but do not go to the right if you have low health, go to the left instead and pick up some health pickups left by dead Germans, by the barbwires. There is a Panzerschreck by the crates in front of you. Pick it up if you want to. |
| − | After that, rejoin your team. You have to take out anti-armor troops again. There are two of them, right in front of you on the street. Throw a few grenades at the group of enemies and you should get 'em. After that, an MG inside a building afar will start to fire at you. There are also many Germans in front of you by a destroyed building. Use grenades and take cover. Get inside the destroyed building and take out the two |
+ | After that, rejoin your team. You have to take out anti-armor troops again. There are two of them, right in front of you on the street. Throw a few grenades at the group of enemies and you should get 'em. After that, an MG inside a building afar will start to fire at you. There are also many Germans in front of you by a destroyed building. Use grenades and take cover. Get inside the destroyed building and take out the two Panzerschreck troops inside a room in front of you. These guys might spawn again so watch out. You can't throw a grenade inside the room because an invisible wall blocks it. If you're low on health, let your allies to take out the enemies. This might take a while. After that, move down the street. Church says there are more Panzerschreck troops inside a three-story building next to you. Clear out the building room by room. After that, the door on the first floor opens, and Church suggests they should check out the basement. |
| − | There are four Germans inside the first room. After you have taken them out, move into the tunnel. Don't forget to pick up the grenades in the room. Your allies will not follow you to the tunnel, so this is very tricky on Hard difficulty. If you have grenades left, (actually you should have some left) use them. But be careful, your character will throw the grenades with the right hand and the tunnel is very narrow, so make sure the grenade goes to the right place. Some Germans will assault you so time your reloads to make sure they don't get too close to you. When you get to the end, your friendlies will rejoin you and assault the Germans in the room in front of you. You also get a few more unnamed friendlies. There is a German with a |
+ | There are four Germans inside the first room. After you have taken them out, move into the tunnel. Don't forget to pick up the grenades in the room. Your allies will not follow you to the tunnel, so this is very tricky on Hard difficulty. If you have grenades left, (actually you should have some left) use them. But be careful, your character will throw the grenades with the right hand and the tunnel is very narrow, so make sure the grenade goes to the right place. Some Germans will assault you so time your reloads to make sure they don't get too close to you. When you get to the end, your friendlies will rejoin you and assault the Germans in the room in front of you. You also get a few more unnamed friendlies. There is a German with a Panzerschreck in the room in front of you so stay in cover. Wait until he reloads and then take him out. You can let your friendlies to take him out too, although this is dangerous as the [[Panzerschreck]] troop will aim at the friendlies and might hurt you if the allies are close to you. After that, move up the stairs and you will appear on the top floor of a building overlooking the theater. There is an MG42 in the building for you to use. |
The friendly tanks then drive to the square and the Germans launch a counter attack from the theater. Get on the machine gun and mow them down. The M12 then proceeds to destroy the theater. You will see some Germans fly by the power of the M12. Just as you are about to move up with the tanks, three anti-armor men come out of a manhole in the square. Take them out. You will discover the Germans are using the sewers to appear all over the city. Move into the sewers to finish the level. |
The friendly tanks then drive to the square and the Germans launch a counter attack from the theater. Get on the machine gun and mow them down. The M12 then proceeds to destroy the theater. You will see some Germans fly by the power of the M12. Just as you are about to move up with the tanks, three anti-armor men come out of a manhole in the square. Take them out. You will discover the Germans are using the sewers to appear all over the city. Move into the sewers to finish the level. |
||
| Line 53: | Line 54: | ||
Mauser Side FH.png|[[Kar98k]] |
Mauser Side FH.png|[[Kar98k]] |
||
MP40 Side FH.PNG|[[MP40]] |
MP40 Side FH.PNG|[[MP40]] |
||
| − | + | Panzerschreck Side FH.png|[[Panzerschreck]] |
|
</gallery> |
</gallery> |
||
|} |
|} |
||
| Line 75: | Line 76: | ||
==Trivia== |
==Trivia== |
||
*The player can enter the burning building across the street from where the level starts and will find several health packs. |
*The player can enter the burning building across the street from where the level starts and will find several health packs. |
||
| + | |||
| + | ==Transcript== |
||
| + | {{Main|First City to Fall/Transcript}} |
||
== Videos == |
== Videos == |
||
| + | [[File:Call of Duty Finest Hour - Western Front, Mission 1 1 2|425px]] |
||
| − | <youtube>http://www.youtube.com/watch?v=0-VTwltTTIo&feature=related</youtube> |
||
| + | [[File:Call of Duty Finest Hour - Western Front, Mission 1 2 2|425px]] |
||
| − | <youtube>http://www.youtube.com/watch?v=-fcVkMqRfRE&feature=related</youtube> |
||
{{CoDFH Campaign}} |
{{CoDFH Campaign}} |
||
Revision as of 15:02, 30 July 2017
- "This is it, we're taking Aachen today."
- — Chuck Walker
Characters
- Chuck Walker (playable)
- Parker
- Rickerson (KIA)
- Johnson (KIA)
- Benny Church
Briefing
A cutscene begins with the character Chuck Walker telling the seven troops under his command that they have to take Aachen. The Germans are surrounded and cut off from their command and control, but the buildings they're hold up in are solid enough to resist shelling. Their orders are to escort the M12 to the town square, clearing the buildings of German resistance. Once they're inside of City Hall, the M12 will "blow the son of a bitch to pieces". They have to stay close behind the Sherman tanks for cover and protect them from Anti-Armor threats. If they lose the Shermans, they're all dead. Corporal Benny Church states that some the buildings are too fortified for the tanks to take out and asks Walker what they're going to do about them. Walker assures him that they're going to "knock 'em all down".
The Battle
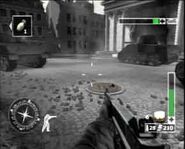
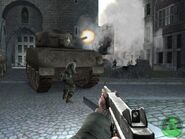
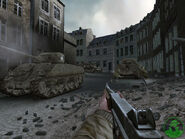
When Walker moves and the tanks and the men start to move, the player automatically losses two men, Pvt. Johnson and Pvt. Rickerson, due to machine gun fire because they expose themselves by not taking cover behind the tanks. There is no way the player can stop their deaths. Seconds before they are cut down, Cpl. Church says "Where are you going? Stay behind the tanks!". The player goes around a corner and sees a machine gunner in a building to the left, perched in an arc, firing at the player. Do not go in front of the tanks until they take the gunner out.staying behind the tanks when they get to the corner the building to the left, with a fire in it has a med kit. In the building on the right, there is an anti-armor man in the window, one of the tanks fires at him, but misses and hits below him, opening a way in the building. Now you have to clear the building. There are seven Germans inside the building, including the anti-armor man on the second floor. There are enemies in two rooms with shut doors, so be ready when you open the doors. There are two med kits inside the building, one on the second floor and one on the first floor.
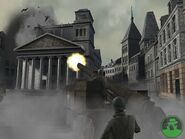
Then the Shermans and the M12 are attacked by two machine gunners in the church, and by five more Panzerschreck men and dozens of Germans outside the church. This is a tricky part on Hard difficulty. The enemies will throw a lot of grenades at the tanks, so stay away from the tanks. Stick to the left and take out all Panzerschreck troops you see. If the M12 gets hit by a Panzerschreck troop, look at the smoke left by the projectile and locate the Panzerschreck troops. There is a medkit and an M1 Garand in a room by the rubble on the right. You can walk over the huge pile of rubble in front of you to surprise the enemies behind the pile. There is another medkit by the barbwires on the left. After the firefight, follow the tanks and there are some enemies on the right by the big pile of rubble that had been mentioned earlier. You can take them out quicker if you surprise them by walking over the rubble. Follow the tanks but do not go to the right if you have low health, go to the left instead and pick up some health pickups left by dead Germans, by the barbwires. There is a Panzerschreck by the crates in front of you. Pick it up if you want to.
After that, rejoin your team. You have to take out anti-armor troops again. There are two of them, right in front of you on the street. Throw a few grenades at the group of enemies and you should get 'em. After that, an MG inside a building afar will start to fire at you. There are also many Germans in front of you by a destroyed building. Use grenades and take cover. Get inside the destroyed building and take out the two Panzerschreck troops inside a room in front of you. These guys might spawn again so watch out. You can't throw a grenade inside the room because an invisible wall blocks it. If you're low on health, let your allies to take out the enemies. This might take a while. After that, move down the street. Church says there are more Panzerschreck troops inside a three-story building next to you. Clear out the building room by room. After that, the door on the first floor opens, and Church suggests they should check out the basement.
There are four Germans inside the first room. After you have taken them out, move into the tunnel. Don't forget to pick up the grenades in the room. Your allies will not follow you to the tunnel, so this is very tricky on Hard difficulty. If you have grenades left, (actually you should have some left) use them. But be careful, your character will throw the grenades with the right hand and the tunnel is very narrow, so make sure the grenade goes to the right place. Some Germans will assault you so time your reloads to make sure they don't get too close to you. When you get to the end, your friendlies will rejoin you and assault the Germans in the room in front of you. You also get a few more unnamed friendlies. There is a German with a Panzerschreck in the room in front of you so stay in cover. Wait until he reloads and then take him out. You can let your friendlies to take him out too, although this is dangerous as the Panzerschreck troop will aim at the friendlies and might hurt you if the allies are close to you. After that, move up the stairs and you will appear on the top floor of a building overlooking the theater. There is an MG42 in the building for you to use.
The friendly tanks then drive to the square and the Germans launch a counter attack from the theater. Get on the machine gun and mow them down. The M12 then proceeds to destroy the theater. You will see some Germans fly by the power of the M12. Just as you are about to move up with the tanks, three anti-armor men come out of a manhole in the square. Take them out. You will discover the Germans are using the sewers to appear all over the city. Move into the sewers to finish the level.
Weapon Loadout
| Starting Loadout |
|---|
| Found in level |
|---|
Gallery
Trivia
- The player can enter the burning building across the street from where the level starts and will find several health packs.
Transcript
- Main article: First City to Fall/Transcript
Videos
| |||||||||||


