m (this wallpaper is defo not for mainspace... it's name... MW3) |
(→Gallery: removed brackets) |
||
| Line 55: | Line 55: | ||
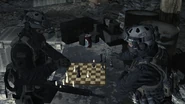
Shadow_Company_soldiers_playing_chess_Just Like Old Times MW2.png|Two Shadow Company soldiers playing chess. |
Shadow_Company_soldiers_playing_chess_Just Like Old Times MW2.png|Two Shadow Company soldiers playing chess. |
||
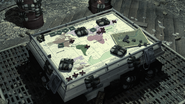
Site Hotel Bravo command post MW2.png|A map showing Shepherd's 'areas of responsibility'. Areas with X's represent areas where missions took place. |
Site Hotel Bravo command post MW2.png|A map showing Shepherd's 'areas of responsibility'. Areas with X's represent areas where missions took place. |
||
| − | Price_and_Soap_Just_Like_Old_Times_MW2.png|John Price |
+ | Price_and_Soap_Just_Like_Old_Times_MW2.png|John Price and Soap. |
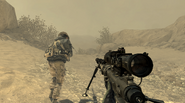
Price ready to kill Shadow Company member.png|[[John Price]] about to stab a Shadow Company soldier. |
Price ready to kill Shadow Company member.png|[[John Price]] about to stab a Shadow Company soldier. |
||
</gallery> |
</gallery> |
||
Revision as of 01:45, 25 August 2013
- "Search the Afghan cave network for General Shepherd."
- — Description
"Just Like Old Times" is the seventeenth mission of Call of Duty: Modern Warfare 2. With most of Task Force 141 eliminated and nearly out of allies that they can trust, Captain Price and Captain MacTavish resolve there is nothing left to do but neutralize General Shepherd. Now labeled war criminals and wanted fugitives, the duo embark on a suicide mission to infiltrate Shadow Company's command base with one goal only: Kill Shepherd.
Characters
- John "Soap" MacTavish (playable)
- John Price
- Nikolai (heard only)
- Shepherd
Walkthrough
The mission starts with Nikolai telling Price he'd be ready to pick them up in three hours. Price tells Nikolai not to bother, as this would be a "one-way trip." They are in a sandstorm while the player (playing as John "Soap" MacTavish) and Price are hiding in the sand. The two then proceed toward a ridge, and ambush a group of Shadow Company soldiers. Soap hooks up on a bridge and rappels down with Price. The two take out the two guards below them standing in front of the cave and then head inside.
They later are forced to hide as a patrol of soldiers check out what happened to the group they took out earlier. They sneak past a group of soldiers having a meeting. Price warns Soap of two soldiers with tactical lights coming down the stairs. They kill them and the two continue. Upstairs, Price stabs a soldier before he notices two more are behind him. Soap and Price learn that Shadow Company soldiers are about to breach the door.
The two quickly take out the group as they come pouring in. Price tells Soap to take a Riot Shield for cover and walk along the catwalk while Price takes out the group. They later learn that Shepherd is being evacuated. They take out several groups of soldiers before proceeding to a door that Shadow Company soldiers have locked.
The duo then breach the door and kill all the soldiers behind it. After the room is clear, Shepherd notifies the soldiers in the cave that the site has been breached and that he is going to set off explosives inside the cave to attempt to kill Soap and Price. Price and Soap quickly hack the door controls so that they can get out before the explosions go off.
During their escape, Soap is injured, but quickly recovers. Shepherd then calls in an artillery strike, "danger close," in another desperate attempt to kill the two, but they still manage to survive and the Shadow Company troops ahead of the duo get stunned or killed. Price comments, like Corporal Dunn had earlier in the campaign, that Shepherd doesn't care about danger close. Price and Soap then proceed to the Zodiacs that Shepherd mentioned earlier.
More Detailed Walkthrough
In the beginning of the mission follow Captain Price. When he stops at the ridge, go to the very right. When the shooting is about to start, aim for a headshot at the soldier on the right. The player should be able to take the soldier and the soldier behind him out in one shot. Follow Captain Price and shoot when told. Rappel down carefully by using the Right Trigger to stop and let go to jump. There are two enemies down below that the player and Captain Price need to carefully take out by knifing. When prompted, go close over one and hit the right analog stick. The player will knife him as Price takes out the other one.
The player should automatically switch to the secondary weapon, a Vector, although there is no need to do so. The Intervention, meanwhile, may be replaced, as there is close-quarters fighting ahead. Follow Price into the cave; hide from the bypassing guards, and kill the smoking soldier or not when prompted. Follow Price again, and kill when prompted. Follow Price again. The player will then come up to a weapons rack with three ACRs; preferably take the one on the right as it has a suppressor, Red Dot Sight, and Heartbeat Sensor. The gun to switch out should be the Vector. Clear the room and follow Price outside.
Also, the player can either switch the non-ACR gun for a Riot Shield, or use the Intervention if the player has kept it. If using the riot shield, proceed along the catwalk until there is a slight bend to the left. Stop just after the bend, and wait until Price takes out the two targets behind the low wall. Price will not take out the soldier that is prone until the player reaches the bridge. The player can either go for a riot shield bash or wait for Price to kill him. Afterwards, either keep the riot shield and wait while another three soldiers appear or switch to the ACR and kill them. The latter technique is faster. If the player kept the Intervention and decides to use it, slowly move, while prone and scoped in, out of cover and take out the tangos when a clear shot appears. After taking out the last of the three, duck back behind cover and repeat, as a single replacement group will move in. After taking out the second group the player can move up without trouble.
In the next area, the player will see a squad of six soldiers fast roping down from a helicopter. There are several with shields, so killing them quickly before they can set up is advisable. Take out as many of them as possible while they fast rope and cook a grenade into them to kill the rest. Instead of going right with Price, go left with the ACR drawn. Watch the heartbeat monitor to see when the soldiers come around the bend and kill them all. Go back to Price to mop up any stragglers.
Another squad of enemy soldiers will fast rope down, about the same composition as the previous fast rope group. Take them out the same way. There will be enemies to the player's left. Get behind the crates and chose to either switch out the ACR for a SCAR-H with thermal scope or keep the ACR. Go toward the marker and take out the enemies using a flanking maneuver. Go with Price and plant the breaching charge. Clear the room. When prompted, go to the computer keyboard, activate it, and run out the door. Do it quickly before the rigged room explodes. Some of the debris will hit the player, and consequently will then be knocked out for a little while.
When the player is able to move again just before the artillery strike (Shepherd's careless "Danger Close"), go stand where Price is. Swap the non-ACR gun for the AT4 at Price's feet. Keep the AT4 out. When the player is near the beginning of the tents, a Black Hawk helicopter should be coming into view in the distance. It will fast rope down troops. Shoot it down with the AT4 to thin out the resistance. If done fast enough, the player can do the same with the Little Bird. If it is already taking off, then it has already unloaded its troops. Shooting it down could still be useful even at this point, since the explosion and debris will kill most of the freshly arrived enemies. Take out the remaining soldiers. The heartbeat sensor on the ACR will help with locating them, or, if the player still has the Intervention, the player can lag behind Price and take out the tangos with less risk, though this requires more accuracy and patience. Follow Price, take out the soldiers that run out of the cave. The player can use the AT4 again instead of using the rifles as the AT4 takes out more enemies. Now go into the cave and begin the briefing for the next mission.
Video Walkthrough
File:Modern Warfare 2 - Campaign - Just Like Old Times
Gallery
Weapon Loadout
| Starting Loadout |
|---|
| Found in level |
|---|
|
These weapons can be found with and without attachments. |
Intel Items
- Item No. 41: (1/4 Intel) After shooting the enemy smoking in front of a security monitor, heading east will lead to a gray crate supporting the first intel.
- Item No. 42: (2/4 Intel) After Price knifes the guard at the top of the stairs he and Soap will be ambushed by a patrol. After they clearing the room, Price will exit the cave to the east. Just before exiting the cave, looking to the northeast, will let one see intel sitting on top of a table.
- Item No. 43: (3/4 Intel) Before breaching the control room, heading north along the right side wall; will lead to intel on a crate with an MG4.
- Item No. 44: (4/4 Intel) Inside the control room and next to Price when he uses the terminal will be a table with tons of cans and the intel on top.
Transcript
- Main article: Just Like Old Times/Transcript
Achievement/Trophy
Off the Grid (25 ![]() / Silver Trophy
/ Silver Trophy ![]() ) - Obtained by beating "Just Like Old Times", and "Endgame" on Veteran.
) - Obtained by beating "Just Like Old Times", and "Endgame" on Veteran.
Trivia
- Main article: Just Like Old Times/Trivia
| |||||||||||||||||


