No edit summary |
(Adding categories) |
||
| (39 intermediate revisions by 22 users not shown) | |||
| Line 1: | Line 1: | ||
| − | {{game|uo|fh|cod2|bro|cod3|rtv|waw|wawds|wawff|featured}} |
+ | {{game|uo|fh|cod2|bro|cod3|rtv|waw|wawds|wawff|wwii|featured}} |
{{Vehicle Infobox |
{{Vehicle Infobox |
||
| name= '''M4 Sherman''' |
| name= '''M4 Sherman''' |
||
| − | |game = ''[[Call of Duty: United Offensive]]<br>[[Call of Duty: Finest Hour]]<br>[[Call of Duty 2]]<br>[[Call of Duty 2: Big Red One]]<br>[[Call of Duty 3]]<br>[[Call of Duty: Roads to Victory]]<br>[[Call of Duty: World at War]]<br>[[Call of Duty: World at War (Nintendo DS)]]<br>[[Call of Duty: World at War: Final Fronts]]'' |
+ | |game = ''[[Call of Duty: United Offensive]]<br>[[Call of Duty: Finest Hour]]<br>[[Call of Duty 2]]<br>[[Call of Duty 2: Big Red One]]<br>[[Call of Duty 3]]<br>[[Call of Duty: Roads to Victory]]<br>[[Call of Duty: World at War]]<br>[[Call of Duty: World at War (Nintendo DS)]]<br>[[Call of Duty: World at War: Final Fronts]]<br>[[Call of Duty: WWII]]'' |
|found in = Multiple levels |
|found in = Multiple levels |
||
| used=[[United States Army]] |
| used=[[United States Army]] |
||
| image= [[File:M4 Sherman model CoD3.png|270px]] |
| image= [[File:M4 Sherman model CoD3.png|270px]] |
||
|caption = The M4 Sherman from ''[[Call of Duty 3]]''. |
|caption = The M4 Sherman from ''[[Call of Duty 3]]''. |
||
| − | |weapons = '''Primary''': 1 x |
+ | |weapons = '''Primary''': 1 x 75mm M3 L/40 gun or 1 x 76mm M1A1/M1A2 gun or 1 x 105mm howitzer M4 |
'''Secondary''': 2 x .50 cal Browning M2HB machine gun |
'''Secondary''': 2 x .50 cal Browning M2HB machine gun |
||
|icon = Sherman HUD icon WaW.png |
|icon = Sherman HUD icon WaW.png |
||
| Line 15: | Line 15: | ||
The '''[[Wikipedia:M4 Sherman|M4 Sherman]]''' was a medium tank used by [[Allied Powers|Allied]] forces during the [[Second World War]]. |
The '''[[Wikipedia:M4 Sherman|M4 Sherman]]''' was a medium tank used by [[Allied Powers|Allied]] forces during the [[Second World War]]. |
||
| − | The Sherman tank is seen throughout every ''Call of Duty'' game set during the [[Second World War]] (except the original ''[[Call of Duty]]''). The tank is frequently seen providing support for the character by Allied forces. |
+ | The Sherman tank is seen throughout every ''Call of Duty'' game set during the [[Second World War]] (except the original ''[[Call of Duty]]''). The tank is frequently seen providing support for the character by Allied forces. The M4 Sherman is considered the quintessential Allied tank of the Second World War. |
| − | A [[ |
+ | A [[Sherman Firefly]] tank can be used in ''[[Call of Duty 3]]'' by playing the Polish missions. |
The M4 Sherman is also featured as a usable vehicle in [[Call of Duty: United Offensive|United Offensive's]] multiplayer, with its rough equal the [[Panzer IV]]. The same configuration was also intended for [[Call of Duty: World at War]]'s multiplayer, however the M4 Sherman and the associated maps were scrapped. |
The M4 Sherman is also featured as a usable vehicle in [[Call of Duty: United Offensive|United Offensive's]] multiplayer, with its rough equal the [[Panzer IV]]. The same configuration was also intended for [[Call of Duty: World at War]]'s multiplayer, however the M4 Sherman and the associated maps were scrapped. |
||
| Line 36: | Line 36: | ||
== [[Call of Duty 2]] == |
== [[Call of Duty 2]] == |
||
| − | M4 Shermans are chronologically first seen in [[Operation Supercharge]]. Three of them can be seen and one of them is destroyed by [[Flak 88]] guns. British Shermans in North Africa are painted light tan and can be mistaken to be white. |
+ | M4 Shermans are chronologically first seen in [[Operation Supercharge]]. Three of them can be seen and one of them is destroyed by [[Flak 88]] guns. British Shermans in North Africa are painted light tan and can be mistaken to be white. Shermans in Europe are seen clad in olive drab and have the "Rhino" cutters on the lower transmission cover to aid them in plowing through hedgerows. The tanks do not have top-mounted MGs on them. |
<gallery> |
<gallery> |
||
| Line 47: | Line 47: | ||
== [[Call of Duty 2: Big Red One]] == |
== [[Call of Duty 2: Big Red One]] == |
||
| − | The M4 Sherman appears several times in this game. Its first appearance is in [[We've Been Through Worse]], a few Shermans can be seen at the beginning during the briefing. One Sherman dozer can be seen pushing a destroyed Sherman up the hill in the background. Another Sherman later joins a group of infantry assaulting the bridge that crosses the river inside Maubeuge. As it tries to cross, a bomb is dropped on the bridge by a Stuka, and the Sherman falls into the river. Some Shermans also appear in [[Farewell to Friends]] carrying [[Roger]] and his squad into Troina in the beginning of the mission. A Sherman later shows up to support the American infantry at the end of the mission, but it is destroyed by a [[FlaK 88]] in the church. In [[The Great Crusade]], two Sherman dozers land on [[Omaha Beach]] and help clear some of the barbed wire. One is quickly destroyed by enemy artillery, and the other is later destroyed by a [[Panzerfaust]]. Shermans can also be seen at the beginning of [[Crucifix Hill]], but they are destroyed by artillery. Two Shermans also appear in [[The Last Train]] supporting Roger and his squad as they move through the German village. One is destroyed by a FlaK 88, and the other continues along with Roger and his squad until they reach the [[ |
+ | The M4 Sherman appears several times in this game. Its first appearance is in [[We've Been Through Worse]], a few Shermans can be seen at the beginning during the briefing. One Sherman dozer can be seen pushing a destroyed Sherman up the hill in the background. Another Sherman later joins a group of infantry assaulting the bridge that crosses the river inside Maubeuge. As it tries to cross, a bomb is dropped on the bridge by a Stuka, and the Sherman falls into the river. Some Shermans also appear in [[Farewell to Friends]] carrying [[Roger]] and his squad into Troina in the beginning of the mission. A Sherman later shows up to support the American infantry at the end of the mission, but it is destroyed by a [[FlaK 88]] in the church. In [[The Great Crusade]], two Sherman dozers land on [[Omaha Beach]] and help clear some of the barbed wire. One is quickly destroyed by enemy artillery, and the other is later destroyed by a [[Panzerfaust 60]]. Shermans can also be seen at the beginning of [[Crucifix Hill]], but they are destroyed by artillery. Two Shermans also appear in [[The Last Train]] supporting Roger and his squad as they move through the German village. One is destroyed by a FlaK 88, and the other continues along with Roger and his squad until they reach the [[Panzer IV]] in the barn. Once the player gets inside the Panzer, that same Sherman will follow until the end of the mission. A few Shermans later appear in [[The Dragon's Teeth]] after the player destroys the V2 rockets. |
| + | |||
| + | |||
| + | |||
| + | <gallery> |
||
| + | Sherman Dozer CoD2 BRO.png|A Sherman Dozer in the mission "[[We've Been Through Worse]]" |
||
| + | Destroyed Sherman CoD2 BRO.png|A destroyed Sherman tank |
||
| + | </gallery> |
||
== [[Call of Duty 3]] == |
== [[Call of Duty 3]] == |
||
| − | {{Quote|The M4 was the standard U.S. medium medium tank. Although inferior in armament and armour to German medium and heavy tanks of the day, it was reliable and easy to manufacture|''Call of Duty 3'' bonus materials section.}} |
+ | {{Quote|The M4 was the standard U.S. medium medium tank. Although inferior in armament and armour to German medium and heavy tanks of the day, it was reliable and easy to manufacture|''Call of Duty 3'' bonus materials section.}}The Sherman makes many appearances throughout the campaign, being used by the Americans, Canadians, and the [[Sherman Firefly|Firefly]] by the Polish. This game clearly shows the vulnerability of the Sherman to [[Tiger]]s. It is available in the multiplayer maps [[Poisson]] and [[Merville]]. The driving controls differ from that of the campaign, although the multiplayer controls are a bit easier. Its hostile counterpart is the Panzer IV. The Panzer only has one advantage over the Sherman and that is its a bit lower to the ground and thus slightly harder to hit. |
| − | The Sherman makes many appearances throughout the campaign, being used by the Americans, Canadians, and the [[Sherman Firefly|Firefly]] by the Polish. This game clearly shows the vulnerability of the Sherman to [[Tiger]]s. It is available in the multiplayer maps [[Poisson]] and [[Merville]]. The driving controls differ from that of the campaign, although the multiplayer controls are a bit easier. Its hostile counterpart is the Panzer IV. The Panzer only has one advantage over the Sherman and that is its a bit lower to the ground and thus slightly harder to hit. |
||
The Sherman's frontal armor can take three hits from a Panzer while the sides can take two. Shermans and Panzers can be taken out by two [[Bazooka]] or [[Panzerschreck]] rounds, or if closer one sticky grenade and one rocket launcher round. |
The Sherman's frontal armor can take three hits from a Panzer while the sides can take two. Shermans and Panzers can be taken out by two [[Bazooka]] or [[Panzerschreck]] rounds, or if closer one sticky grenade and one rocket launcher round. |
||
| Line 58: | Line 64: | ||
M4 Sherman traversing rubble CoD3.jpg|A Sherman tank as it appears in ''Call of Duty 3'' for the Americans (Polish and Canadians use the Firefly). |
M4 Sherman traversing rubble CoD3.jpg|A Sherman tank as it appears in ''Call of Duty 3'' for the Americans (Polish and Canadians use the Firefly). |
||
M4 Sherman coming out of smoke CoD3.jpg|Another Sherman tank in ''Call of Duty 3''. |
M4 Sherman coming out of smoke CoD3.jpg|Another Sherman tank in ''Call of Duty 3''. |
||
| + | Sherman cod3.PNG|Sherman M4A3 in the bonus materials. |
||
| + | Sherman tank mutiplayer CoD3.jpg|A Sherman tank in Mutiplayer. |
||
</gallery> |
</gallery> |
||
== [[Call of Duty: World at War]] == |
== [[Call of Duty: World at War]] == |
||
| − | The Sherman only appears as an AI in solo/co-op, and is not featured in any map in multiplayer. It was, however, intended to be featured in several maps, including [[Beachhead (map)| |
+ | The Sherman only appears as an AI in solo/co-op, and is not featured in any map in multiplayer. It was, however, intended to be featured in several maps, including the cancelled map [[Beachhead (map)|Beachhead]]. The multiplayer variant was identical to the standard Pacific camouflaged Sherman, only with an added usable [[M2 Browning]] for the second player. |
| − | The Sherman makes |
+ | The Sherman makes its first appearance in the American campaign level [[Hard Landing]] during the attack of the Japanese airfield on [[Peleliu Island]]. |
The M4A3R3, a flamethrower version of the Sherman is also seen in the level [[Relentless]]. It's standard version is also seen in the same level. |
The M4A3R3, a flamethrower version of the Sherman is also seen in the level [[Relentless]]. It's standard version is also seen in the same level. |
||
| − | A winterized Sherman is also found in the game files. |
+ | A winterized Sherman is also found in the game files; presumably there was originally going to be an additional campaign set in the European Theater of Operations in winter time. |
<gallery captionalign="left"> |
<gallery captionalign="left"> |
||
| Line 74: | Line 82: | ||
M4 Sherman flamethrower Peleliu WaW.png|A Sherman "Crocodile" on Peleliu. |
M4 Sherman flamethrower Peleliu WaW.png|A Sherman "Crocodile" on Peleliu. |
||
M4 Sherman flamethrower WaW.png|A Sherman firing its Flamethrower in ''World at War''. |
M4 Sherman flamethrower WaW.png|A Sherman firing its Flamethrower in ''World at War''. |
||
| + | M4 Sherman olive green WaW.png |
||
| − | M4_Sherman_olive_green_WaW.png |
||
| + | M4 Sherman camouflage WaW.png |
||
| − | M4_Sherman_camouflage_WaW.png |
||
| − | + | M4 Sherman camouflage MP WaW.png|Cut multiplayer variant with a [[Browning M1919]] for the second player. |
|
| − | + | M4 Sherman camouflage DWG WaW.png|Equipped with {{w|DD tank#Deep wading gear|deep wading gear}}. |
|
| − | + | M4 Sherman winter WaW.png|Cut winterized variant, possibly intended for use in the cancelled [[Holland]] campaign. |
|
</gallery> |
</gallery> |
||
== [[Call of Duty: World at War: Final Fronts]] == |
== [[Call of Duty: World at War: Final Fronts]] == |
||
| − | + | The M4 Sherman tank appears multiple times in both the Pacific and European campaings during the game. In the mission "[[The Race to Bastogne]]", the player takes control of [[Alex McCall|GySgt. Alex McCall]], the operator of the a Sherman tank. |
|
| + | |||
| + | |||
| + | |||
| + | <gallery> |
||
| + | Sherman using its Flamethrower CoD WaW FF.png|Sherman using its Flamethrower in the mission "[[Basic Training]]" |
||
| + | Destroyed Sherman CoD WaW FF.png|A destroyed Sherman tank |
||
| + | Burning Sherman CoD WaW FF.png|A burning Sherman tank. |
||
| + | Sherman CoD WaW FF.png|A Sherman in the mission "[[Ettelbruck]]" |
||
| + | Sherman Firing CoD WaW FF.png|The same Sherman firing at a building. |
||
| + | Sherman Player CoD WaW FF.png|The Player takes control of a Sherman's turret in the mission "[[The Race to Bastogne]]" |
||
| + | </gallery> |
||
| + | |||
| + | ==[[Call of Duty: WWII]]== |
||
| + | ===Campaign=== |
||
| + | The M4/A1 Sherman appears throughout the campaign of the game. The tank is used by Armored battalions and divisions of the [[United States Army]]. They first appear in "[[D-Day (mission)|D-Day]]" as covers for the player's advance but soon were all destroyed. In the level "[[Collateral Damage (mission)|Collateral Damage]]", the player assumes control as SSG. [[Augustine Perez]] of the [[745th Tank Battalion]] and command the crew of his M4 Sherman. |
||
| + | |||
| + | ===Multiplayer=== |
||
| + | The tank is featured aesthetics in several multiplayer maps. In the [[War Mode]] mission "[[Operation Breakout]]", the tank appear after the [[Allied Powers]] completed the second objective. The player can get on top and use the mounted machine gun. The tank is also the final objective of the mission as the Allies have to escort it to destroy the German 88s. |
||
| + | |||
| + | <gallery> |
||
| + | Abrams Pool tank WWII.png|Abrams' and Pool's tanks. |
||
| + | Rabson's tank (destroyed).png|Rabson's tank being destroyed. |
||
| + | Perez tank WWII.png|Perez's unique tank in Aachen. |
||
| + | Perez's view inside the tank AM.png|View inside the tank. |
||
| + | Perez's Tank (outside view).png|Aerial view of Perez's tank. |
||
| + | Call-of-duty-wwii Collateral Damage-004.jpg|Pre-release screenshot |
||
| + | M4 Sherman CoD WWII.png|Xbox One achievement image |
||
| + | Call of Duty WWII M4 Sherman camouflage .jpg|M4 Sherman with camouflage "Operation Cobra" in Call of Duty WWII |
||
| + | Call of Duty WWII M4 Sherman .jpg |
||
| + | </gallery> |
||
| + | |||
==Trivia== |
==Trivia== |
||
| − | *In ''United Offensive |
+ | *In ''United Offensive''s American campaign, it is possible to spot a "second" machine gun in the Sherman's hull MG turret. This is most evident when the said gun traverses to engage enemy troops. One of the gun barrels will always point forward while the other would move around in the turret; the 'straight' gun is probably part of the model itself while the other, 'actual gun' is an operational weapon fitted to the model. |
| − | *In ''[[Call of Duty 2]]'', European Shermans, instead of African Shermans were used in [[Operation Supercharge]]. This is possibly a mistake done by the developers. |
+ | *In ''[[Call of Duty 2]]'', European (Green) Shermans, instead of African (Desert tan) Shermans were used in [[Operation Supercharge]]. This is possibly a mistake done by the developers. |
| − | *In all of the games following [[United Offensive]], the Shermans in-game bear the greatest resemblance to the M4A3E8 "Easy Eight" Sherman, or the M4A3E2 "Sherman Jumbo", with their unsloped joints between front and side armor. However, all models use the standard M4 turret, rather than the later models with a much larger mantlet behind the gun. |
||
*In ''World at War'', it is possible to be killed by the flamethrower Sherman. |
*In ''World at War'', it is possible to be killed by the flamethrower Sherman. |
||
| − | *In the level [[Defending the Pointe]], one can get on top of a parked Sherman. It is |
+ | *In the level [[Defending the Pointe]], one can get on top of a parked Sherman. It is hard to do while the tank is moving but it is possible. Getting onto the tank does not offer any advantages. |
| − | *In ''[[Call of Duty: Black Ops]]'', there is a playercard background called "The Sherman." It consists of an image of |
+ | *In ''[[Call of Duty: Black Ops]]'', there is a playercard background called "The Sherman." It consists of an image of the tank's tracks. |
| + | |||
| − | {{ |
+ | {{CoDUO vehicles}} |
{{CoDFH vehicles}} |
{{CoDFH vehicles}} |
||
{{CoD2 Vehicles}} |
{{CoD2 Vehicles}} |
||
| − | {{ |
+ | {{CoD3 Vehicles}} |
{{CoD5 vehicles}} |
{{CoD5 vehicles}} |
||
{{CoDWaWFF Vehicles}} |
{{CoDWaWFF Vehicles}} |
||
| + | {{CoD14 Vehicles}} |
||
[[Category:Call of Duty: United Offensive Ground Vehicles]] |
[[Category:Call of Duty: United Offensive Ground Vehicles]] |
||
[[Category:Call of Duty 2 Ground Vehicles]] |
[[Category:Call of Duty 2 Ground Vehicles]] |
||
| Line 105: | Line 145: | ||
[[Category:Call of Duty: World at War: Final Fronts Ground Vehicles]] |
[[Category:Call of Duty: World at War: Final Fronts Ground Vehicles]] |
||
[[Category:Call of Duty 2: Big Red One Ground Vehicles]] |
[[Category:Call of Duty 2: Big Red One Ground Vehicles]] |
||
| + | [[Category:Call of Duty: WWII Ground Vehicles]] |
||
| + | [[Category:Call of Duty: World at War (Nintendo DS) Vehicles]] |
||
| + | [[Category:Call of Duty: World at War: Final Fronts Tanks]] |
||
Revision as of 03:56, 22 March 2019
- For the similarly named Sherman variant and modern infantry weapon, see Sherman Firefly and M4 Carbine.
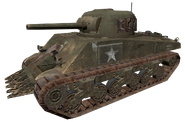
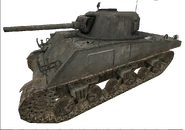
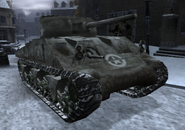
The M4 Sherman was a medium tank used by Allied forces during the Second World War.
The Sherman tank is seen throughout every Call of Duty game set during the Second World War (except the original Call of Duty). The tank is frequently seen providing support for the character by Allied forces. The M4 Sherman is considered the quintessential Allied tank of the Second World War.
A Sherman Firefly tank can be used in Call of Duty 3 by playing the Polish missions.
The M4 Sherman is also featured as a usable vehicle in United Offensive's multiplayer, with its rough equal the Panzer IV. The same configuration was also intended for Call of Duty: World at War's multiplayer, however the M4 Sherman and the associated maps were scrapped.
Call of Duty: United Offensive
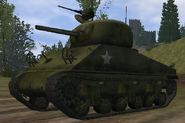
In Call of Duty: United Offensive, the Sherman is the Americans' main tank and appears in all four American campaign levels. Like the Panzer and T-34, the Sherman can be used by two players and a machine gun mounted on its top, this one being a M2 .50 along with a .30 cal machine gun poking out from the front of the tank. Since the Elefant is unavailable to the Germans in levels that have the American team, the player doesn't have to worry about seeing one pop up without warning. Just make sure to keep on eye out for anti-tank weapon-equipped enemies, and the player should be fine.
Call of Duty: Finest Hour
The first time they are shown is during the campaign in Aachen while playing Chuck Walker. While playing as Sam Rivers it is possible to get to control a Sherman for most of the level (the other times being outside clearing out buildings). The tanks then are seen one last time during the last 3 missions of the game in Remagen.
Two M4 Shermans are also seen in the idle menu movie, where they destroy two Panzer IV's and several German infantrymen using them as cover.
Call of Duty 2
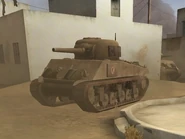
M4 Shermans are chronologically first seen in Operation Supercharge. Three of them can be seen and one of them is destroyed by Flak 88 guns. British Shermans in North Africa are painted light tan and can be mistaken to be white. Shermans in Europe are seen clad in olive drab and have the "Rhino" cutters on the lower transmission cover to aid them in plowing through hedgerows. The tanks do not have top-mounted MGs on them.
Call of Duty 2: Big Red One
The M4 Sherman appears several times in this game. Its first appearance is in We've Been Through Worse, a few Shermans can be seen at the beginning during the briefing. One Sherman dozer can be seen pushing a destroyed Sherman up the hill in the background. Another Sherman later joins a group of infantry assaulting the bridge that crosses the river inside Maubeuge. As it tries to cross, a bomb is dropped on the bridge by a Stuka, and the Sherman falls into the river. Some Shermans also appear in Farewell to Friends carrying Roger and his squad into Troina in the beginning of the mission. A Sherman later shows up to support the American infantry at the end of the mission, but it is destroyed by a FlaK 88 in the church. In The Great Crusade, two Sherman dozers land on Omaha Beach and help clear some of the barbed wire. One is quickly destroyed by enemy artillery, and the other is later destroyed by a Panzerfaust 60. Shermans can also be seen at the beginning of Crucifix Hill, but they are destroyed by artillery. Two Shermans also appear in The Last Train supporting Roger and his squad as they move through the German village. One is destroyed by a FlaK 88, and the other continues along with Roger and his squad until they reach the Panzer IV in the barn. Once the player gets inside the Panzer, that same Sherman will follow until the end of the mission. A few Shermans later appear in The Dragon's Teeth after the player destroys the V2 rockets.
Call of Duty 3
- "The M4 was the standard U.S. medium medium tank. Although inferior in armament and armour to German medium and heavy tanks of the day, it was reliable and easy to manufacture"
- — Call of Duty 3 bonus materials section.
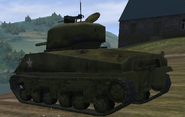
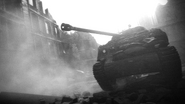
The Sherman makes many appearances throughout the campaign, being used by the Americans, Canadians, and the Firefly by the Polish. This game clearly shows the vulnerability of the Sherman to Tigers. It is available in the multiplayer maps Poisson and Merville. The driving controls differ from that of the campaign, although the multiplayer controls are a bit easier. Its hostile counterpart is the Panzer IV. The Panzer only has one advantage over the Sherman and that is its a bit lower to the ground and thus slightly harder to hit.
The Sherman's frontal armor can take three hits from a Panzer while the sides can take two. Shermans and Panzers can be taken out by two Bazooka or Panzerschreck rounds, or if closer one sticky grenade and one rocket launcher round.
Call of Duty: World at War
The Sherman only appears as an AI in solo/co-op, and is not featured in any map in multiplayer. It was, however, intended to be featured in several maps, including the cancelled map Beachhead. The multiplayer variant was identical to the standard Pacific camouflaged Sherman, only with an added usable M2 Browning for the second player.
The Sherman makes its first appearance in the American campaign level Hard Landing during the attack of the Japanese airfield on Peleliu Island.
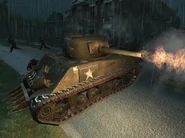
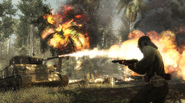
The M4A3R3, a flamethrower version of the Sherman is also seen in the level Relentless. It's standard version is also seen in the same level.
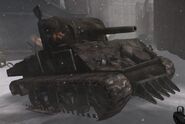
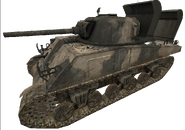
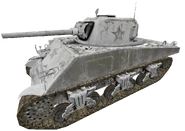
A winterized Sherman is also found in the game files; presumably there was originally going to be an additional campaign set in the European Theater of Operations in winter time.
Call of Duty: World at War: Final Fronts
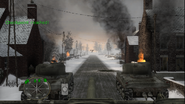
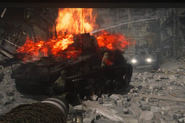
The M4 Sherman tank appears multiple times in both the Pacific and European campaings during the game. In the mission "The Race to Bastogne", the player takes control of GySgt. Alex McCall, the operator of the a Sherman tank.
Call of Duty: WWII
Campaign
The M4/A1 Sherman appears throughout the campaign of the game. The tank is used by Armored battalions and divisions of the United States Army. They first appear in "D-Day" as covers for the player's advance but soon were all destroyed. In the level "Collateral Damage", the player assumes control as SSG. Augustine Perez of the 745th Tank Battalion and command the crew of his M4 Sherman.
Multiplayer
The tank is featured aesthetics in several multiplayer maps. In the War Mode mission "Operation Breakout", the tank appear after the Allied Powers completed the second objective. The player can get on top and use the mounted machine gun. The tank is also the final objective of the mission as the Allies have to escort it to destroy the German 88s.
Trivia
- In United Offensives American campaign, it is possible to spot a "second" machine gun in the Sherman's hull MG turret. This is most evident when the said gun traverses to engage enemy troops. One of the gun barrels will always point forward while the other would move around in the turret; the 'straight' gun is probably part of the model itself while the other, 'actual gun' is an operational weapon fitted to the model.
- In Call of Duty 2, European (Green) Shermans, instead of African (Desert tan) Shermans were used in Operation Supercharge. This is possibly a mistake done by the developers.
- In World at War, it is possible to be killed by the flamethrower Sherman.
- In the level Defending the Pointe, one can get on top of a parked Sherman. It is hard to do while the tank is moving but it is possible. Getting onto the tank does not offer any advantages.
- In Call of Duty: Black Ops, there is a playercard background called "The Sherman." It consists of an image of the tank's tracks.
| ||||||||||||||
| ||||||||
| ||||||||||||||
| |||||||||||
| ||||||||||||||
| |||||||||||
| ||||||||||||||


