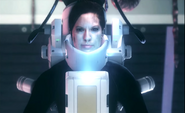
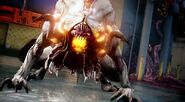
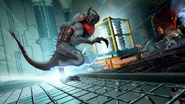
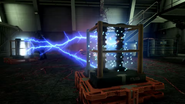
(I thought it would make more sense to list the boss enemy last.) Tag: rte-wysiwyg |
No edit summary |
||
| Line 12: | Line 12: | ||
|character = Members of [[CIF Team 1]] |
|character = Members of [[CIF Team 1]] |
||
|team = [[Rapid Reaction Force]] - CIF Team 1 |
|team = [[Rapid Reaction Force]] - CIF Team 1 |
||
| − | }} |
+ | }} |
| + | |||
| + | |||
| + | |||
{{quote|Search for the double agent aboard the abandoned research vessel. Exterminate the Cryptids and recover any intel which could lead us to the Ark.|Mission Description}} |
{{quote|Search for the double agent aboard the abandoned research vessel. Exterminate the Cryptids and recover any intel which could lead us to the Ark.|Mission Description}} |
||
| Line 66: | Line 69: | ||
Weapons Available: |
Weapons Available: |
||
| − | *[[LSAT]]: |
+ | *[[LSAT]]: On a catwalk only accessible through a sealed door; $3,000 |
*[[MR-28]]: In the sealed room under the crane control room. |
*[[MR-28]]: In the sealed room under the crane control room. |
||
| − | *[[Ripper]] |
+ | *[[Ripper]]: On top the crates in the middle of the room, next to a possible hive spawn. |
*[[MTAR-X]]: Inside a shipping container on the left hand side. |
*[[MTAR-X]]: Inside a shipping container on the left hand side. |
||
*[[CBJ-MS]]: On top of a shipping container on the right of the entry point. |
*[[CBJ-MS]]: On top of a shipping container on the right of the entry point. |
||
*[[SVU]]: Against a wall to the right of the entry point. |
*[[SVU]]: Against a wall to the right of the entry point. |
||
| − | *[[Panzerfaust (Ghosts)|Panzerfaust]] In the pit in the middle of the cargo area. |
+ | *[[Panzerfaust (Ghosts)|Panzerfaust]]: In the pit in the middle of the cargo area. |
| − | *[[Chain SAW]]: Against a wall of the cargo area where the Rover exits($3,000) |
+ | *[[Chain SAW]]: Against a wall of the cargo area where the Rover exits ($3,000) |
*[[FP6]]: On the floor near the hive blocking the Rover. |
*[[FP6]]: On the floor near the hive blocking the Rover. |
||
| − | *[[VKS]] On upper Catwalk above the Rover. |
+ | *[[VKS]]: On upper Catwalk above the Rover. |
===Top Deck=== |
===Top Deck=== |
||
| Line 81: | Line 84: | ||
Weapons Available: |
Weapons Available: |
||
| − | *[[Bulldog]] Under the Balcony next to a Hive |
+ | *[[Bulldog]]: Under the Balcony next to a Hive |
| − | *[[FP6]] Near where the Cargo Crane drops you off |
+ | *[[FP6]]: Near where the Cargo Crane drops you off |
| − | *[[CBJ-MS]] Opposite where the Cargo Crane drops you off |
+ | *[[CBJ-MS]]: Opposite where the Cargo Crane drops you off |
| − | *[[Honey Badger]] Behind a Crate on the upper floor of the outside section |
+ | *[[Honey Badger]]: Behind a Crate on the upper floor of the outside section |
*[[Chain SAW]] (Outside) |
*[[Chain SAW]] (Outside) |
||
*[[MTAR-X]] (Inside: Ontop of center experiment pod) |
*[[MTAR-X]] (Inside: Ontop of center experiment pod) |
||
| Line 91: | Line 94: | ||
===Kraken=== |
===Kraken=== |
||
| − | Out on the bow deck, players will face the biggest Cryptid boss so far, the Kraken. It has several attacks, including roars, tentacle smashes, Cryptid spawning, and the torturing heat wave. It has two roars, one just shell-shocks the player, while the other is an EMP pulse that disables abilities for around 10 seconds before it switches sides. Players have to stay mobile as they engage the Kraken and the spawning Cryptids, or else a tentacle will bring them down to last stand with one hit. When the Kraken starts glowing, players must prepare for its strongest attack: it will attach its tentacles to several places on the ship and emit heat from its body into the hull, heating up the floor and severely damage players that step on it. To avoid it, players either stay on top of the Hive pile in the middle, or on one of the 4 mini-gun turret controllers at the corners. This is where the Kraken is at its most relaxed state and takes the most damage from players' weapons. (The fifth and last intel is located on the opposite side of the bow deck.) On average it takes at least 4 cycles of attacks before the Kraken is defeated, it will rear itself onto the ship before dying and sinking into the ocean. As the game ends, the team receives orders to |
+ | Out on the bow deck, players will face the biggest Cryptid boss so far, the Kraken. It has several attacks, including roars, tentacle smashes, Cryptid spawning, and the torturing heat wave. It has two roars, one just shell-shocks the player, while the other is an EMP pulse that disables abilities for around 10 seconds before it switches sides. Players have to stay mobile as they engage the Kraken and the spawning Cryptids, or else a tentacle will bring them down to last stand with one hit. When the Kraken starts glowing, players must prepare for its strongest attack: it will attach its tentacles to several places on the ship and emit heat from its body into the hull, heating up the floor and severely damage players that step on it. To avoid it, players either stay on top of the Hive pile in the middle, or on one of the 4 mini-gun turret controllers at the corners. This is where the Kraken is at its most relaxed state and takes the most damage from players' weapons. (The fifth and last intel is located on the opposite side of the bow deck.) On average it takes at least 4 cycles of attacks before the Kraken is defeated, it will rear itself onto the ship before dying and sinking into the ocean. As the game ends, the team receives orders to retrieve Archer from the ship and prepare for extract. |
==Chaos Mode Weapons== |
==Chaos Mode Weapons== |
||
Here is a list of weapons available in [[Chaos Mode]]. |
Here is a list of weapons available in [[Chaos Mode]]. |
||
| Line 141: | Line 144: | ||
*[[Chain SAW]] (Leaning against a wall outside the medical, $3000) |
*[[Chain SAW]] (Leaning against a wall outside the medical, $3000) |
||
*[[MR-28]] (Located behind and optional door that is under the crane control room, $2000) |
*[[MR-28]] (Located behind and optional door that is under the crane control room, $2000) |
||
| − | *[[Panzerfaust (Ghosts)|Panzerfaust]] (On a rail behind the crates in the spawn room, |
+ | *[[Panzerfaust (Ghosts)|Panzerfaust]] (On a rail behind the crates in the spawn room, in the pit that runs under the center of the main cargo bay, $2000) |
*[[Kastet]] (Behind a potential hive in the middle of the cargo area, $2000) |
*[[Kastet]] (Behind a potential hive in the middle of the cargo area, $2000) |
||
*[[VKS]] ($1500) |
*[[VKS]] ($1500) |
||
Revision as of 17:51, 30 June 2020
- "Search for the double agent aboard the abandoned research vessel. Exterminate the Cryptids and recover any intel which could lead us to the Ark."
- — Mission Description
Mayday is the third map and second episode of the Extinction saga. Mayday takes place on the Chinese ship where Nightfall's epilogue left off.
The objective is to board the ship, take out the hives and "retrieve a foreign double agent". Mayday brings two new Cryptids, the Seeder, taking place of the Scorpion, and the Kraken. The Seeder, much like the Scorpion, shoots toxic gas. The Seeder will also fire pods that can grow into mutated plants that are turret-like in nature. The Kraken is the monstrous Cryptid shown at the end of Nightfall's epilogue. For the first time in Extinction, it is also possible to craft items, including some that change the properties of the Venom-X. Mayday was released on April 3 in the Devastation DLC for Xbox players, and was released May 8 for the remaining platforms.
Characters
- Rapid Reaction Force - CIF Team 1 (playable)
- Godfather (heard only)
- Samantha Cross (M.I.A./Declared K.I.A.)
- David Archer
Story (based on Intel)
Prologue:
Captain David Archer leads an expedition down a Cryptid colony and finds an Obelisk. One explorer asks what it is, Archer says it's a tombstone. The explorer asks whose it is, and Archer answers "ours," when suddenly a Scorpion attacks him. A bright flash of light, and Archer finds himself sitting next to Dr. Samantha Cross. He asks where he is, but she answers, "Not where. When." Archer looks out at the distance to see several arks and what looks like ruins of a city, which he thinks it's like looking through a window to the past. On the contrary, Cross picks up a human skull saying, "Maybe, you're looking in the wrong direction," and Archer reacts horrified to realize he is sitting on a pile of human skeletons and that this was a vision not of the past, but of the future. He then wakes up from the vision when the Stormbreaker begins to shake. He walks into the Beacon Chamber and asks what's happening. A crew member yells that the ship is under attack, and that it is the Americans. But Archer looks out the window and sees the Kraken surfacing, saying, "No, much worse," and the Kraken roars.
Medusa Files:
Day 2 - 9:01 PM - Nightfall's funders thought the program was a bioweapons project and that the Cryptids were the end result. But under the supervision of David Archer, the true objective of Nightfall was to figure out the Cryptids' means to another end; there must be other colonies such as the one found in Colorado, and Archer believes the Cryptids can help them locate them. He never thought that Dr. Samantha Cross would be the key to the whole thing, now he's got new patrons, a ship, and a crew, and the journey is nearing its conclusion, with Cross as the "beacon" to the colonies.
Day 7 - 5:06 PM - In the 17th century, the ancient Aztec civilization was visited by Spanish Conquistador, Hernán Cortés, but the first thing they noticed were the "fierce four-legged demons wearing iron shoes and leather masks retended by strange pale-skin slaves." The Aztecs were amazed by such animals that they failed to notice the cold-blooded killers riding on their backs. Archer makes an analogy that the Cryptids were "beasts of war, bred for battle, trained to obey." When Archer reviewed the after-action report of Colorado, he noticed that the Cryptids were more than just animals; they attack not only in large groups, but with coordination, communication, and control. Something was commanding them, up until the nuclear warhead was detonated. The Aztecs failed to see the true face of the enemy, and the civilization was wiped out as a result, and Archer vows to not let the same mistake happen again.
Day 11 - 10:30 PM - During a different conflict in the Middle East, Archer witnessed Taliban tribesmen bring down a $30 million NATO UAV Drone by overriding its GPS guide system with a $300 HAM radio. If the Arks have been awakened, the humans will become the ones hiding in caves. Humanity would lose against the Cryptids in a head-on fight, but something can be learned from the tribesmen. By severing the enemy commanders from the Cryptids, the Cryptids could maybe be turned against their former masters. By watching Cross with the Cryptids back in the Nightfall facility, the key could be inside her head. The mythological story of Perseus tells of how he decapitated the mythical creature, Medusa, to create the ultimate weapon. Soon, Archer wants to see if an old trick can work against a new enemy (Weapon Codename: Medusa).
Day 25 - 12:15 PM - Archer contacts General "Godfather" Castle, first describing his new notorious terrorist status, but affirms that he will always be a soldier first. He then explains that the reason why they only see Archer as an enemy because they fail to realize the truth that the humans species is at risk of extinction from the Cryptid outbreaks, and they also fail to acknowledge his assets that could be the only way to defeat the now worldwide common enemy. The best chance is the join forces and make the first move, and Archer knows they locations as well as their weaknesses. Godfather reluctantly forms a truce with Archer.
Kassar Cinematics
The Kassar Cinematics are 5 pieces of intel found by finding computer tablets (like the laptop cases in Nightfall) in the Extinction Map, Mayday. They consist of cinematics that show the interactions between Dr. Kassar, a surviving member of the Nightfall Program, and mainly Dr. Samantha Cross, the Polyglotist Savant hired by Archer now held captive on board the Stormbreaker.
Epilogue:
As the Stormbreaker sinks in the South Pacific, a flight of V-22 Ospreys head for Ball's Pyramid, where the next colony, twice the size of the one in Colorado, is located. Meanwhile, Godfather receives a call from the President, who asks him why he didn't kill Archer. Godfather explains how they've been struck twice on their own soil and he decides the fight should be brought to the Cryptids by striking first. Archer is not the real enemy, rather a "necessary evil," because he's the only one who's been the closest to them and has the knowledge about them. At the bottom of the mountain, Archer discovers one of the Cryptid Masters, which begins to awake.
Features
- Schematics
- Locker and Key
- Intel
- Side Paths (Doors)
Docking Area
The players begin on a hovercraft heading towards the back door of the ship, docking in the opened rear of the boat. To the right of the docking area a Hunter (co-op) or Scout (solo) will break out of the crate. The first Hive is directly in front of the raft after getting off, and another Hive at the back. There are two sealed doors containing crafting items and search boxes. In a room above the crate are a Pipe Bomb and Sticky Flare schematics. A fire trap and an electric trap can aid players in holding off the Cryptids. After the second Hive is destroyed, a sealed door leads to the third Hive, where one of the Kraken's tentacles will burst in from the outside, and players have to take it out before the Hive is destroyed. Once that is done, another sealed door at the end of the hall behind the Hive will lead to the Cargo Area. (The first intel can be found after opening the sealed room by the lockers; smash the windows and the intel is next to the crafting item location on the pipe.)
Weapons located here:
- Ripper: On a crate to the right of the first hive, $1500
- Panzerfaust: On a rail behind the crates
- ARX-160: behind the sealed door above the second hive. $2000
- FP6: leaning against a truck on the right of the boat the player arrives in. ($1500)
- VKS On the Left side of the first area on the upper balcony ($1500)
- ARX-160: On the catwalk in the room with the Tentacle. ($2000)
- CBJ-MS: On a bent crate in the center area. ($2000)
Cargo Area
Right before entering the next area, there is are Tesla and Hypno trap schematics (the second intel is sitting on the tiny catwalk just outside those two schematics, above the room with the tentacle). Plenty of search boxes and a few crafting items in this area. There are 3 Hives, one at a random location, and the other at the back of the Cargo Bay. (The third intel is sitting on top of one of the cargo boxes; players climb on top of them and do a small series of jumps, it is sitting on top of the box with the bit of hive material covering it.) The third one is possibly the most difficult Hive to destroy in all of Extinction Mode so far - the Hive at the back of the Cargo Bay is blocking a UGV drone drill loading dock, which players load the drill onto and activate the controls from a room above. The UGV will then bring the drill to the Hive in the middle of the room below and begin drilling. Players must defend the drill from taking too much damage while protecting themselves from a mass of Cryptids that will swarm them in the room; the drill is unrepairable as the room is inaccessible, so it is best that the Engineer loads the drill onto the UGV to give it the extra armor. Once that Hive is done, the UGV brings the drill back out and players then drill the sealed door to the control center in order to activate the crane that will take them to the Top Deck. There are two sealed doors on either side of where the players enter the Cargo Area; one room holds the LSAT and Venom-X and Sticky Flare schematics and many crafting item searches, the other has a weapon and 2 lockers. Two electric traps will aid players when drilling the sealed door to the control center. After activating the crane, a mini-event occurs: Archer pops up in the many screens inside the room -
Archer: Godfather must have an odd sense of humor, sending you to rescue me. You can tell your man there's been, uh, a bit of a cock-up. (puffs his cigar) Some careless git burned up every copy of the Ark map, (points to his head) except the one in here. Tell Godfather I'm prepared to accept his offer, but first I'll need the item we discussed as a token of good faith. I just want the head, right? Do what you like with the rest of her, but bring back that pretty little redhead in one piece. You can't win this war without my help, and you have it. When I have proof that Samantha Cross is dead. (puffs his cigar again) When all players board the container, the crane will lift them out of the Cargo Bay and onto the Top Deck.
Weapons Available:
- LSAT: On a catwalk only accessible through a sealed door; $3,000
- MR-28: In the sealed room under the crane control room.
- Ripper: On top the crates in the middle of the room, next to a possible hive spawn.
- MTAR-X: Inside a shipping container on the left hand side.
- CBJ-MS: On top of a shipping container on the right of the entry point.
- SVU: Against a wall to the right of the entry point.
- Panzerfaust: In the pit in the middle of the cargo area.
- Chain SAW: Against a wall of the cargo area where the Rover exits ($3,000)
- FP6: On the floor near the hive blocking the Rover.
- VKS: On upper Catwalk above the Rover.
Top Deck
Samantha Cross has been labeled a high value target and is not to be taken alive. Outside on the Top deck are 2 Hives out of 3 random locations, a sealed door in the middle gives players a crafting item and a few lockers. On the top platform are two electric traps to prevent Cryptids from surrounding the players. There are several crafting items and search boxes around this area, a Venom-X and Pipe Bomb schematics are next to the corner Hive location. Once the 2 Hives outside are destroyed, players enter the compound of the Top Deck and there are 3 Hives to destroy, also a few more search boxes to give players items. A sealed door at the back gives players more crafting items and lockers. (The fourth intel is located under the beacon room, where two search box locations are; in the middle of the back, go behind the cylinder.) Godfather then updates the current objective to killing Cross but leaving her head intact. After the Hives are destroyed, Archer gives the players instructions that the only way to safely kill Cross and get her head is to fill the beacon room with Chlorine gas. Players must protect the 4 gas pumps from taking too much damage, at least one must keep working in order to completely fill the room with gas. As the gas is almost finished, Cross begins to scream in pain, then the beacon room breaks from the outside and she disappears, along with the beacon amplifier. The beacon room opens and players will jump out and face the Kraken.
Weapons Available:
- Bulldog: Under the Balcony next to a Hive
- FP6: Near where the Cargo Crane drops you off
- CBJ-MS: Opposite where the Cargo Crane drops you off
- Honey Badger: Behind a Crate on the upper floor of the outside section
- Chain SAW (Outside)
- MTAR-X (Inside: Ontop of center experiment pod)
- ARX-160 (Inside: Leaning against first experiment pod in the room)
- LSAT (Inside: Ontop of and experiment pod with a ladder next to the bottom floor side door. Can be reached from above during chlorine gas objective.)
Kraken
Out on the bow deck, players will face the biggest Cryptid boss so far, the Kraken. It has several attacks, including roars, tentacle smashes, Cryptid spawning, and the torturing heat wave. It has two roars, one just shell-shocks the player, while the other is an EMP pulse that disables abilities for around 10 seconds before it switches sides. Players have to stay mobile as they engage the Kraken and the spawning Cryptids, or else a tentacle will bring them down to last stand with one hit. When the Kraken starts glowing, players must prepare for its strongest attack: it will attach its tentacles to several places on the ship and emit heat from its body into the hull, heating up the floor and severely damage players that step on it. To avoid it, players either stay on top of the Hive pile in the middle, or on one of the 4 mini-gun turret controllers at the corners. This is where the Kraken is at its most relaxed state and takes the most damage from players' weapons. (The fifth and last intel is located on the opposite side of the bow deck.) On average it takes at least 4 cycles of attacks before the Kraken is defeated, it will rear itself onto the ship before dying and sinking into the ocean. As the game ends, the team receives orders to retrieve Archer from the ship and prepare for extract.
Chaos Mode Weapons
Here is a list of weapons available in Chaos Mode.
Intel
- Main article: Mayday/Intel
Achievements/Trophies
- The Belly of the Beast (20
 / Bronze Trophy
  ) - Reach the cargo area in Mayday in Regular or Hardcore difficulty.
- Come Up For Air (30
 / Bronze Trophy
  ) - Reach the top deck in Mayday in Regular or Hardcore difficulty.
- Survived Mayday (30
 / Bronze Trophy
  ) - Kill the Kraken for the first time in Mayday in Regular or Hardcore difficulty.
- Upping the Ante (30
 / Silver Trophy
  ) - Kill the Kraken using a Relic in Mayday in Regular or Hardcore difficulty.
- Mayday Completionist (30
 / Silver Trophy
  ) - Complete all Challenges and kill the Kraken in Mayday in Regular or Hardcore difficulty.
- Inquisitive Mind (30
 / Bronze Trophy
  ) - Find all of the Intel in Mayday.
- Deforestation (30
 / Bronze Trophy
  ) - Kill 15 Seeder Turrets in one game in Mayday in Regular or Hardcore difficulty.
- Big Game Trapper (30
 / Bronze Trophy
  ) - Use a hypno trap to turn a Rhino friendly in Mayday in Regular or Hardcore difficulty.
- Egg-stra Devastation! (30
 / Bronze Trophy
  ) - Complete the Egg-Stra XP challenge and then destroy a hive in the Devastation DLC package.
- The Architect (30
 / Bronze Trophy
  ) - Successfully build all of the Schematics in Mayday in Regular or Hardcore difficulty.
Weapons
- Ripper (Near the start leaning on a lift, near a possible hive spawn in the center of the main cargo bay, $1500)
- LSAT (On the catwalk above the entrance to the main cargo bay, $3000)
- Venom-X (Crafted from the Venom Schematic)
- CBJ-MS (On top of one of the shipping crates in the main cargo bay, $2000)
- FP6 (On the opposite side of the Ripper in the spawn area, on the floor near the hive blocking the Rover in the main cargo bay, $1500)
- Bulldog
- MTAR-X ($2000 in the crate on the left side of the main cargo hold)
- ARX-160 (Near the start behind a sealed door above the second hive, $2000)
- Honey Badger (To the left of the tentacle hive, $2000)
- Chain SAW (Leaning against a wall outside the medical, $3000)
- MR-28 (Located behind and optional door that is under the crane control room, $2000)
- Panzerfaust (On a rail behind the crates in the spawn room, in the pit that runs under the center of the main cargo bay, $2000)
- Kastet (Behind a potential hive in the middle of the cargo area, $2000)
- VKS ($1500)
- MAAWS (Replaces the Trinity Rocket as a Strike Package, $1300)
Gallery
Video
Trivia
- Since most of the areas are enclosed, the SOFLAM and the Trinity Rocket have been removed (the latter having been replaced by the MAAWS).
- The Hypno Knife has also been removed due to the presence of Hypno Trap schematics.
- The player can keep pushing the lift button and Archer will appear again, but appears mad for pushing the button again. Godfather will also get furious and tell the player to get moving.
| |||||||||||||||||||||||||||||||||||||||||||||||||||||||||||
| ||||||||||||||||||||


