No edit summary |
Tag: Visual edit |
||
| Line 1: | Line 1: | ||
| + | {{game|waw|bo|bo2|bo3|mobile|bocw|z|featured}} |
||
| − | {{Level Infobox |
||
| + | {{For|a similarly named zombies map|Kino der Toten}} |
||
| − | |prev = [[Downfall (Single-Player)|Downfall]] |
||
| + | {{For|the [[Cyborg Rising]] variant in [[Call of Duty: Online]]|Outpost (Cyborg Rising)}} |
||
| − | |next = [[Verrückt]] |
||
| + | {{Infobox/level |
||
| − | |name = Nacht der Untoten |
||
| − | | |
+ | |name = Nacht der Untoten |
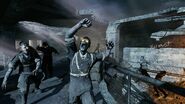
| + | |image = <tabber> |
||
| − | |caption = Nacht Der Untoten |
||
| − | | |
+ | |-|World at War = [[File:Nacht Der Untoten Menu Selection WaW.png]] |
| + | |-|Black Ops = [[File:Night rezurrection BO.png]] |
||
| − | |character = Unknown. |
||
| + | |-|Black Ops III = [[File:Nacht Der Untoten Menu Selection BO3.png]] |
||
| − | |team = [[United States Marine Corps]] |
||
| + | </tabber> |
||
| − | |weapons = [[M1911]] (8 + 32 rounds), 2 [[stielhandgranate]], any weapon found + bought |
||
| + | |prev = [[Tutorial (Zombies)|Tutorial]] ([[Call of Duty: Zombies|iOS]]) |
||
| − | |place = Somewhere in Germany or Poland |
||
| + | |next = [[Verrückt]] |
||
| − | |objective = Survive for as long as possible against limitless waves of [[zombie]]s |
||
| + | |game = ''[[Call of Duty: World at War]]''<br>''[[Call of Duty: Black Ops]]''<br>''[[Call of Duty: Zombies]]''<br>''[[Call of Duty: Black Ops II]]'' <small>(Easter Egg)</small><br>''[[Call of Duty: Black Ops III]]'' <small>(Remaster & [[Revelations (map)|Revelations]])</small><br>''[[Call of Duty: Mobile]]'' <small>(pre-alpha)</small><br>''[[Call of Duty: Black Ops Cold War]]'' <small>([[Die Maschine]] & [[Forsaken]])</small> |
||
| − | |enemies = [[Zombies|Nazi Zombies]] |
||
| + | |character = Unknown Soldiers (World at War)<br>[[Rook (Zombies)|Rook]] (Call of Duty: Zombies)<br>[["Tank" Dempsey]], [[Nikolai Belinski]], [[Takeo Masaki]], [[Edward Richtofen]] (Black Ops & Black Ops III) |
||
| − | |multiplayer = [[Airfield (Multi-Player)|Airfield]] |
||
| + | |team = Marines (World at War & Call of Duty: Zombies) <br> Ultimis (Black Ops & Black Ops III) |
||
| + | |place = Abandoned Airfield, German-Occupied Europe |
||
| + | |date = June 4<sup>th</sup>, 1945<br>(Original Timeline) |
||
| + | |objective = Survive for as long as possible against limitless waves of the Undead. |
||
| + | |enemies = [[Zombie]]s<br>[[Edward Richtofen]] (At the end of [[Tutorial (Zombies)|Tutorial]]) ([[Call of Duty: Zombies|iOS]]) |
||
| + | |console = <tt>nazi_zombie_prototype</tt> (''World at War'')<br><tt>zombie_cod5_prototype</tt> (''Black Ops'')<br><tt>zm_prototype</tt> (''Black Ops III'') |
||
| + | |multiplayer = [[Airfield (multiplayer)|Airfield]] |
||
| + | |zombies = [[Green Run]] ([[TranZit]] only)<br>[[Revelations (map)|Revelations]]<br>[[Die Maschine]]<br>[[Forsaken]] (minigame) |
||
| + | |campaign = [[Hard Landing (campaign)|Hard Landing]] |
||
}} |
}} |
||
| + | <choose> |
||
| + | <option>{{quote|You drove [[Waffen-SS|them]] deep into the [[Berlin|heart of the Reich]]. You thought they were dead. You were wrong.|Level description/Mission Briefing}}</option> |
||
| + | <option>{{quote|Where it all began: an abandoned airfield suspended in space and plagued by infinite hordes of the undead.|Map biography}}</option> |
||
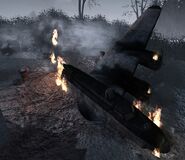
| + | <option>{{quote|An Allied plane malfunctions over an airfield and crashes. German Army trucks, transporting the undead and Element 115 between Group 935 facilities, is struck in the crash. The marines surviving the crash hold out against the undead as long as they can.|Zombies Timeline Description}}</option> |
||
| + | </choose> |
||
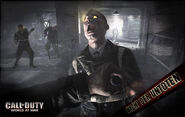
| + | '''Nacht der Untoten''' (German for '''Night of the Undead'''), is the first [[Zombies (Treyarch)|Zombies]] map featured in ''[[Call of Duty: World at War]]''. Originally unlocked after completing the campaign, it was an unannounced game mode and map hidden in the game by Treyarch. It would go on to become its own game mode that was originally known as Nazi Zombies. |
||
| − | {{quote|You drove them deep into the heart of the Reich. You thought they were dead. You were wrong.| Singleplayer Solo mission description in the Mission Select menu}} |
||
| + | The map would go on to be remastered, and remade multiple times throughout future editions of ''Call of Duty'' developed by Treyarch. This included a remaster in ''[[Call of Duty: Black Ops]]'' as part of the Hardened and Prestige editions of the game, and later as part of the [[Rezurrection]] map pack. It was remade as part of the [[Zombies Chronicles]] downloadable content for ''[[Call of Duty: Black Ops III]]''. |
||
| − | '''''Nacht der Untoten''''' (German for "''Night of the Undead''") is the first level in the unlockable [[Nazi Zombies]] bonus campaign in ''[[Call of Duty World at War]]'' for [[Xbox 360]], [[PlayStation 3|PS3]] and [[Personal Computer|PC]]. Players can team up together with up to three other players online or in split screen co-op or as a single player solo mission. |
||
| + | Nacht der Untoten was also featured as part of other future maps. Most of the structure of the map appeared in the ''[[Call of Duty: Black Ops II]]'' map [[Green Run]]. A displaced Nacht der Untoten floating in space appears as a playable area in the ''Call of Duty: Black Ops III'' map [[Revelations (map)|Revelations]] alongside fractured portions of other maps featured in Treyarch Zombies. In ''[[Call of Duty: Black Ops Cold War]]'' it is featured as part of the map [[Die Maschine]]. The lower level is also playable in an arcade minigame in the map [[Forsaken]]. |
||
| − | == Gameplay Information == |
||
| − | Nacht der Untoten (German for Night Of The Undead) is set in a run-down building, where up to four players must defend against a limitless number of waves of zombies for as long as possible. Each room in the building contains a number of windows that can be barricaded with wooden planks. Zombies must knock off each wooden plank in order to climb through the window and enter the building. Zombies do not carry, use, or drop any weapons, and only use melee attacks. Two consecutive melee attacks will put a player into [[Last Stand]]. When a player is down, another player may revive them by walking up to the downed player and hold the action button. This causes the reviving player to stick a "syrette" into the downed player. If the downed player is not revived in an amount of time, then they will bleed out and they will have to spectate other players until it's the end of the round. The game ends when all players are down or dead. |
||
| + | ==Overview== |
||
| − | The game is divided into rounds, sometimes referred to as "waves" or rarely "days" by players. Once a round is finished (by killing all the zombies), there is a small period of time, about 5 seconds, where players can repair barricades, buy weapons and regroup for the next round of the undead. As the game progresses, the zombies will come in larger numbers, have more health, and move faster. While the core elements of the normal game are still present (i.e. aiming down weapon sights, reviving team members in [[Last Stand]]), unique gameplay features have been added to Nacht der Untoten. |
||
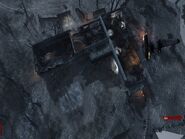
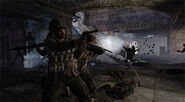
| + | Nacht der Untoten is located in an abandoned airfield where up to four unamed Marines must defend themselves against an infinite number of waves of [[Zombie|the undead]] for as long as possible. |
||
| + | ==Map Layout== |
||
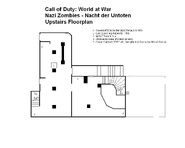
| + | Nacht der Untoten is a small map that consists of three rooms: the starting room, the "Help" room and the upper floor which is divided into two rooms. |
||
| + | ===Starting Room === |
||
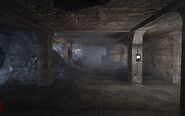
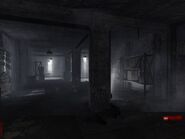
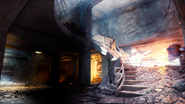
| + | The Starting Room (where the player spawns) is a fairly large room downstairs. It has five boarded windows, which zombies will remove the boards to enter the map. Players can rebuild the defences on the windows, each board repaired rewards the player with 10 points (there is a maximum amount of points a player can earn per round). There are two weapons available to purchase in this room from chalk outlines located on the walls. |
||
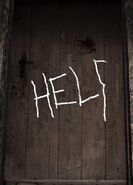
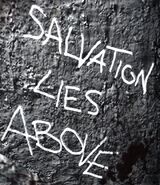
| + | From this room, the player can either go through a door to the right of where the player spawns, with the word "Help" written on it (the letter P is unfinished so it reads "Hell") for 1000 points. Alternatively, the player can clear the sofa barricade on the stairs and head upstairs. |
||
| − | === Point System === |
||
| − | All players start off with 500 points. Players gain points by repairing barricades (reattaching wooden planks to windows) and killing zombies. Repairing barricades will give players 10 points for each wooden plank reattached. Shooting, meleeing, and killing zombies will also earn points. 10 points are awarded for each non-fatal shot, while the killing shot awards 60 points (70 for an upper chest or neck shot kill). A headshot will award 100 points, while a melee attack will be awarded with 130 points for each stab. A grenade kill will give 50 points. The points are used to buy weapons for varying costs (or from the Mystery Box for 950 points each), ammunition for half the price of the respective weapon (unless it is exclusive to the "Mystery Box", therefore ammo may only be retrieved from the box by receiving the weapon again or from the Max Ammo power-up) and unlock new rooms in the building for 1000 points per clearance of debris. |
||
| + | '''Weapons Available:''' |
||
| − | == Power-Ups == |
||
| − | Zombies occasionally drop power-ups that are beneficial to players. |
||
| + | * [[Kar98k]] - 200 points (''World at War'' and ''Black Ops'') |
||
| − | * '''Double Points''' - All points a player gains is doubled. This power-up lasts for 30 seconds. Its in-game drop is a "x2" symbol. |
||
| + | * [[M1A1 Carbine]] - 600 points (''World at War'' and ''Black Ops'') |
||
| − | * '''Insta-Kill''' - This power-up will give players one-hit kills on Zombies. When a player kills a Zombie with this power-up in play, the Zombie's head will almost always explode regardless of where the bullet hit, killing it instantly. The player will be awarded 10 points for the shot, and 100 for the kill, once again regardless of where the bullet hit. Therefore, players should not aim for headshots during insta-kill. This power-up lasts for 30 seconds. The in-game drop is a human skull. If the player has a flamethrower, it will be most effective during Insta-Kill, as a very small burst of flame will kill any zombie instantly, allowing the player to incinerate a large group of zombies in under a second. |
||
| − | * '''Atomic Bomb''' - This power-up causes an incineration of all zombies currently on the map. There is a small delay before the nuke activates and kills all zombies, who are set on fire and whose heads explode, causing them to die instantly, starting with the zombies closer to the bomb, and spreading outwards. Unlike [[Verrückt]] and [[Shi No Numa]], or [[Der Riese]], players receive 0 points for the zombies that were killed by the Atomic Bomb. The in-game drop is an atomic bomb. |
||
| − | * '''Max Ammo''' - This power up gives all players full reserve ammunition for all weapons. However, it will not replenish [[fragmentation grenade|frag grenades]] or [[Molotov Cocktail]]s. It will also not replenish the ammo of a person who is down. It will replenish the ammo of the weapon they are using WHILE down, but when they are revived their ammo will be the same as it was before being downed. The in-game drop is denoted by an ammo box. |
||
| + | '''Perk-a-Colas Available:''' |
||
| − | == Weapons == |
||
| + | *[[Mule Kick]] - 4000 points (''Black Ops'' and ''Black Ops III'' only) |
||
| + | ==="Help!" Room=== |
||
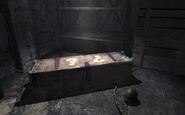
| + | The "Help!" Room has two windows and a wall that leads into a dead-end cave that can be barricaded, it's slightly smaller than the Starting Room. The [[Mystery Box]] is located here along with two other weapons. There is a staircase opposite the door from the Starting room, which has debris that can be cleared for 1000 points. |
||
| + | '''Weapons Available:''' |
||
| + | *[[Double-Barreled Shotgun]] - 1200 points (''World at War'' and ''Black Ops'') |
||
| + | *[[Thompson (weapon)|Thompson]] - 1200 points (''World at War'' and ''Black Ops'') |
||
| + | *[[Mystery Box]] - 950 points per use |
||
| + | ===Upstairs=== |
||
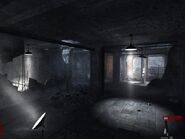
| + | Upstairs has four windows and a slight elevation advantage. It is the largest playable area, split into two rooms, each one with a staircase downstairs. It has a lot of rubble and debris laying around, limiting maneuverability. This area contains four weapons that can be purchased from the wall and the [[Sniper Cabinet]]. |
||
| + | '''Weapons Available:''' |
||
| + | *[[Stielhandgranate]]s (4) - 250 points (''World at War'' and ''Black Ops'') |
||
| + | *[[Sawed-Off]] [[Double-Barreled Shotgun]] w/ [[Grip]] - 1200 points (''World at War'' and ''Black Ops'') |
||
| + | *[[M1897 Trench Gun]] - 1500 points (''World at War'' and ''Black Ops'') |
||
| + | *[[BAR]] - 1800 points (''World at War'' and ''Black Ops'') |
||
| + | '''Sniper Cabinet Weapons:''' |
||
| + | * [[Sniper Scope|Scoped]] [[Kar98k]] - 1500 points (''World at War'' and ''Black Ops'') |
||
| − | [[File:AscendFromDarkness.PNG|right|thumb|256px|The writing on the wall at the stairs in the first room]] |
||
| + | * [[M2 Flamethrower]] (iOS version only) - 2000 points |
||
| − | In Nacht der Untoten, all players start with an [[M1911]]. Players can purchase more weapons by their specific buy zones, which are indicated by a chalk outline of the gun on a wall. Ammunition can be bought from the weapon's buy zone at half the price of the weapon. Ammunition for weapons that do not have buy zones (i.e. [[M1911]], [[FG-42|Deployable FG42]]) must be obtained from a Max Ammo power-up or by obtaining the same weapon from the Mystery Box (the latter option being possible but unlikely). It is possible for a player to have twice the amount of ammunition for a given weapon by carrying two weapons that use the same ammunition (i.e. carrying a [[Double-Barreled Shotgun]] and [[Trench Gun]]). |
||
| + | * [[Locus]] (''Black Ops III'' Version) - 5000 points |
||
| + | ==Features== |
||
| − | Players can also choose to pay 950 points for a random weapon from the "Mystery Box" (denoted by two question marks) in the "Help" room, an unlockable room on the same floor as the starting room. When a player activates the box, it will open up and cycle through a variety of weapons, eventually stopping at a random weapon. The weapons that can be obtained from the "Mystery Box" also include weapons that cannot be bought from buy zones on the wall, such as the [[Ray Gun]], [[Flamethrower|M-2 Flamethrower]], and [[Panzerschreck]]. |
||
| + | As the first entry in the game mode, Nacht der Untoten has a reletively simple feature-set and layout. However, some of the features of this map would go on to become staples in the series. |
||
| + | *[[Mystery Box]] |
||
| + | *Wall Weapons |
||
| + | *[[Oil Drum|Explosive Barrels]] |
||
| + | *[[Sniper Cabinet]] |
||
| + | *[[Power-Ups (Zombies)|Power-Ups]] - [[Max Ammo]], [[Double Points]], [[Insta-Kill]] and the [[Nuke (Zombies)|Nuke]] |
||
| + | ===Wonder Weapon=== |
||
| + | Nacht der Untoten features the first in the series of [[Wonder Weapons]], the [[Ray Gun]]. This can only be obtained from the Mystery Box. |
||
| + | ===Weapons=== |
||
| + | {| class="wikitable mw-collapsible mw-collapsed" |
||
| + | !Starting Weapons |
||
| + | |- |
||
| + | | class="mw-collapsible-content" |<gallery widths="120" bordercolor="transparent"> |
||
| + | M1911 menu icon WaW.png|[[M1911]]<br>(''World at War & Black Ops'') |
||
| + | CoDWAWknife.png|[[Knife]]<br>(''World at War & Black Ops'') |
||
| + | Stielhandgranate third person WaW.png|2 [[Stielhandgranate]]s<br>(''World at War & Black Ops'') |
||
| + | 1911 Gunsmith Model BO3.png|[[M1911|1911]]<br>(''Black Ops III'') |
||
| + | RK5 Gunsmith model BO3.png|[[RK5]]<br>(''Black Ops III'' if [[A Better Tomorrow]] has been completed) |
||
| + | Knife BOIII.png|[[Knife]]<br>(''Black Ops III'') |
||
| + | Frag Grenade Menu Icon BOIII.png|[[Fragmentation Grenades]]<br>(''Black Ops III'') |
||
| + | </gallery> |
||
| + | |} |
||
| + | {| class="wikitable mw-collapsible mw-collapsed" |
||
| + | !Off-Walls Weapons (World at War & Black Ops) |
||
| + | |- |
||
| + | | class="mw-collapsible-content" |<gallery widths="120" bordercolor="transparent"> |
||
| + | Kar98k menu icon WaW.png|[[Kar98k]] - 200 points |
||
| + | Kar98k Sniper Scope WaW.png|[[Sniper Scope|Scoped]] [[Kar98k]] - 1500 points (Sniper Cabinet) |
||
| + | M1A1 Carbine menu icon WaW.png|[[M1A1 Carbine]] - 600 points |
||
| + | Thompson menu icon WaW.png|[[Thompson (weapon)|Thompson]] - 1200 points |
||
| + | M1897 Trench Gun menu icon WaW.png|[[M1897 Trench Gun]] - 1500 points |
||
| + | Double barreled Shotgun WaW.png|[[Double-Barreled Shotgun]] - 1200 points |
||
| + | Sawed-Off Shotgun Grip model WaW.png|[[Sawed-Off]] Double-Barreled Shotgun w/ [[Grip]] - 1200 points |
||
| + | BAR menu icon WaW.png|[[BAR]] - 1800 points |
||
| + | Stielhandgranate third person WaW.png|[[Stielhandgranate]] - 250 points |
||
| + | </gallery> |
||
| + | |} |
||
| + | {| class="wikitable mw-collapsible mw-collapsed" |
||
| + | !Off-Walls Weapons (Black Ops III) |
||
| + | |- |
||
| + | | class="mw-collapsible-content" |<gallery widths="120" bordercolor="transparent"> |
||
| + | RK5 Gunsmith model BO3.png|[[RK5]] - 500 points |
||
| + | Pharo Gunsmith model BO3.png|[[Pharo]] - 700 points |
||
| + | Kuda Model BO3.png|[[Kuda]] - 1250 points |
||
| + | KN-44 Model BO3.png|[[KN-44]] - 1400 points |
||
| + | Sheiva Gunsmith model BO3.png|[[Sheiva]] - 500 points |
||
| + | KRM-262 Gunsmith model BO3.png|[[KRM-262]] - 750 points |
||
| + | Argus Gunsmith model BO3.png|[[Argus]] - 1100 points |
||
| + | Locus Model BO3.png|[[Locus]] - 5000 points (Sniper Cabinet) |
||
| + | Frag Grenade Menu Icon BOIII.png|[[Fragmentation Grenades]] - 250 points |
||
| + | </gallery> |
||
| + | |} |
||
| + | {| class="wikitable mw-collapsible mw-collapsed" |
||
| + | !World at War [[Mystery Box]] |
||
| + | |- |
||
| + | | class="mw-collapsible-content" |<gallery widths="120" bordercolor="transparent"> |
||
| + | .357 Magnum menu icon WaW.png|[[.357 Magnum]] |
||
| + | Springfield menu icon WaW.png|[[Springfield]] |
||
| + | Kar98k menu icon WaW.png|[[Kar98k]]<br>(Also Off-Wall) |
||
| + | Kar98k Sniper Scope WaW.png|[[Sniper Scope|Scoped]] [[Kar98k]]<br>(Also Off-Wall) |
||
| + | PTRS-41 menu icon WaW.png|[[PTRS-41]] |
||
| + | Gewehr 43 menu icon WaW.png|[[Gewehr 43]] |
||
| + | M1 Garand menu icon WaW.png|[[M1 Garand]] with or without M7 grenade launcher |
||
| + | STG44 menu icon WaW.png|[[STG-44]] |
||
| + | M1A1 Carbine menu icon WaW.png|[[M1A1 Carbine]]<br>(Also Off-Wall) |
||
| + | Thompson menu icon WaW.png|[[Thompson (weapon)|Thompson]]<br>(Also Off-Wall) |
||
| + | MP40 menu icon WaW.png|[[MP40]] |
||
| + | M1897 Trench Gun menu icon WaW.png|[[M1897 Trench Gun]]<br>(Also Off-Wall) |
||
| + | Double barreled Shotgun WaW.png|[[Double-Barreled Shotgun]] (with or without [[Sawed-Off]] & [[Grip]])<br>(Also Off-Wall) |
||
| + | BAR menu icon WaW.png|[[BAR]]<br>(Also Off-Wall) |
||
| + | MG42 menu icon WaW.png|[[Bipod|Deployable]] [[MG42]] |
||
| + | FG42 menu icon WaW.png|[[Bipod|Deployable]] [[FG42]] |
||
| + | Browning M1919 menu icon WaW.png|[[Bipod|Deployable]] [[Browning M1919]] |
||
| + | Panzerschreck profile view WaW.png|[[Panzerschreck]] |
||
| + | M2 Flamethrower third person WaW.png|[[M2 Flamethrower]] |
||
| + | Ray Gun 3rd person view WaW.png|[[Ray Gun]] |
||
| + | Molotov Cocktail third person WaW.png|[[Molotov Cocktail]] |
||
| + | </gallery> |
||
| + | |} |
||
| + | {| class="wikitable mw-collapsible mw-collapsed" |
||
| + | !Black Ops [[Mystery Box]] |
||
| + | |- |
||
| + | | class="mw-collapsible-content" | <gallery widths="120" bordercolor="transparent"> |
||
| + | Python menu icon BO.png|[[Python]] |
||
| + | CZ75 menu icon BO.png|[[CZ75]] (with or without [[Dual Wield]]) |
||
| + | Spectre Menu Icon Black Ops.png|[[Spectre (weapon)|Spectre]] |
||
| + | Famas menu icon BO.png|[[FAMAS]] |
||
| + | Galil menu icon BO.png|[[Galil]] |
||
| + | AUG menu icon BO.png|[[AUG (rifle)|AUG]] with [[Swarovski Scope]] |
||
| + | FAL Menu BO.png|[[FAL|FN FAL]] |
||
| + | Commando menu icon BO.png|[[Commando (weapon)|Commando]] |
||
| + | G11 menu icon BO.png|[[G11]] with [[Low Power Scope]] |
||
| + | SPAS-12 menu icon BO.png|[[SPAS-12]] |
||
| + | HS10 menu icon BO.png|[[HS-10]] |
||
| + | HK21 Menu Icon BO.png|[[HK21]] |
||
| + | RPK menu icon BO.png|[[RPK]] |
||
| + | Menu mp weapons l96a1.png|[[L96A1]] |
||
| + | Dragunov Menu Icon Black Ops.png|[[Dragunov]] |
||
| + | M72 LAW menu icon BO.png|[[M72 LAW]] |
||
| + | China Lake menu icon BO.png|[[China Lake]] |
||
| + | Ballistic Knife menu icon BO.png|[[Ballistic Knife]] |
||
| + | Crossbow menu icon BO.png|[[Crossbow]] |
||
| + | Ray Gun 3rd person view WaW.png|[[Ray Gun]] |
||
| + | Thundergun 3rd Person BO.png|[[Thundergun]] |
||
| + | Monkey Bomb.png|[[Monkey Bomb]] |
||
| + | </gallery> |
||
| + | |} |
||
| + | {| class="wikitable mw-collapsible mw-collapsed" |
||
| + | !Black Ops III [[Mystery Box]] |
||
| + | |- |
||
| + | | class="mw-collapsible-content" | <gallery widths="120" bordercolor="transparent"> |
||
| + | L-CAR 9 Gunsmith model BO3.png|[[L-CAR 9]] |
||
| + | Vesper Gunsmith model BO3.png|[[Vesper]] |
||
| + | VMP Gunsmith model BO3.png|[[VMP]] |
||
| + | Kuda Model BO3.png|[[Kuda]]<br>(Also Off-Wall) |
||
| + | Pharo Gunsmith model BO3.png|[[Pharo]]<br>(Also Off-Wall) |
||
| + | Weevil Gunsmith model BO3.png|[[Weevil]] |
||
| + | Bootlegger third person BO3.png|[[Bootlegger]] |
||
| + | MP40 Third Person BO3.png|[[MP40]] |
||
| + | AK-74u Gunsmith model BO3.png|[[AK-74u]] |
||
| + | ICR-1 Gunsmith model BO3.png|[[ICR-1]] |
||
| + | KN-44 Model BO3.png|[[KN-44]]<br>(Also Off-Wall) |
||
| + | M8A7 Gunsmith model BO3.png|[[M8A7]] |
||
| + | Sheiva Gunsmith model BO3.png|[[Sheiva]]<br>(Also Off-Wall) |
||
| + | HVK-30 Gunsmith model BO3.png|[[HVK-30]] |
||
| + | Man-O-War Gunsmith model BO3.png|[[Man-O-War]] |
||
| + | StG-44 Third Person BO3.png|[[STG-44|StG-44]] |
||
| + | MX Garand Gunsmith model BO3.png|[[MX Garand]] w/ [[Reflex Sight]] |
||
| + | KRM-262 Gunsmith model BO3.png|[[KRM-262]]<br>(Also Off-Wall) |
||
| + | Argus Gunsmith model BO3.png|[[Argus]]<br>(Also Off-Wall) |
||
| + | 205 Brecci Gunsmith model BO3.png|[[205 Brecci]] |
||
| + | Haymaker 12 Gunsmith model BO3.png|[[Haymaker 12]] |
||
| + | BRM Model BO3.png|[[BRM]] |
||
| + | Dingo Gunsmith model BO3.png|[[Dingo]] |
||
| + | 48 Dredge Gunsmith model BO3.png|[[48 Dredge]] |
||
| + | Gorgon Gunsmith model BO3.png|[[Gorgon]] |
||
| + | RPK Gunsmith model BO3.png|[[RPK]] |
||
| + | Locus Model BO3.png|[[Locus]]<br>(Also Off-Wall) |
||
| + | Drakon Gunsmith model BO3.png|[[Drakon]] |
||
| + | SVG-100 Model BO3.png|[[SVG-100]] |
||
| + | XM-53 Gunsmith model BO3.png|[[XM-53]] |
||
| + | Ray Gun Third Person BO3.png|[[Ray Gun]] |
||
| + | Ray Gun Mark II Third Person BO3.png|[[Ray Gun Mark II]] |
||
| + | Thundergun Third Person BO3.png|[[Thundergun]] |
||
| + | Annihilator menu icon BO3.png|[[Annihilator]] |
||
| + | Monkey Bomb.png|[[Monkey Bomb]] |
||
| + | </gallery> |
||
| + | |} |
||
| + | {| class="wikitable mw-collapsible mw-collapsed" |
||
| + | !iOS-only Weapons |
||
| + | |- |
||
| + | | class="mw-collapsible-content" |<gallery widths="120" bordercolor="transparent"> |
||
| + | M2 Flamethrower third person WaW.png|[[M2 Flamethrower]] (Off-Wall) |
||
| + | Type 100 menu icon WaW.png|[[Type 100]] (Mystery Box) |
||
| + | PPSh-41 menu icon WaW.png|[[PPSh-41]] (Mystery Box) |
||
| + | Bouncing Betty menu icon WaW.jpg|[[Bouncing Betties]] (Mystery Box) |
||
| + | </gallery> |
||
| + | |} |
||
| + | === Perk-a-Cola=== |
||
| + | {| class="wikitable mw-collapsible" |
||
| + | ![[Perk-a-Cola|Perk-a-Cola Machines]] |
||
| + | |- |
||
| + | | class="mw-collapsible-content" |<gallery widths="120" bordercolor="transparent"> |
||
| + | Mule Kick Machine Render.png|[[Mule Kick]] - 4000 points (via update, ''Black Ops'' and ''Black Ops III'' only) |
||
| + | Der Wunderfizz model BOII.png|[[Der Wunderfizz]] - 1500 points (''Black Ops III'' only) |
||
| + | Juggernog Machine Render.png|[[Juggernog]] (via Der Wunderfizz, ''Black Ops III'' only) |
||
| + | Quick Revive Machine Render.png|[[Quick Revive]] (via Der Wunderfizz, ''Black Ops III'' only) |
||
| + | Speed Cola Machine Render.png|[[Speed Cola]] (via Der Wunderfizz, ''Black Ops III only'') |
||
| + | Double Tap II machine BOII.png|[[Double Tap Root Beer|Double Tap II Root Beer]] (via Der Wunderfizz, ''Black Ops III'' only) |
||
| + | Stamin-Up Machine Render.png|[[Stamin-Up]] (via Der Wunderfizz, ''Black Ops III'' only) |
||
| + | Deadshot Daiquiri Machine Render.png|[[Deadshot Daiquiri]] (via Der Wunderfizz, ''Black Ops III'' only) |
||
| + | Widow's Wine model BO3.png|[[Widow's Wine]] (via Der Wunderfizz, ''Black Ops III'' only) |
||
| + | </gallery> |
||
| + | |} |
||
| + | ==Easter Eggs== |
||
| + | There is no [[Main Quest]] in Nacht der Untoten, but there are some minor Easter Eggs introduced which began a long tradition of hiding content inside the maps. |
||
| + | ===Music Radio === |
||
| + | In the "Help!" Room, to the right of the [[Mystery Box]] there is a radio. When it is knifed/shot it will play some music which varies based upon which game you are playing. Within ''Call of Duty: World at War'', it will play various songs such as the Black Cats soundtrack, the [[Red Army]] theme, the ''Königgrätzer Marsch'' or [[WTF]]. For ''Call of Duty: Black Ops III'', it will play a variety of songs used throughout the Zombies mode. |
||
| + | The radio will award the [[Radio Silence?]] achievement if knifed in ''[[Call of Duty: Zombies]]''. |
||
| − | No Japanese weapons can be obtained from the "Mystery Box" (or are available in Nacht der Untoten), and the only Russian weapon available is the [[PTRS-41]]. On the second floor of the building there is also a cabinet that will randomly give one of three sniper rifles at the cost of 1500 points. |
||
| + | ==Call of Duty: Black Ops== |
||
| + | A remastered version of Nacht der Untoten is available on ''Call of Duty: Black Ops'' if the player has purchased the Hardened or Prestige editions of the game, or if the player has purchased the Rezurrection downloadable content. The map features a couple of changes from the ''Call of Duty: World at War'' version to bring the map up to date with the later maps. |
||
| + | * Cold War-era weapons were available in the Mystery Box, replacing the [[World War II]] weapons. |
||
| − | Weapons available are listed below: |
||
| + | * Two newer Wonder Weapons were added to the Mystery Box, [[Monkey Bomb]]s and [[Thundergun]]. |
||
| − | === Starting === |
||
| + | * With Patch 1.15, [[Mule Kick]] was added in the starting room |
||
| + | * The unamed marines were changed out for the Ultimis characters ([[Tank Dempsey]], [[Nikolai Belinski]], [[Takeo Masaki]] and [[Edward Richtofen]]), they recycled voice lines from other maps. |
||
| + | * The radio in the "Help!" Room now plays different music, mostly from the [[Dead Ops Arcade]] soundtrack. |
||
| + | * The [[Carpenter]] power-up was added. |
||
| + | * The timer for Doulbe Points and Insta-Kill was removed, to bring it in line with later maps which showed an icon instead. |
||
| + | * A musical easter egg was added, [[Undone]] by [[Kevin Sherwood]]. This can be activated by the player shooting at three specific [[Oil Drum|Explosive Barrels]] that are visible from the Starting room. |
||
| + | ==Call of Duty: Black Ops II == |
||
| + | Nacht der Untoten makes a cameo appearance in the ''[[Call of Duty: Black Ops II]]'' Zombies map [[Green Run]] on [[TranZit]], as "The Prototype". The structure can be found within the cornfield between the [[Farm]] and [[Power Station]]. There are two entrances to the building, one is through the window to the left of where the [[Kar98k]] used to be bought and the other is to the right of the Kar98k. The only room that is accessible is the Starting room as the "Help!" door is blocked by unclearable debris, and the stairs heading upstairs have collapsed. No barriers can be built in the Windows, and the [[Denizen]]s do not spawn inside or around the bunker. There are no purchasable weapons on the walls. |
||
| + | Within the building, there are some spawn locations for [[Buildables]]. The Handbrake for the [[Thrustodyne Aeronautics Model 23]] can spawn either: |
||
| + | * Near the lamp. |
||
| − | *[[M1911]] |
||
| + | * In one of the cabinets. |
||
| − | *[[Stielhandgranate]] x2 |
||
| + | * On the stairway, on the right behind the desk. |
||
| − | === Downstairs, starting room === |
||
| + | The Radio for the [[NAV table]] can also spawn here, if it doesn't spawn in the [[Diner]]. |
||
| + | ==Call of Duty: Black Ops III== |
||
| + | === Revelations === |
||
| − | *[[M1 Carbine]] (600 points) |
||
| + | In the map [[Revelations (Map)|Revelations]], Nacht der Untoten appears as the "hub" world alongside several other fractured portions of other maps featured in the Treyarch Zombies series. The player can enter Nacht der Untoten by overriding the Corruption Engines found in the spawn area, [[Der Eisendrache]], [[Mob of the Dead]] and [[Verrückt]]. Nacht der Untoten is also used to trap the Apothicon with a tesla ray from the upstairs balcony. Once each corruption engine is activated, the player must hold the Use button on the control panel when the Apothicon flies by to trap it in place. |
||
| − | *[[Kar98k]] (200 points) |
||
| − | === Downstairs, help room === |
||
| + | The [[Pack-A-Punch]] can be accessed from Nacht der Untoten by entering the Apothicon at any time for the remainder of the game. With all corruption engines powered and the Apothicon trapped, the hub can be used as a short cut to any location on the map via the teleports. [[Juggernog]], the workbench for the [[Guard of Fafnir|Dragon Shield]], the music radio easter egg (activated by holding the Use button on all 4 buttons hidden in the bunker), and the weapon trading bench (activated by using the Chalk in Der Eisendrache to fix all of the chalk writing on each map) are all available. |
||
| − | *[[Double-Barreled Shotgun]] (1200 points) |
||
| − | *[[M1 Thompson]] (1500 points) |
||
| − | *Any weapon from the [[Mystery Box]] (950 points) |
||
| − | === |
+ | === Zombies Chronicles === |
| + | A remade version of Nacht der Untoten is also available for ''Call of Duty: Black Ops III'' if the player has purchased the [[Zombies Chronicles]] downloadable content. This version has upgraded graphics and makes use of the ''Black Ops III'' engine to update features of the map. There are a number of changes made on this version of the map: |
||
| + | * Better Zombies intelligence |
||
| − | *[[Sawed-Off]] [[Double-Barreled Shotgun]] (1200 points off the wall upstairs, always with the [[Grip]] attachment) |
||
| + | * Futuristic ''Black Ops III''-era weapons are available from the Mystery Box and Wall Weapons, rather than the [[World War II]] weapons (although some do return in the box), or Cold War-era weapons from the ''Call of Duty: Black Ops'' version of the map. |
||
| − | *[[M1918 Browning Automatic Rifle|BAR]] (1800 points off the wall upstairs) |
||
| + | * The [[Monkey Bomb]]s and [[Thundergun]] are available, to match the ''Call of Duty: Black Ops'' version. |
||
| − | *[[M1897 Trench Gun]] (1500 points off the wall upstairs) |
||
| + | * Carpenter and the [[Death Machine]] power-ups were added. |
||
| + | * [[Mule Kick]] is also available from the same location as the ''Call of Duty: Black Ops'' version. |
||
| + | * The [[Der Wunderfizz]] was added upstairs, which allows the player to obtain more [[Perk-a-Cola]]s. |
||
| + | * Two [[Gobblegum|Gobblegum machines]] are located on the map. |
||
| + | * The Ultimis characters ([["Tank" Dempsey]], [[Nikolai Belinski]], [[Takeo Masaki]] and [[Edward Richtofen]]) are the playable characters, instead of the unidentified Marines. Unlike the ''Call of Duty: Black Ops'' version, the characters are silent in this version. |
||
| + | * [[Undone]] by [[Kevin Sherwood]] was available again. This can be activated by the player shooting at all 28 [[Oil Drum|Explosive Barrels]] that are located all across the map, both upstairs and downstairs. |
||
| + | * A radio featuring [[Monty (Zombies)|Doctor Monty]] was added, addressing the Ultimis crew, which tells the story of how they ended up in Nacht der Untoten and explains what happened to the unamed marines from the original incarnation of the map. |
||
| − | === |
+ | ====Doctor Monty's Radio Transcript ==== |
| + | [[Monty (Zombies)|Doctor Monty]]: ''"Nacht der Untoten... that translates to "night of the dead". I learned that tonight, huh, me trying to scrub up on my German, you see. Anyway, it happened in an old concrete building on an airfield somewhere, I don't know where. I remember it being really small, simple by today's standards. I think there was a bit of fog. Not a lot of it, certainly not coming into the building itself. You know what I just realized? You weren't even there. At least not at first. It was some other, random, unfortunate soldiers that had the misfortune to live through that horrible night, or Nacht as it was known. There, I speak German now."'' |
||
| − | The sniper cabinet costs 1500 points, and gives a random sniper rifle, either the [[PTRS-41]], the [[Springfield M1903 rifle|Springfield w/ scope]], or most commonly, the [[Kar98k|Kar98k w/scope]]. |
||
| + | ===Samantha Dolls - ''[[Samantha's Lullaby]]''=== |
||
| + | This version also added a second musical easter egg that will play ''[[Samantha's Lullaby]]'' and spawn a max ammo. The following steps must be performed: |
||
| + | # Interact with the four buttons that are located around the map, after all four buttons are activated, a thunderous sound will be heard. The buttons are located: |
||
| − | Note:On the iPod touch and iPhone version, the upstairs cabinet will give out a flamethrower every time, not a sniper rifle. |
||
| + | #* Under the shelf at the bottom of the steps in the Mystery Box room |
||
| + | #* On the ceiling above the spiral stairwell going up from the spawn room |
||
| + | #* Up on the wall to the left of the Mule Kick machine |
||
| + | #* On the wall across from the Argus wall-buy upstairs |
||
| + | # Interact with the starter Samantha doll which will appear on the ground in front of the RK5 wall purchase. Once interacted with, it will start the search for Samantha dolls around the map, indicated by music box music. |
||
| + | # Shoot the Samantha dolls. Follow the music that is playing to located a spinning Samantha doll on the map. The player should shoot it until it disappears. You must do this until the last doll summons the thunderous sound indicating completion. The possible locations of the Samantha doll are: |
||
| + | #* In the hole in the roof to the left of the Der Wunderfizz |
||
| + | #* On a fence post in the farthest window in the Starting room |
||
| + | #* On the pond in the left window barrier in Starting room |
||
| + | #* On the end of the tanks barrel in the window next to Mule Kick |
||
| + | #* On the top floor on top of a power line post |
||
| + | #* On top of a truck in the farthest right Starting room window |
||
| + | #* Next to a power generator on the first floor, looking through a window In the hole in the ceiling on the bottom floor. |
||
| + | # Interact with the first Samantha doll again, it will now be on the ground propped up and spinning. Interact with it to see it be lifted by a skeleton hand and disappear into the ground. The Max Ammo will then spawn and Samantha's Lullaby will play. |
||
| − | == |
+ | ==Call of Duty: Mobile== |
| + | {{Cut}}Nacht Der Untoten was planned to return in ''[[Call of Duty: Mobile]]'', but it was cut from the final game. The only evidence of your existence, it is from the [https://www.youtube.com/watch?v=dy7XZ5PeD4c "Elite Squad"] trailer. Elite Squad it was as it was known ''Call of Duty: Mobile'' in its pre-alpha phase. Based on trailer, the map would feature the same layout as the previous games, with the addition of the [[Perk-a-Cola]]s scattered across the map. Nacht Der Untoten ended up being cut at some point in development and replaced by [[Shi No Numa]] in the final game. |
||
| − | *[[Holy pistol]] (only available through hacking) |
||
| + | == Call of Duty: Black Ops Cold War== |
||
| − | *[[BRAAAINS...]] (only available through hacking) |
||
| + | The building from Nacht der Untoten makes a cameo appearance in the ''[[Call of Duty: Black Ops Cold War]]'' Zombies map [[Die Maschine]], featuring the original bunker ruins as a centerpiece of the map. |
||
| + | The lower level of Nacht der Untoten would be playable in a minigame in the Zombies map [[Forsaken]]. |
||
| − | == Effectiveness Of Weapons == |
||
| + | ==Gallery== |
||
| − | This list has been determined through play-testing. |
||
| + | ===''Call of Duty: World at War''=== |
||
| + | <gallery> |
||
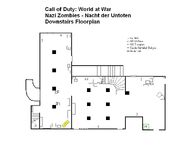
| + | Nacht der Untoten - DNST.jpg|Downstair Floor-plan. |
||
| + | Nacht der Untoten - UPST.jpg|Upstairs Floor-plan. |
||
| + | Nacht Der Untoten Ground Floor.jpg|View of ground floor from Help Room door. |
||
| + | Nacht der Untoten Upstairs.jpg|Upstairs view. |
||
| + | Nacht der Untoten Overview.jpg|Map overview. |
||
| + | Nacht der Untoten Help Room.jpg|Help Room ([[Mystery Box]] in far left corner). |
||
| + | Nacht der Untoten Sniper Cabinet.jpg|[[Sniper Cabinet]] located Upstairs. |
||
| + | Nacht der Untoten Mystery Box.jpg|[[Mystery Box]] located in the Help Room. |
||
| + | Nacht der Untoten Help Room Door.jpg|The unfinished Help on the door to the Help Room. |
||
| + | Nacht der Untoten You Must Ascend From Darkness.jpg|The writing on the wall in the Start Room. |
||
| + | Nacht der Untoten Salvation Writing.jpg|The writing on the wall in the Help Room. |
||
| + | Nacht der Untoten crashed B-17 WaW.jpg|Crashed [[B-17 Flying Fortress]] outside the building. |
||
| + | Nacht der Untoten Poster2.jpg|A [[Zombie]] attacking the player in Nacht der Untoten. |
||
| + | Nazi Zombies logo WaW.png|Nazi Zombies sign shown on the loading screen. |
||
| + | Marines Nacht der Untoten WaW.jpg|Marines from the Nacht Der Untoten trailer. |
||
| + | </gallery> |
||
| + | ===''Call of Duty: Zombies''=== |
||
| + | <gallery> |
||
| + | Mystery Box Nacht der Untoten CoDZ.PNG|The Mystery Box in ''Call of Duty: Zombies''. |
||
| + | Help Door Nacht der Untoten CoDZ.PNG|The Help door in ''Call of Duty: Zombies''. |
||
| + | Sniper Cabinet CoDZ.jpg|The Sniper cabinet. |
||
| + | </gallery> |
||
| + | ===''Call of Duty: Black Ops''=== |
||
| + | <gallery> |
||
| + | Night rezurrection BO.png|In [[Zombie Labs]]. Note the [[Makarov (weapon)|Makarov]], which isn't usable in-game. |
||
| + | Nacht Der Untoten Loading Screen.png|Loading screen in ''[[Call of Duty: Black Ops|Black Ops]]''. |
||
| + | Nacht der Untoten zombies BO.jpg|Nacht der Untoten in ''Black Ops''. |
||
| + | Nacht der Untoten Easter egg 9-24-11 BOZ.png|As seen in ''Black Ops Zombies''. |
||
| + | </gallery> |
||
| + | ===''Call of Duty: Black Ops II'' === |
||
| + | <gallery> |
||
| + | Nacht der Untoten outside BOII.png|The outside of Nacht Der Untoten in [[Green Run]]. |
||
| + | Nacht Der Untoten Inside 1 BO2.png|The inside of Nacht Der Untoten in Green Run. |
||
| + | Nacht Der Untoten Inside 2 BO2.png|Another shot of Nacht Der Untoten. |
||
| + | </gallery> |
||
| + | === ''Call of Duty: Black Ops III''=== |
||
| + | <gallery> |
||
| + | Nacht Der Untoten Room 1 Revelations BO3.png|Nacht der Untoten in [[Revelations (map)|Revelations]]. |
||
| + | Nacht der Untoten History BO3.jpg|Treyarch's official tweet on Nacht der Untoten's background. |
||
| + | Nacht Der Untoten Loading Screen BO3.png|Nacht der Untoten's loading screen in [[Black Ops III]]. |
||
| + | Nacht Intro logo BO3.PNG|''Call of Duty'' Zombies sign shown on the solo loading screen. |
||
| + | Nacht der Untoten View BO3.png|Promotional image used for the [[Zombies Chronicles]] DLC showcase of the map. |
||
| + | Nacht Help Door BO3.jpeg|The unfinished Help on the door to the Help Room. |
||
| + | Nacht Ascend From Darkness BO3.jpeg|The writing on the wall in the Start Room. |
||
| + | Nacht Salvation Lies Above BO3.jpeg|The writing on the wall in the Help Room. |
||
| + | </gallery> |
||
| + | ===''Call of Duty: Mobile''=== |
||
| + | <gallery> |
||
| + | Nacht Pre-Alpha COD Mobile.PNG|Nacht der Untoten as seen in the "Elite Squad" trailer. |
||
| + | Zombies FPS View COD Mobile Pre Alpha.PNG|A character killing a zombie in the "Elite Squad" trailer. |
||
| + | </gallery> |
||
| + | ===''Call of Duty: Zombies (comic)''=== |
||
| + | <gallery> |
||
| + | Nacht Der Untoten Loading Screen Zombies Comic.jpg|The alternate version of the Nacht der Untoten loading screen from the third issue of the [[Call of Duty: Zombies (comic)|Zombies comicbook series]]. |
||
| + | </gallery> |
||
| + | ===''Call of Duty: Black Ops Cold War''=== |
||
| + | <gallery> |
||
| + | NachtDerUntoten DieMaschine 1 BOCW.png|The Nacht der Untoten building as seen in [[Die Maschine]]. |
||
| + | NachtDerUntoten DieMaschine 2 BOCW.png |
||
| + | </gallery> |
||
| + | ==Videos== |
||
| + | ===''Call of Duty: World at War''=== |
||
| + | <gallery> |
||
| + | Call of Duty World At War Nacht Der Untoten - Loading Screen|Nacht der Untoten Loading Screen. |
||
| + | Nacht Der Untoten Rounds 1-100 Full Gameplay - World at War Zombies|Gameplay (rounds 1-101). |
||
| + | </gallery> |
||
| + | ===''Call of Duty: Black Ops''=== |
||
| + | <gallery> |
||
| + | Black Ops Zombies Nacht der Untoten - Solo Round 40+ Strategy|Gameplay in the starting room. |
||
| + | </gallery> |
||
| + | ===''Call of Duty: Black Ops II'' === |
||
| + | <gallery> |
||
| + | Black Ops 2 Getting to Nacht Der Untoten on Tranzit (Zombies Easter Egg)|Tutorial on how to get to Nacht der Untoten in Green Run. |
||
| + | </gallery> |
||
| + | ==Trivia== |
||
| + | === ''Call of Duty: World at War'' === |
||
| − | |||
| + | *On [[Treyarch]]'s official site, Nacht der Untoten is referenced in the Mysterious Radio Transmissions Intelligence. It would say ''"Ever since the second outbreak at Nacht der Untoten..."''. |
||
| − | *[[Stielhandgranate|Steilhandgranate]]-Although not really usable as a main weapon, these can be useful when there is a large group of zombies or you are out of ammo. These are often used after the rounds of the pistol have been used up at the start of the game. Later on grenades become slightly annoying as they often create crawlers which make you have to shift your view to the floor, which can sometimes either disorientate you or cost you valuable seconds. This is effective to throw at windows when zombies are breaking through, as it will either slow them down or kill them outright. |
||
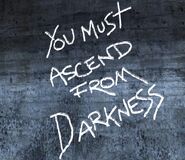
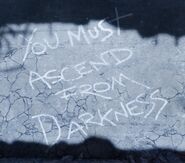
| + | * "Ascend From Darkness", one of the messages written on the wall, was also one of [[Viktor Reznov]]'s steps to escape from the [[Vorkuta (Prison)|Vorkuta]] prison. This would later be used as step two of [[Origins]]' [[Little Lost Girl|main quest]] which would follow Reznov's steps. |
||
| − | *[[Double-Barreled Shotgun]]-Although powerful enough to be one shot kill until high rounds and has a faster reload time than the Trench Gun, there is not really any time at which this gun is preferable. On low rounds the player should be able to easily kill the zombies while they are a fair distance away, while on later rounds there are a large amount of zombies, so the player will not have enough ammo in the magazine to defeat them all. It is a good weapon to use at and under round 7. The frequent reloading of this gun is quite frustrating because of the swarms of zombies and only two maximum shells. The Trench Gun should be used over this. |
||
| + | * The map uses the same bunker seen in the Multiplayer map [[Airfield (multiplayer)|Airfield]] and the Campaign mission [[Hard Landing (campaign)|Hard Landing]]. |
||
| − | *[[Double-Barreled Shotgun|Sawed-Off Double-Barreled Shotgun w/Grip]]-This gun has the same advantages and disadvantages as the Double-Barreled Shotgun, however it has a shorter range with higher power. Whether to use this or the Double-Barreled Shotgun is a matter of personal preference. |
||
| + | *The map's name in english, "Night of the Undead", is similar to the title of [[George A. Romero]]'s first film "{{w|Night of the Living Dead}}". |
||
| − | * [[PTRS-41]]-This sniper is extremely powerful, has a penetrating bullet, and is one shot kill up to around round 20. It is however very difficult to use in short range situations as it has very low accuracy without the scope. The player can use it to 'No-Scope' the zombies at close range. This gun is best used to guard windows as you will be shooting zombies at long distances and can kill multiple zombies in a row with a single shot if lined up right. The player can also stand upstairs above the help room and snipe from there. In later round however this is not recommended unless you know that you are heavily guarded. This gun has a large reload time, so it's adviced to Reload Cancel. |
||
| + | *The song heard during the 'Game Over' sequence is "[[Lullaby for a Dead Man]]", which would go on to be featured in full as an Easter Egg in the next map, [[Verrückt]]. |
||
| − | *[[Kar98k]]-(un-scoped or scoped) Un-scoped, this weapon is only usable in the first few rounds. After round one the player must rely on headshots. The main reason for buying this gun would be the low cost as it is the only gun you can initially buy. Scoped, this weapon is much more powerful and can be used longer as a one shot kill weapon. It has the same applications as the [[PTRS-41]], however it is much less powerful and will cease to be one shot kill much earlier. At this point it is useless. If the player does buy this, it is best to trade it off by round 5, as a Bolt-Action Rifle is close to useless outside the 1st 5 rounds, thought the [[PTRS-41]] is an exception. |
||
| + | *The appearance of the Marines is randomized. |
||
| − | *[[Ray Gun]]-This weapon is, for most players, the best weapon in the game. Its one shot kill abilities up to and over round 30 is unrivaled, and its large magazine size of 20 is huge for a gun of such power. The player can carry 180 rounds (including the magazine), so the likelihood of getting a "Max ammo" item before running out is extremely high. If the player is using this on harder levels on multiplayer, they should try and stand behind someone who is not using the ray gun as this will prevent the player from blowing themselfs up. This gun is effective at long range however some find it inaccurate due to the delay between the firing of the shot and when it hits. It is much easier to hit zombies which are coming towards you than someone else. Its also good when the holding the player is in last stand, by firing at the ground next to the player, you will kill any zombies attacking your reviver. Unfortunately, it has a major flaw. Shooting a zombie at close range may kill the player. Splash damage is what will kill both players. Truly consider whether you will use this or not. |
||
| + | *The Thompson is mistakenly listed as 1500 points on the wall. However, it actually costs 1200 points. This would be fixed in the ''Call of Duty: Black Ops'' version of the map. |
||
| − | *[[M2 Flamethrower]]-Flamethrowers were meant to be used against the living. Not the undead. The player has to wait 3-5 seconds for the zombie to die after they burn them. Unless the player has the time to burn a large group with all the fuel. This makes camping in one spot a trap. It has unlimited ammo so it can be fired forever. It often obstructs the players teammates view of the area. When it overheats, the player can be defenseless, unless the player has a backup weapon which they should use. This weapon has high mobility unlike the machine gun. This weapon rises to the top when on insta kill. If the player gets insta kill, let the guy with a flamethrower go out and kill them. The player might as well take it and see if it works for them, though most weapons are considered better than this. In Shi No Numa, the Mobility is decreased to that of the Browning M1919. There is one strategy the flamethrower is useful in: First, the player should go upstairs and go down from there, then, hope for a flamethrower from the mystery box, then guard there. Once the player has used up their primary weapon ammo, they should pull out the flamethrower and run laps around the help room burning the zombies as they run. |
||
| + | *The trucks outside the bunker can be destroyed. |
||
| − | *[[MP40]]-Not the best gun to use, but if used right, it will become a great weapon to hold onto, even in later rounds (16-17). It trades the Thopmson's high rate of fire for better damage, and accuracy, though when it weakens, the player should begin their search for an HMG, and don't rely on it too much. |
||
| + | *If the player enters the Help room in the first four rounds, zombies will not spawn behind the wall until round five. This is not the case in ''Black Ops'' and ''Black Ops III''. <ref>https://www.youtube.com/watch?v=UYnB3BaJAVY</ref>[https://www.youtube.com/watch?v=UYnB3BaJAVY] |
||
| − | *[[StG44]]-Not considered a good gun overall as it is weak, and ammo will deplete quickly. But it does have advantages, like it's accuracy, high mobility, and relatively small reload time, but it is very inaccurate when tracking targets, so it's advisable to lead shots while tracking a target. It is recommended to look for an HMG over this. |
||
| + | ===''Call of Duty: Black Ops''=== |
||
| − | *[[MG42]]-This high powered MG can lay waste to entire lines of zombies. It is extremely effective due to its unrivaled rate of fire. However, this gun has the most recoil of any gun in Nazi Zombies (Yes, more than [[M1919]]). Therefore, it is advised to burst fire, however if there is a whole line of [[Zombie]]s, then it may be worth it to go all out. This gun eats ammo up however the reload time is about half that in Multiplayer, so it isn't that long. This gun rivals the [[Ray Gun]] and in many places it is better. If the player turns around while rebuilding and find three zombies they can kill them all with its high rate of fire provided they have at least 25 bullets. |
||
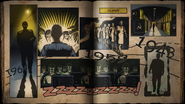
| + | *The menu image of Nacht der Untoten, along with the other three ''Call of Duty: World at War'' maps, is used in the loading screen for Kino der Toten on ''Call of Duty: Black Ops'' in the style of a comic strip. |
||
| − | *[[FG42]]-A good weapon to have in the early-mid rounds. It's strong, light, and has a rate of fire that can rival the [[MG42]]'s. However, its small magazine capacity prevents it from being a reliable gun as the game progresses. Best used to quickly score lots of points to be able to get another weapon when it runs out of ammo. Its recoil is quite high, so it is advisable to "climb". |
||
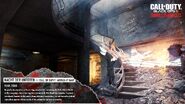
| + | *In the poster for the Rezurrection map pack, Nacht der Untoten is referred to as '''Night'''. |
||
| − | *[[.357 Magnum Revolver]]-An excellent weapon to have up to round 15. Its one-shot kill ability (depending on range) makes it a highly coveted weapon among players. However, it isn't without its flaws. It only has a capacity of 6 cartridges, frequenting reloading. This takes away time, which isn't something you always have. Other than that, this weapon makes a great alternative to a lot of other weapons they player may be wielding. It can penetrate up to 3 zombies, which really helps if you are employing a strategy that involves funneling the zombies into a small choke point, although once the magnum loses its one-shot killing power, the player should begin their search for a ray gun. |
||
| + | *Teaser art for Rezurrection shows a Russian firing dual-wield [[Makarov (weapon)|Makarovs]], which is not possible in-game. |
||
| − | *[[M1911]]-It's more reliable in the beginning of the level, where there are less zombies. These zombies are very weak, which will allow you to scratch up some points. However, this pistol should be traded off as soon as the player can afford a much more reliable gun. |
||
| + | ===''Call of Duty: Zombies''=== |
||
| − | *[[M1 Carbine]]-A must have weapon in the first few levels. Its semi-auto nature and it's larger ammo capacity makes it superior over the [[Kar98k]]. However, it is suprisingly weak, even early on, as headshots don't always kill them, this is it's major downfall, whether buying this or the [[Kar98k]] is up to personal preference. Trade off this weapon by at least round 6. |
||
| + | *The players can hear their characters speak by getting three ("I'm gonna bust some heads!"), five ("Back in the dirt!") or seven ("Kick ass!") headshots in a row. |
||
| − | *[[M1 Garand]]-It's semi-automatic and it's quite accurate, but low ammo count and weaker damage compared to other weapons are it's downfalls, so it's advisable to trade it off by round 12. The player can also get one with a grenade launcher attachment, but it has the same problems as the [[Panzershreck]], but spare ammo and reload times are better. Far more reliable in the other maps. But it can be a good primary offensive weapon until round 10. |
||
| + | *The wall-buy for the sawed-off Double-Barreled Shotgun says just "Sawed-Off". |
||
| − | *[[M1918 Browning Automatic Rifle]]-Not a very good gun for later rounds, as Ammo Count is an issue even early on. Though it is fairly accurate, it has a resonably slow reload time, it has a low rate of fire, and it has a very low ammo capacity. The player is better off avoiding it. |
||
| + | ===''Call of Duty: Black Ops II'' === |
||
| − | *[[M1897 Trench Gun]]-The Trench gun is considered to be an excellent weapon against the zombie invasion. But eventually by round 12, it may take two or more shots to kill one zombie. By then, you may need to get as close as possible for a reliable kill (Hopefully 2 shot kill at the least). When locked in a small space in other maps and by the grenade pickup here, it will be effective about 85% of the time. If you are a window guarder, the trench gun will do well. But compared to the [[Double barreled shotgun|Sawn off Double Barreled Shotgun]], it has less range, and less stopping power needed against the zombies. Remember, you need to stop them in their tracks and force them to fall down. For this particular case, grab a sawn off shotgun off the wall. But still, what better way to do that then with Model 1897! |
||
| + | *On the map Green Run, when inside the main building, faint whispering can be heard. |
||
| − | *[[Thompson|M1 Thompson]]- A decent weapon with moderate power, and a fast reload time (shorter if the magazine is NOT empty). Due to the upward recoil on this, headshots are easily obtainable with bursts. This gun is very mobile, and allows the player to run round at a decent speed. Also, the player can purchase ammo off the wall for it. The major downside to this gun is the small magazine size and high rate of fire which absorbs ammo quickly, although this is less of a problem given it's quck reload time. Overall, a decent weapon and a good choice for the mid rounds (10-17). |
||
| + | ===''Call of Duty: Black Ops III''=== |
||
| − | *[[Molotov Cocktail]]-This incendiary device is not the most reliable weapon. Its only benefit is setting zombies on fire, leaving them to die a very slow and painful death. On the other side, however, it can turn the zombies into crawlers (useful if you require additional time to prepare for the next round), limit your teammates' vision, and even put the player in [[Last Stand]] if they are not careful. There is no real downside to buying it, as it does not use any weapon slots. |
||
| + | * The title in the intro cutscene is changed from "Nazi Zombies" to "Call of Duty Zombies". All references to Nazi's were removed in the ''Call of Duty: Black Ops III'' version, with the swastika being replaced with Iron Crosses. This was likely due to the censorship laws in Germany. |
||
| − | *[[M1919]]-This is considered a good gun, even in the higher rounds (10-29). This gun trades in the [[MG42]]'s high fire rate and short reload for less recoil and more accuracy. This means that as long as the player has teammates that can cover one player while they reload, this gun can lay waste to entire lines of zombies while using less ammo than the MG42. However it takes much longer to reload than any other weapon so make sure the player either has a teammate covering them or a good secondary weapon. If you know how to [[Reload Cancel]] this gun will be much more effective. Mobility is something often forgotten in Nazi Zombies but it is as key as remembering how to shoot your gun. Lets be reasonable with both machine guns. Forget fast reload times (maybe the MG42 is a good reload time), mobility, and low recoil, all things you need if you even want to survive (machine guns have high recoil and this leads to little accuracy). If you are holding out in the Help Room and get cornered, you will end up joining the undead. If you get in a corner and zombies are all around, for example by the Thompson chalkline. Without the mobility or agility to get around them before they close in on you, you will end up joining the undead. If you had a high-mobility weapon like a thompson, M1 Carbine, .357 Magnum, or Model 1897, you would often get through them and continue the onslaught. One could argue that you could just shoot them before they close on you. Still, chances are slim since they will probably be running at you. But with a mobile weapon, you can still run fast enough. Still like above, this gun has its uses. It should be used if camping in one spot where there is a choke point you can constantly put fire on. Even up there, without the mobility needed if you get cornered in the grenade pickup, you cannot outrun them to get to safety. |
||
| + | ==References== |
||
| − | *[[Gewehr 43]]-As with other semi-automatic weapons, this gun is only effective in the earlier rounds. However, in the later rounds, its lack of power, small capacity, and semi-auto nature make it ineffective against the zombie horde. By the time the player gets it, they will need a better gun. |
||
| + | <references /> |
||
| − | *[[Springfield]]-This is considered to be one of the worst guns available. It has extremely low power, even on round 1. Its iron sights are not considered accurate. It takes around 1 and a half magazines to kill one zombie. If the player happens to come across a scoped version, however, it may be worth taking. Other than that, it is recommended that the player avoids this weapon. |
||
| + | {{Zombies mode}}{{CoD5 Maps}}{{CoD7 Maps}}{{CoD12 Maps}} |
||
| − | *[[Panzershreck]]-Normally you would think that a rocket launcher would be an amazing weapon. Sadly, this isn't the case. The Panzershreck usually just turns the zombies into crawlers. Plus, it's heavy, hazardous to the player, limits the players vision (through the smoke and iron sights), can put the player in last stand if the player is too careless with it, and comes with little spare ammo (4 rockets). Considered not a great weapon, although it is far more reliable in the other maps where it gives the player more spare ammo (20 Rockets). |
||
| + | [[fr:Nacht der Untoten]] |
||
| − | *[[Knife]]-Reliable in the early rounds, where the [[Zombies|zombies]] are weaker. It is an excellent way to conserve ammo and get many points. However, as the rounds drag on, the zombies become more resilient to knife blows. This prevents the knife from being an effective weapon in the mid to later rounds. It excels in usage during Insta-Kill. Also, the number of knife attacks to take down a zombie are the same as the round number (except round 4, where it is still 3), so past round 4 or 5, using it is dangerous. An effective strategy to use with the knife if a zombie corners the player and the player needs to reload a slow gun, if the player shot enough bullets in him, 1 or 2 knife slashes will probably kill him, this can be a lifesaver. |
||
| + | [[sv:Nacht der Untoten]] |
||
| − | |||
| + | [[Category:Call of Duty: World at War Zombies Maps]] |
||
| − | == Hints And Tips == |
||
| + | [[Category:Call of Duty: Black Ops Zombies Maps]] |
||
| − | *One of the most important things to remember in Nacht Der Untoten is to NEVER open all three doors. This doesn't help at all. The best tactic is to access the HELP room via upstairs. Two people can guard the stairs while two can clear out the HELP room. If one opens the HELP room from downstairs, two can guard the door, but they are prone to zombies sneaking past the other two. If the downstairs HELP is opened, open upstairs as well. This will allow more zombies to attack the front of the HELP room rather than accessing the HELP room directly. |
||
| + | [[Category:Green Run Locations]] |
||
| − | |||
| + | [[Category:Call of Duty: Black Ops III Zombies Maps]] |
||
| − | *If you are reloading and you're cornered by a zombie, mashing the knife button will save you, but only if there aren't other zombies grouping you. This is only applicable to the earlier rounds, in later rounds, the amount of stabs needed to kill the zombies happens slower than two hits from the zombie, which will kill you. |
||
| − | |||
| − | *ALWAYS reload before you get Max Ammo. This will allow you to have a full magazine when you get the power-up, giving you the maximum amount of ammo your gun can get. But if you don't have the time to reload and have to dive into masses of undead to get it, just simply get it, some ammo is always better than no ammo at all. |
||
| − | *Try to score as many points as possible in the earlier rounds as having lots of points to spend will improve your chances of getting a powerful weapon. Good guns to use for scoring points are the MP40, Thompson, FG42, MG42 and M1919 Browning(which are also two of the best and most popular guns at higher levels) and STG 44. The flamethrower is also effective against groups and zombies at windows. |
||
| − | *One effective way to get to the high rounds can be done with this strategy. (But everything just needs to work perfectly for this to actually work well) 4 people are needed. Going into the help room by day 4 and going upstairs from the hell room is effective. Make sure everyone has a machine gun, ray gun, or tommy gun. Tommy gun is easy to get so its recommended since you can unleash a lethal blast of lead. Go by the grenade pickup. Have three people all guarding the choke point at the door. Have one guy with a sawn off shotgun watching that window. Don't take your eyes of it if you are that person. Sawn off shotgun must be had since it has a short range with high power. Regular double barrel shotgun is fine too. The Model 1897 is a big no no for this strategy. Its 2 shot kill and inferior accuracy can not be tolerated for this. With three guys watching the door with strong guns and a guy watching the window. Chances of being overrun from the window is zero. |
||
| − | |||
| − | * Contrary to popular belief, opening new rooms does NOT let more zombies in. It simply allows more entrances for them to enter through. The set amount of zombies per round will be spread between the windows. A skilled player can use this to their advantage by 'funneling' the zombies in certain ways. For example, if running round the help room, the stairs in the main room may be opened in order to make a larger proportion of the zombies enter through the door, as it is easier to kill them when they enter through here. |
||
| − | |||
| − | *In the first 3 or 4 rounds, players should concentrate on conserving ammo in general, often easily using the knife. The number of knife melees needed to kill the zombies corresponds with the round number, except for the 4th round. |
||
| − | |||
| − | * It is advised to only open the "Help" room when players have enough points to both open it and purchase the weapons inside. Unlocking the "Help" room opens three more windows for zombies to enter. |
||
| − | |||
| − | * In the "Help" room, the wall opposite to the side right-hand side window can be broken through by zombies. The flamethrower can actually fire straight through this wall. This window is regarded by many as the hardest to defend, as your view of the zombie is blocked while the wall is up. |
||
| − | |||
| − | [[File:Hel(p).PNG|256px|right|thumb|The unfinished HEL(P) on the door in the first room]] |
||
| − | |||
| − | * A very good place to hold out is the upper floor, near the grenade pickup. First you have to open the "Help" door, and then open the upper floor through the "Help" room. Hold out near the grenades, so that one person is watching the window near the stairs down (don't open it though) and the other three should watch the doorway between that section with the grenades and the rest. This tactic makes all the zombies come from two directions: from the doorway that leads to the rest of the building and the window. This tactic was used to set a world record without using glitches of 35 rounds. This has however been beaten through a different tactic, with zombies chasing the player round the help room. This has been used to get to level 152 (video proof up until level 82 on YouTube. Creator claims file size was too big). |
||
| − | |||
| − | * Another popular tactic is to wait until every player has a few thousand points. Next, a player opens the first staircase and another opens the second. Then the players hold out in the 'Help' room. This strategy will create a 'bottle neck' at the second staircase, where all the zombies from the other parts of the house have to go down a single staircase to reach the players in the 'Help' room. One or two players can cover the windows and wall, while the remaining cover the staircase. This tactic has other benefits, such as immediate access to the Mystery Box, and plenty of room to move around if zombies start overwhelming the players. I would recommend having 1-2 players (depending on # of total players- 1 for a 2 player team, 2 for a 3 or 4 player team) armed with machine guns (MG42 or Browning 1919) standing at the top of the stairs covering the doorway to the starting room staircase and the window near the rifle cabinet, while the remaining players take whatever effective weapons are available and hold the mystery box room. if the team is overwhelmed, they can retreat to the base of the stairs and then to the corner with the mystery box to make their last stand. |
||
| − | |||
| − | * If all but one/most of the zombies are eliminated during a round, the final zombie(s) can be wounded so that they crawl on the ground or hold the zombie at a window, continuously repairing the window as the zombie tries to break in. This gives the player much time to restock on ammo, reload weapons, and fortify positions before the next wave comes. |
||
| − | |||
| − | * At the beginning of the level, the player is given enough points to buy only one of the two weapons in the main room right off the start: the [[Kar98k]]. This weapon is only useful for the first couple levels, in which you should be shooting at the zombies safely from behind the windows. Once you're to the point where it is inevitable that the zombies will break into the house, the Kar98k becomes useless. The other weapon in the room, the [[M1 Carbine]], can be bought as soon as the end of the first round. It has almost as long of a range as the Kar98k, faster rate of fire, and a three times larger magazine; however, the damage is very low, and even if you get a head shot, it will not always kill a zombie. By this point you will normally have gotten a new gun anyway, so this is not a major flaw at the time you use the gun. |
||
| − | |||
| − | *Many people feel that the [[flamethrower]] is overrated, as in the later levels, some people cannot rely on it. Zombies burned with the flamethrower will continue to live for some time before dying, allowing them a chance to overwhelm you. However, zombies flamed will be "stunned" for a second, easily giving you a chance to run and let them burn. This can be very useful on the much higher levels as it would take a lot of ammo to kill each zombie otherwise and the flamethrower kills them relatively quickly. The flamethrower can spray several zombies and kill them within 5 seconds around level 50, although five seconds is enough to be cornered by the burning group. If the player is using the second tactic mentioned above (running round the help room), they can spray the zombie group following them and run. |
||
| − | |||
| − | *While this can be a dangerous tactic, it can sometimes be beneficial to let yourself get downed (assuming you are on multiplayer) if you are out of ammo. Sometimes it is impossible to go and get another gun so this can be useful when you have the [[Ray Gun]] especially, however if a max ammo is acquired, the other player should wait until the other is revived otherwise the downed player will receive no ammo. |
||
| − | |||
| − | *You should ideally go for a Ray Gun with MG/flamethrower combination. As on higher rounds you are likely to run out of ammo on either a ray gun or MG/Browning, so you should have both. Remember that the MG42 will not last very long, as the rate of fire is very quick. A Browning is acceptable, however its firepower is far inferior to that of the MG. It does, however, have a large magazine capacity and slow but powerful fire rate, so it can be used as long as you have time to reload after the magazine is exhausted. The reload time for the Browning is VERY long (the longest of any weapon in the game) so you may want to use one magazine per round and switch to your other weapon when the magazine runs out. |
||
| − | |||
| − | *On earlier rounds, (between 5 and around 12) the Thompson is a very effective weapon as its recoil causes the gun to get many headshots when aimed at the chest. Also, ammo can easily be bought for this as it is on the wall in the help room. |
||
| − | |||
| − | *When repairing the wall, it may be beneficial to leave one part broken, so you can still shoot zombies on the other side without having the flamethrower. |
||
| − | |||
| − | *If you have just repaired a window and a zombie was fairly near the window when you started, be careful as the zombie can sometimes either climb straight through the barriers or attack you from the other side. |
||
| − | |||
| − | *If you have a Magnum and a Ray Gun and you are about to go down (if you're in multiplayer), make sure you have your ray gun out as you are downed. This way, you can still use your ray gun while you're on the ground to cover your teammates while they revive you. |
||
| − | |||
| − | *Theoretically, the less people there are playing, the further you can get. This is because when you play with more than one person, the game adjusts itself to give each player a significant amount of zombies to keep it busy. Therefore, levels can be considerably shorter on solo mode than with four players. |
||
| − | |||
| − | *If you manage to shoot 3 zombies with only 1 bullet, you will receive the 'Rough economy' achievement/trophy. You can easily do this with the PTRS-41, Magnum or the Ray Gun. This is possible on any zombie map. |
||
| − | |||
| − | *Be careful with the Ray Gun; if you are too close to the wall and you fire, this may result in the splash damage of the Ray Gun actually killing you. |
||
| − | |||
| − | * One of the worst things you could do is to back yourself into a corner, unless you are camping. This puts you in a bad position as eventually you will have to reload allowing the zombies to attack you. This really could happen on any of the maps. |
||
| − | |||
| − | *Keep in mind that on Level 6, Zombies will begin to run instead of walking like in the first few levels. |
||
| − | *If a player is killed at any level try to make sure you obtain any new weapons before the end of that round so when the player respawns they will be able to have at least one try at the mystery box. |
||
| − | |||
| − | *If players are holding out in the help room, then they can "funnel" more zombies through the door by opening the upstairs entry in the starting room, causing less Zombies to spawn in at the help room windows. |
||
| − | *NEVER clear the debris for the upstairs. It just gives the zombies more windows to com in from, and is harder to defend then the help room. |
||
| − | *Keep moving. If you move backwards and side to side, the zombies will chase after you, giving you more time to kill them. It will also give your partner(s) more time to fix windows and they will be able to kill zombies easier. |
||
| − | |||
| − | == Strategies == |
||
| − | xx |
||
| − | |||
| − | === Strategy 1 === |
||
| − | |||
| − | First play with 3 or 4 players. Have each person have 1 window to guard. On the first to fourth levels you all should back up in the little corner near the help room and take turns killing a zombie. Don't go for bombs until the higher levels. After that the player with the least points should Rebuild 2 windows and the rest rebuild 1 window. Only use the pistol at the first level to kill a zombie. Then buy the M1A1 Carbine. Keep on using that weapon until level 4. The remaining bullets of the pistol should be used to kill zombies. After that "pistol fantastic event" use the M1A1 carbine again. If you ever get a Max-Ammo power-up use the pistol(only for levels 1-5). When you need a retreat immediately open the "HELP" room. Then try to get a Ray gun, MG42,etc. and replace it with the Colt. Only use it when you REALLY need it or at the ends or beginnings of rounds. 2 people guard the windows. 2 people guard the door outside of the Hell(p) room. Only rebuild the first 2 windows near you. When it starts get to be heavy go upstairs(round 9,10) and you all should have a good gun. The two weapons should be Ray Gun with a Flamethrower. 2 people with a Ray Gun and a MG42. Ray Gun with a Browning, FG42, or a Trench gun. 3 people should be at the place with the window near the sawed off shotgun. 2 people should be at the entrance, 1 person on the window throwing grenades a lot, and a person covering the window on the right side. If a person has died and is back again have a person go with him to the place where he needs a weapon let him buy the best gun affordable than let him guard the window on the right. Don't go off somewhere and stay in your positions the whole time unless you need backup or you see a Bomb or Max Ammo. If you run out of ammo just don't buy a new one. Use your other weapon. Someone should sometime later get a max ammo. On the Harder levels, one should have enough points to not have to dive into masses of undead for Double Points. |
||
| − | |||
| − | === Strategy 2 === |
||
| − | |||
| − | Get your first kills with your pistol until you are on your last magazine, or out of ammo, then buy the M1 Carbine. Hold out with your friends until between round four and round five. The person with the most points (1950+) should open the help room, then buy your guns and hold out in there until round six or seven with two people guarding the cave and windows in the help room and the other two in the main room. When round eight and nine roll around, have the two people in the main room come in the help room and guard the door with the other two still guarding the windows and the cave wall. at the end of round nine, open the stairs FROM THE HELP ROOM and back up to the grenades with the Heavy Machine Guns (MGs, Brownings, Ray Guns) crouched in front of the people in the back (PTRS-41s or HMGs)(standing). If seen from above, you should look like this: ::. Hold a zombie at the end of each round so people without ammo can get another gun or get a Max Ammo if there is one around. You may need to alternate your positions (if a Browning or MG needs to Reload) but keep the same basic shape. Also, the zombies will all come from one room in front of you (except for a few that come to the window at your right) so you can chuck some grenades out there if you are standing in the back. WATCH OUT FOR CRAWLERS if you throw the grenades. If a zombie breaks in from the front of the :: and gets behind you, run out of formation, kill him, and get back in quickly. If any get behind you, its over. It is possible to get up to round 30+ using this formation. |
||
| − | |||
| − | === Strategy 3 === |
||
| − | |||
| − | It is a good idea to only use your knife in round 1 through 4. Then you should follow strategy 2 (Except not to buy the carbine!). Not buying the carbine will save you 600 points in which you could use for the mystery box! Keeping the pistol will give you an invaluable weapon to use for Insta-Kill. Hold out until you all get either at least 1 of these weapons: Ray Gun, MG42 , or the Browning, (or two) However if you are starting to be overwhelmed and did not get the guns yet, these guns will do: .357 Magnum ,FG42, Trenchgun, Double-Barreled shotgun (Not advised and only as a last resort. Try to get a crawler and trade it ASAP) Panzerschreck (NOT ON SOLO!!) ,flamethrower ( Not on solo or 2 player. Only 3 or 4). As in 3, open up the couch in the help room then go by the grenades. Go into the formation. |
||
| − | |||
| − | === Strategy 4 === |
||
| − | |||
| − | 2-4 players. Get the carbine when you have enough points, but don't use it until you run out of pistol ammo. After the first round you start to get overrun at, open the "HELP" room. you should stay here until you get either 2 MG (30 cal or MG-42), an MG and a Ray gun, or a FG-42 and either a Ray gun or a MG. It is also better to wait until round 14 or 15 before you open the stairs or when ever your ready. When you do open the stairs, go to the room with the grenades and have men positioned in the following (do not open the other set of stairs. There are only two entrances into the area (minus the stairs) which makes it easier to defend against large zombie waves). (Man 1) Post a man at the window, holding down the repair window button, only shoot through the window if there are TWO zombies there and always keeping one there so, if the repair button is held that zombie wont go any ware leaving your group to get ready for the next wave (it being the last zombie). (Man 2) Next post a man in between the window keeper and the door (make sure he has a ray gun or a browning etc. something that will kill fast) so the zombies will go to him not the window keeper (this guy is also a big killer). (Man 3) Next have a man next to the window keepers support and looking through the door, this will be your main killer, he will just fire at anything that comes through your door. (Man 4)Position this guy to the very left but further from the door as Man 2 and 3, this will take out any zombies that get too close (this guy shouldn't have a machine gun or it will be difficult). Feel free to rotate around, Man 3 will probably make the most money so make sure one person isn't always playing it. Good luck! |
||
| − | |||
| − | '''Strategy 5''' |
||
| − | |||
| − | Try to mostly knife your way through the first few rounds. Then by round 4 or 5 open the main room stairs and go to the help room from the 2nd story. Have 2 people preferably with ray gun and flamethrower to guard stairs while the other 2 guard the 3 windows. Make sure you get a better weapon between rounds if you have to or get ammo. |
||
| − | |||
| − | '''Strategy 6''' |
||
| − | |||
| − | Get to the help room by round 7. Try to have 1 person with a ray gun and another with an MG42 [you need 2 separate players for this to work] after you have 2 people with those weapons open help room stairs and head towards the trench gun sign. Have ray gunner, MG42-operator, and a third player with a trench gun guarding the hallway with another player guarding the window. Don't worry about conserving ammo since too much you should receive countless powerups. The person covering the window should probably keep 1 zombie on the outside alive so the others can repair windows and have time to refocus. The window guarder should also trade spots with another player if there is one zombie outside to get better weapons and supplies.Also beawear of crawlers since they can hide under dead zombie bodeys. It is also optional to guard the window near the sawed-off-shotgun instead - each choice is up to you. |
||
| − | |||
| − | == Trivia == |
||
| − | [[File:Nacht der Untoten Poster.jpg|right|thumb|256px|Zombies attack!]] |
||
| − | *In the trailer, one of the unknown marines shouts "Take cover!!!", which is one of the exact same sound effects from the [[Call of Duty 3]] trailer. |
||
| − | *This mode is not available for the [[Wii]] version of the game. |
||
| − | *The song that plays during the game over/scoring screen is called [[Lullaby For A Dead Man]]. |
||
| − | *A [[Ray Gun]] can be bought in the Mystery box, which is only otherwise available in other Nazi Zombies levels, or through an easter egg on [[Little Resistance]]. |
||
| − | *The [[Thompson]] buyzone incorrectly states that it costs 1500 points for the weapon, but it really costs 1200 points. |
||
| − | * When crouching, the [[Sawed-Off Shotgun]]'s reticule becomes smaller. In [[multiplayer]], this does not happen. |
||
| − | *Occasionally when you shoot a zombie right when it's about to hit you, it restarts the meleeing animation and buys you those few precious seconds that you can escape with. |
||
| − | *Flames (from [[Molotov Cocktail|molotovs]] or the [[M2 Flamethrower|flamethrower]]) will burn the bushes outside. This can reveal zombie spawn points, where they will seem to appear out of thin air. |
||
| − | *''Nacht der Untoten'' is the only [[Nazi Zombie]]s map to have any scoped bolt action rifles (the [[PTRS-41]] technically being a semi-automatic rifle). |
||
| − | *An eerie cackle can be heard at the beginning of the level and at the game over/scoring screen. |
||
| − | *From round 11 and beyond, the tally marks are replaced by Arabic numerals. (12, 13, 14, etc.) |
||
| − | *In the help room next to the mystery box lies a radio on the table. If you shoot/knife it then it will start playing music. Repeatedly striking the radio cycles through all the songs. |
||
| − | *The building in which the players defend themselves resembles one of the buildings from the multiplayer map [[Airfield]], as well as the single-player mission [[Hard Landing]], with some minor differences. |
||
| − | *When ''Nacht der Untoten'' is selected from the single-player solo mission selection, there is a special opening cut-scene. The cut-scene shows the perspective of a survivor from a crashed B17 bomber and an advancing wave of zombies on the horizon. Strained breathing can be heard from the survivor, in addition to perspective "blackouts" when the cut-scene fades and then refocuses. |
||
| − | *There have been cases due to extreme lag that the host starts out on his back with no gun, and cant get a secondary weapon. |
||
| − | *It is unknown if the crashed aircraft had to make an emergency landing or was shot down by another force. The downed plane does not have any Axis markings on it and it is damaged quite a bit, suggesting that the aircraft was brought down by hostile forces. |
||
| − | * The crashed plane found outside the building can also be found in the single-player mission ''Hard Landing'', after the player has assaulted the building full of enemies and prior to attacking the tanks with the [[M9A1 Bazooka|Bazooka]]. By using [[Rifle Grenade]]s, it is possible to jump out of the building and find the plane. |
||
| − | * Scattered around the bottom floor there are helmets and blood stains, possibly suggesting that the person you play as was not the only survivor, though they'd be have died before your character/characters make it there, supported by the unfinished 'HELP' on the door in the first room, the sandbags blocking off the windows and the two messages near the stairwells. |
||
| − | * On the official site, on the Mysterious Radio Transmissions intel, it says "ever since the second outbreak at Nacht Der Untoten", possibly indicating another zombie outbreak before the one in ''Nacht Der Untoten'' although it most likely relates to where it all started, [[Der Riese]]. |
||
| − | *There are many signs that indicate this area is somewhere near Germany, or in a German occupation area. One thing that supports this is the [[Nazi Zombies]] themselves; if this took place in Airfield, there would not be any Nazis around. Another thing that supports this is that the truck by the barred area has a swastika on it. One final example is that in the "Hel(p)" room, there is a chest with the German phrase, "Eigentum der Deutschen Wehrmacht", translating to "Property of the German Armed Forces". |
||
| − | *It is also thought that the character could be in the USAF or RAF because of the crashed plane. Though the character models look exactly like a [[United States Marine Corps|United States Marines]], so it is likely that the character is affiliated with the American forces. This may be supported if the characters are taken to be the same as in [[Verruckt]], as one of the quotes heard in the new map is "you picked on the wrong marine", showing that they are indeed American. |
||
| − | *When coming down the "help room" stairs, zombies can sometimes float down through the floor into the help room. |
||
| − | *A mod for the [[PC]] version of this game allows you to play with the modern weapons of [[:Call of Duty 4: Modern Warfare]]. |
||
| − | *If you use the PTRS and shoot at the shins or boots of a zombie, it is possible to make a crawler. |
||
| − | *In the tralier the person who you see still alive might be [[Barron]] from [[Black Cats]]. |
||
| − | *On the iPod touch and iPhone versions of the game, the ray gun is significantly less powerful. It becomes a 2-hit kill at round 11, 3-hit kill at round 15, 4-hit kill at round 19, 5-hit kill at round 21, and so on and so forth. |
||
| − | *On the iPod touch and iPhone version it is impossible to reload cancel by attempting to switch weapons, you must use the knife to stop reloading. |
||
| − | *On the iPod touch and iPhone app of the game the radio easter egg still works. |
||
| − | *The radio can sometimes be heard playing some German Military songs like Preussens Gloria and Königgrätzer Marsch to name a few. |
||
| − | *Hell room is a popular nickname for the help room. |
||
| − | *This is a popular [[zombie]] map due to the fact it is free. |
||
| − | * The bunker in the level [[Hard Landing (Single-Player)|Hard landing]] looks just like the bunker the player is in on this [[Zombie]] map. |
||
| − | {{CoD5 Campaign}}{{NaziZombies}}{{DEFAULTSORT:Nacht Der Untoten}} |
||
| − | [[Category:Call of Duty: World at War]] |
||
| − | [[Category:Levels]] |
||
| − | [[Category:Call of Duty: World at War Single Player Levels]] |
||
| − | [[Category:Nazi Zombies]] |
||
Latest revision as of 00:03, 8 November 2023
- For a similarly named zombies map, see Kino der Toten.
- For the Cyborg Rising variant in Call of Duty: Online, see Outpost (Cyborg Rising).
- "You drove them deep into the heart of the Reich. You thought they were dead. You were wrong."
- — Level description/Mission Briefing
Nacht der Untoten (German for Night of the Undead), is the first Zombies map featured in Call of Duty: World at War. Originally unlocked after completing the campaign, it was an unannounced game mode and map hidden in the game by Treyarch. It would go on to become its own game mode that was originally known as Nazi Zombies.
The map would go on to be remastered, and remade multiple times throughout future editions of Call of Duty developed by Treyarch. This included a remaster in Call of Duty: Black Ops as part of the Hardened and Prestige editions of the game, and later as part of the Rezurrection map pack. It was remade as part of the Zombies Chronicles downloadable content for Call of Duty: Black Ops III.
Nacht der Untoten was also featured as part of other future maps. Most of the structure of the map appeared in the Call of Duty: Black Ops II map Green Run. A displaced Nacht der Untoten floating in space appears as a playable area in the Call of Duty: Black Ops III map Revelations alongside fractured portions of other maps featured in Treyarch Zombies. In Call of Duty: Black Ops Cold War it is featured as part of the map Die Maschine. The lower level is also playable in an arcade minigame in the map Forsaken.
Overview
Nacht der Untoten is located in an abandoned airfield where up to four unamed Marines must defend themselves against an infinite number of waves of the undead for as long as possible.
Map Layout
Nacht der Untoten is a small map that consists of three rooms: the starting room, the "Help" room and the upper floor which is divided into two rooms.
Starting Room
The Starting Room (where the player spawns) is a fairly large room downstairs. It has five boarded windows, which zombies will remove the boards to enter the map. Players can rebuild the defences on the windows, each board repaired rewards the player with 10 points (there is a maximum amount of points a player can earn per round). There are two weapons available to purchase in this room from chalk outlines located on the walls.
From this room, the player can either go through a door to the right of where the player spawns, with the word "Help" written on it (the letter P is unfinished so it reads "Hell") for 1000 points. Alternatively, the player can clear the sofa barricade on the stairs and head upstairs.
Weapons Available:
- Kar98k - 200 points (World at War and Black Ops)
- M1A1 Carbine - 600 points (World at War and Black Ops)
Perk-a-Colas Available:
- Mule Kick - 4000 points (Black Ops and Black Ops III only)
"Help!" Room
The "Help!" Room has two windows and a wall that leads into a dead-end cave that can be barricaded, it's slightly smaller than the Starting Room. The Mystery Box is located here along with two other weapons. There is a staircase opposite the door from the Starting room, which has debris that can be cleared for 1000 points.
Weapons Available:
- Double-Barreled Shotgun - 1200 points (World at War and Black Ops)
- Thompson - 1200 points (World at War and Black Ops)
- Mystery Box - 950 points per use
Upstairs
Upstairs has four windows and a slight elevation advantage. It is the largest playable area, split into two rooms, each one with a staircase downstairs. It has a lot of rubble and debris laying around, limiting maneuverability. This area contains four weapons that can be purchased from the wall and the Sniper Cabinet.
Weapons Available:
- Stielhandgranates (4) - 250 points (World at War and Black Ops)
- Sawed-Off Double-Barreled Shotgun w/ Grip - 1200 points (World at War and Black Ops)
- M1897 Trench Gun - 1500 points (World at War and Black Ops)
- BAR - 1800 points (World at War and Black Ops)
Sniper Cabinet Weapons:
- Scoped Kar98k - 1500 points (World at War and Black Ops)
- M2 Flamethrower (iOS version only) - 2000 points
- Locus (Black Ops III Version) - 5000 points
Features
As the first entry in the game mode, Nacht der Untoten has a reletively simple feature-set and layout. However, some of the features of this map would go on to become staples in the series.
- Mystery Box
- Wall Weapons
- Explosive Barrels
- Sniper Cabinet
- Power-Ups - Max Ammo, Double Points, Insta-Kill and the Nuke
Wonder Weapon
Nacht der Untoten features the first in the series of Wonder Weapons, the Ray Gun. This can only be obtained from the Mystery Box.
Weapons
| Starting Weapons |
|---|
M1911 (World at War & Black Ops) Knife (World at War & Black Ops) 2 Stielhandgranates (World at War & Black Ops) 1911 (Black Ops III) Knife (Black Ops III) Fragmentation Grenades (Black Ops III) |
| Off-Walls Weapons (World at War & Black Ops) |
|---|
Kar98k - 200 points M1A1 Carbine - 600 points Thompson - 1200 points M1897 Trench Gun - 1500 points Double-Barreled Shotgun - 1200 points BAR - 1800 points Stielhandgranate - 250 points |
| Off-Walls Weapons (Black Ops III) |
|---|
| World at War Mystery Box |
|---|
Kar98k (Also Off-Wall) M1 Garand with or without M7 grenade launcher M1A1 Carbine (Also Off-Wall) Thompson (Also Off-Wall) M1897 Trench Gun (Also Off-Wall) BAR (Also Off-Wall) |
| Black Ops Mystery Box |
|---|
| Black Ops III Mystery Box |
|---|
| iOS-only Weapons |
|---|
Perk-a-Cola
| Perk-a-Cola Machines |
|---|
Mule Kick - 4000 points (via update, Black Ops and Black Ops III only) Der Wunderfizz - 1500 points (Black Ops III only) Juggernog (via Der Wunderfizz, Black Ops III only) Quick Revive (via Der Wunderfizz, Black Ops III only) Speed Cola (via Der Wunderfizz, Black Ops III only) Double Tap II Root Beer (via Der Wunderfizz, Black Ops III only) Stamin-Up (via Der Wunderfizz, Black Ops III only) Deadshot Daiquiri (via Der Wunderfizz, Black Ops III only) Widow's Wine (via Der Wunderfizz, Black Ops III only) |
Easter Eggs
There is no Main Quest in Nacht der Untoten, but there are some minor Easter Eggs introduced which began a long tradition of hiding content inside the maps.
Music Radio
In the "Help!" Room, to the right of the Mystery Box there is a radio. When it is knifed/shot it will play some music which varies based upon which game you are playing. Within Call of Duty: World at War, it will play various songs such as the Black Cats soundtrack, the Red Army theme, the Königgrätzer Marsch or WTF. For Call of Duty: Black Ops III, it will play a variety of songs used throughout the Zombies mode.
The radio will award the Radio Silence? achievement if knifed in Call of Duty: Zombies.
Call of Duty: Black Ops
A remastered version of Nacht der Untoten is available on Call of Duty: Black Ops if the player has purchased the Hardened or Prestige editions of the game, or if the player has purchased the Rezurrection downloadable content. The map features a couple of changes from the Call of Duty: World at War version to bring the map up to date with the later maps.
- Cold War-era weapons were available in the Mystery Box, replacing the World War II weapons.
- Two newer Wonder Weapons were added to the Mystery Box, Monkey Bombs and Thundergun.
- With Patch 1.15, Mule Kick was added in the starting room
- The unamed marines were changed out for the Ultimis characters (Tank Dempsey, Nikolai Belinski, Takeo Masaki and Edward Richtofen), they recycled voice lines from other maps.
- The radio in the "Help!" Room now plays different music, mostly from the Dead Ops Arcade soundtrack.
- The Carpenter power-up was added.
- The timer for Doulbe Points and Insta-Kill was removed, to bring it in line with later maps which showed an icon instead.
- A musical easter egg was added, Undone by Kevin Sherwood. This can be activated by the player shooting at three specific Explosive Barrels that are visible from the Starting room.
Call of Duty: Black Ops II
Nacht der Untoten makes a cameo appearance in the Call of Duty: Black Ops II Zombies map Green Run on TranZit, as "The Prototype". The structure can be found within the cornfield between the Farm and Power Station. There are two entrances to the building, one is through the window to the left of where the Kar98k used to be bought and the other is to the right of the Kar98k. The only room that is accessible is the Starting room as the "Help!" door is blocked by unclearable debris, and the stairs heading upstairs have collapsed. No barriers can be built in the Windows, and the Denizens do not spawn inside or around the bunker. There are no purchasable weapons on the walls.
Within the building, there are some spawn locations for Buildables. The Handbrake for the Thrustodyne Aeronautics Model 23 can spawn either:
- Near the lamp.
- In one of the cabinets.
- On the stairway, on the right behind the desk.
The Radio for the NAV table can also spawn here, if it doesn't spawn in the Diner.
Call of Duty: Black Ops III
Revelations
In the map Revelations, Nacht der Untoten appears as the "hub" world alongside several other fractured portions of other maps featured in the Treyarch Zombies series. The player can enter Nacht der Untoten by overriding the Corruption Engines found in the spawn area, Der Eisendrache, Mob of the Dead and Verrückt. Nacht der Untoten is also used to trap the Apothicon with a tesla ray from the upstairs balcony. Once each corruption engine is activated, the player must hold the Use button on the control panel when the Apothicon flies by to trap it in place.
The Pack-A-Punch can be accessed from Nacht der Untoten by entering the Apothicon at any time for the remainder of the game. With all corruption engines powered and the Apothicon trapped, the hub can be used as a short cut to any location on the map via the teleports. Juggernog, the workbench for the Dragon Shield, the music radio easter egg (activated by holding the Use button on all 4 buttons hidden in the bunker), and the weapon trading bench (activated by using the Chalk in Der Eisendrache to fix all of the chalk writing on each map) are all available.
Zombies Chronicles
A remade version of Nacht der Untoten is also available for Call of Duty: Black Ops III if the player has purchased the Zombies Chronicles downloadable content. This version has upgraded graphics and makes use of the Black Ops III engine to update features of the map. There are a number of changes made on this version of the map:
- Better Zombies intelligence
- Futuristic Black Ops III-era weapons are available from the Mystery Box and Wall Weapons, rather than the World War II weapons (although some do return in the box), or Cold War-era weapons from the Call of Duty: Black Ops version of the map.
- The Monkey Bombs and Thundergun are available, to match the Call of Duty: Black Ops version.
- Carpenter and the Death Machine power-ups were added.
- Mule Kick is also available from the same location as the Call of Duty: Black Ops version.
- The Der Wunderfizz was added upstairs, which allows the player to obtain more Perk-a-Colas.
- Two Gobblegum machines are located on the map.
- The Ultimis characters ("Tank" Dempsey, Nikolai Belinski, Takeo Masaki and Edward Richtofen) are the playable characters, instead of the unidentified Marines. Unlike the Call of Duty: Black Ops version, the characters are silent in this version.
- Undone by Kevin Sherwood was available again. This can be activated by the player shooting at all 28 Explosive Barrels that are located all across the map, both upstairs and downstairs.
- A radio featuring Doctor Monty was added, addressing the Ultimis crew, which tells the story of how they ended up in Nacht der Untoten and explains what happened to the unamed marines from the original incarnation of the map.
Doctor Monty's Radio Transcript
Doctor Monty: "Nacht der Untoten... that translates to "night of the dead". I learned that tonight, huh, me trying to scrub up on my German, you see. Anyway, it happened in an old concrete building on an airfield somewhere, I don't know where. I remember it being really small, simple by today's standards. I think there was a bit of fog. Not a lot of it, certainly not coming into the building itself. You know what I just realized? You weren't even there. At least not at first. It was some other, random, unfortunate soldiers that had the misfortune to live through that horrible night, or Nacht as it was known. There, I speak German now."
Samantha Dolls - Samantha's Lullaby
This version also added a second musical easter egg that will play Samantha's Lullaby and spawn a max ammo. The following steps must be performed:
- Interact with the four buttons that are located around the map, after all four buttons are activated, a thunderous sound will be heard. The buttons are located:
- Under the shelf at the bottom of the steps in the Mystery Box room
- On the ceiling above the spiral stairwell going up from the spawn room
- Up on the wall to the left of the Mule Kick machine
- On the wall across from the Argus wall-buy upstairs
- Interact with the starter Samantha doll which will appear on the ground in front of the RK5 wall purchase. Once interacted with, it will start the search for Samantha dolls around the map, indicated by music box music.
- Shoot the Samantha dolls. Follow the music that is playing to located a spinning Samantha doll on the map. The player should shoot it until it disappears. You must do this until the last doll summons the thunderous sound indicating completion. The possible locations of the Samantha doll are:
- In the hole in the roof to the left of the Der Wunderfizz
- On a fence post in the farthest window in the Starting room
- On the pond in the left window barrier in Starting room
- On the end of the tanks barrel in the window next to Mule Kick
- On the top floor on top of a power line post
- On top of a truck in the farthest right Starting room window
- Next to a power generator on the first floor, looking through a window In the hole in the ceiling on the bottom floor.
- Interact with the first Samantha doll again, it will now be on the ground propped up and spinning. Interact with it to see it be lifted by a skeleton hand and disappear into the ground. The Max Ammo will then spawn and Samantha's Lullaby will play.
Call of Duty: Mobile
Nacht Der Untoten was planned to return in Call of Duty: Mobile, but it was cut from the final game. The only evidence of your existence, it is from the "Elite Squad" trailer. Elite Squad it was as it was known Call of Duty: Mobile in its pre-alpha phase. Based on trailer, the map would feature the same layout as the previous games, with the addition of the Perk-a-Colas scattered across the map. Nacht Der Untoten ended up being cut at some point in development and replaced by Shi No Numa in the final game.
Call of Duty: Black Ops Cold War
The building from Nacht der Untoten makes a cameo appearance in the Call of Duty: Black Ops Cold War Zombies map Die Maschine, featuring the original bunker ruins as a centerpiece of the map.
The lower level of Nacht der Untoten would be playable in a minigame in the Zombies map Forsaken.
Gallery
Call of Duty: World at War
Call of Duty: Zombies
Call of Duty: Black Ops
Call of Duty: Black Ops II
Call of Duty: Black Ops III
Call of Duty: Mobile
Call of Duty: Zombies (comic)
Call of Duty: Black Ops Cold War
Videos
Call of Duty: World at War
Call of Duty: Black Ops
Call of Duty: Black Ops II
Trivia
Call of Duty: World at War
- On Treyarch's official site, Nacht der Untoten is referenced in the Mysterious Radio Transmissions Intelligence. It would say "Ever since the second outbreak at Nacht der Untoten...".
- "Ascend From Darkness", one of the messages written on the wall, was also one of Viktor Reznov's steps to escape from the Vorkuta prison. This would later be used as step two of Origins' main quest which would follow Reznov's steps.
- The map uses the same bunker seen in the Multiplayer map Airfield and the Campaign mission Hard Landing.
- The map's name in english, "Night of the Undead", is similar to the title of George A. Romero's first film "Night of the Living Dead".
- The song heard during the 'Game Over' sequence is "Lullaby for a Dead Man", which would go on to be featured in full as an Easter Egg in the next map, Verrückt.
- The appearance of the Marines is randomized.
- The Thompson is mistakenly listed as 1500 points on the wall. However, it actually costs 1200 points. This would be fixed in the Call of Duty: Black Ops version of the map.
- The trucks outside the bunker can be destroyed.
- If the player enters the Help room in the first four rounds, zombies will not spawn behind the wall until round five. This is not the case in Black Ops and Black Ops III. [1][1]
Call of Duty: Black Ops
- The menu image of Nacht der Untoten, along with the other three Call of Duty: World at War maps, is used in the loading screen for Kino der Toten on Call of Duty: Black Ops in the style of a comic strip.
- In the poster for the Rezurrection map pack, Nacht der Untoten is referred to as Night.
- Teaser art for Rezurrection shows a Russian firing dual-wield Makarovs, which is not possible in-game.
Call of Duty: Zombies
- The players can hear their characters speak by getting three ("I'm gonna bust some heads!"), five ("Back in the dirt!") or seven ("Kick ass!") headshots in a row.
- The wall-buy for the sawed-off Double-Barreled Shotgun says just "Sawed-Off".
Call of Duty: Black Ops II
- On the map Green Run, when inside the main building, faint whispering can be heard.
Call of Duty: Black Ops III
- The title in the intro cutscene is changed from "Nazi Zombies" to "Call of Duty Zombies". All references to Nazi's were removed in the Call of Duty: Black Ops III version, with the swastika being replaced with Iron Crosses. This was likely due to the censorship laws in Germany.
References
| ||||||||||||||||||||
| ||||||||||||||||||||
| |||||||||||||||||||||||||||||

