Tag: sourceedit |
Resting sun (talk | contribs) mNo edit summary |
||
| (23 intermediate revisions by 17 users not shown) | |||
| Line 1: | Line 1: | ||
{{game|bo2}} |
{{game|bo2}} |
||
{{Infobox/level |
{{Infobox/level |
||
| ⚫ | |||
| ⚫ | |||
|name = Odysseus |
|name = Odysseus |
||
|image = [[File:Odyseus Menu BOII.png|300px]] |
|image = [[File:Odyseus Menu BOII.png|300px]] |
||
| ⚫ | |||
| ⚫ | |||
|game = ''[[Call of Duty: Black Ops II]]'' |
|game = ''[[Call of Duty: Black Ops II]]'' |
||
| − | |character =[[David "Section" Mason]] |
+ | |character = [[David "Section" Mason]], [[Raul Menendez]] |
| − | |team = [[Joint Special Operations Command|JSOC Counter Terrorist Force]] ( |
+ | |team = [[Joint Special Operations Command|JSOC Counter Terrorist Force]] (as David)<br> [[Cordis Die (faction)|Cordis Die]] (as Menendez) |
|place = [[USS Barack Obama|USS ''Barack Obama'']], Gulf of Mexico |
|place = [[USS Barack Obama|USS ''Barack Obama'']], Gulf of Mexico |
||
| − | |date = June |
+ | |date = June 19th, 2025<ref>https://youtu.be/bVEbYbYd2ZE?t=10m1s Treyarch's Black Ops Timeline</ref> |
|objective = • Interrogate Raul Menendez<br /> |
|objective = • Interrogate Raul Menendez<br /> |
||
• Get your weapons<br /> |
• Get your weapons<br /> |
||
| Line 20: | Line 20: | ||
• Get to hangar bay<br /> |
• Get to hangar bay<br /> |
||
• Find Menendez<br /> |
• Find Menendez<br /> |
||
| − | |enemies =[[Mercs]] (as Section)<br>[[United States Navy]] (as Menendez) |
+ | |enemies = [[Mercs]] (as Section)<br>[[United States Navy]] (as Menendez)<br>[[Javier Salazar]] (as Section after Salazar's betrayal) |
|console = <tt>blackout</tt> |
|console = <tt>blackout</tt> |
||
| − | |multiplayer = [[Carrier (map)|Carrier]] |
+ | |multiplayer = [[Carrier (map)|Carrier]] |
| + | }} |
||
{{Quote|Menendez, successfully captured during the Yemen assault, is brought on board the USS Barack Obama for immediate interrogation.|Mission description}} |
{{Quote|Menendez, successfully captured during the Yemen assault, is brought on board the USS Barack Obama for immediate interrogation.|Mission description}} |
||
| Line 31: | Line 32: | ||
*[[Raul Menendez]] (playable) |
*[[Raul Menendez]] (playable) |
||
*[[Mike Harper]] (Alive/not present) (player-determined) |
*[[Mike Harper]] (Alive/not present) (player-determined) |
||
| − | *[[Javier Salazar]] ( |
+ | *[[Javier Salazar]] (K.I.A./P.O.W) (player-determined) |
*[[Crosby (Black Ops II)|Crosby]] (W.I.A.) |
*[[Crosby (Black Ops II)|Crosby]] (W.I.A.) |
||
| − | *[[Tommy Briggs]] ( |
+ | *[[Tommy Briggs]] (K.I.A./W.I.A) (player-determined) |
*[[David Petraeus]] (cutscene only) |
*[[David Petraeus]] (cutscene only) |
||
| − | *[[Chloe Lynch]] ( |
+ | *[[Chloe Lynch]] (Alive/K.I.A/not present) (player-determined) |
*[[Farid]] (K.I.A./not present) (player-determined) |
*[[Farid]] (K.I.A./not present) (player-determined) |
||
| − | *[[DeFalco]] (Alive/K.I.A |
+ | *[[DeFalco]] (Alive/K.I.A/not present) (player-determined) |
| − | *[[Josefina Menendez]] (Mentioned only) |
||
==Plot== |
==Plot== |
||
| Line 67: | Line 67: | ||
</tabber> |
</tabber> |
||
| − | Menendez will then be given the chance to either kill Briggs by shooting him in the head, or sparing him at Salazar's urging by shooting him in the leg. If the player simply waits and doesn't shoot at all, Salazar will knock him unconcious, essentially leaving Briggs unharmed. He then |
+ | Menendez will then be given the chance to either kill Briggs by shooting him in the head, or sparing him at Salazar's urging by shooting him in the leg. If the player simply waits and doesn't shoot at all, Salazar will knock him unconcious, essentially leaving Briggs unharmed. He then proceeds to upload a virus into the U.S. satellite network that controls the entire U.S. military drone fleet, before the player shifts control back to Mason. |
Mason then enters the server room and ascertains Menendez's goals. If Chloe survived the confrontation, she will awaken and suggest and start working on a method to try and stop Menendez. Briggs, if he survived too, will give Mason some advice before falling back unconscious. It is at this point that [[Mike Harper|Harper]] can turn up, provided he survived the events of the previous mission. |
Mason then enters the server room and ascertains Menendez's goals. If Chloe survived the confrontation, she will awaken and suggest and start working on a method to try and stop Menendez. Briggs, if he survived too, will give Mason some advice before falling back unconscious. It is at this point that [[Mike Harper|Harper]] can turn up, provided he survived the events of the previous mission. |
||
| − | Mason then chases after Menendez, who has escaped the ''Obama'', encountering Salazar, who has surrendered. If Harper is present, he will execute Salazar for his betrayal. If not, |
+ | Mason then chases after Menendez, who has escaped the ''Obama'', encountering Salazar, who has surrendered. If Harper is present, he will execute Salazar for his betrayal. If not, Mason will simply order him off. Mason then makes his way to the deck of the ship, and boards a VTOL. A Merc manages to wound pilot [[Crosby (Black Ops II)|Crosby]], but Section (or [[Mike Harper|Harper]] if he survived Achilles' Veil) will proceed to shoot the Merc and kick him off the VTOL as it is rising and thus concluding the mission. |
==Video Walkthrough== |
==Video Walkthrough== |
||
| + | <gallery> |
||
| − | + | Call of Duty Black Ops II - Odysseus |
|
| + | </gallery> |
||
==Challenges== |
==Challenges== |
||
| Line 136: | Line 138: | ||
Menendez_Outside_BOII.png|Menendez outside of the control room with a Mercs soldier (if DeFalco was previously killed in [[Karma]]). |
Menendez_Outside_BOII.png|Menendez outside of the control room with a Mercs soldier (if DeFalco was previously killed in [[Karma]]). |
||
Overpowered_Again_Odysseus_BOII.png|Raul threatening to kill Briggs. |
Overpowered_Again_Odysseus_BOII.png|Raul threatening to kill Briggs. |
||
| − | Chloe's_Death_BOII.png|Chloe's Death (if DeFalco was killed in [[Karma]]). |
+ | Chloe's_Death_BOII.png|Chloe's Death (if DeFalco was killed in [[Karma]] and if [[Farid]] was killed in [[Achilles' Veil]]). |
Briggs'_Death_BOII.png|Briggs' Death. |
Briggs'_Death_BOII.png|Briggs' Death. |
||
Virus_Upload_BOII.png|Raul uploading the virus. |
Virus_Upload_BOII.png|Raul uploading the virus. |
||
Revision as of 22:06, 27 June 2020
- "Menendez, successfully captured during the Yemen assault, is brought on board the USS Barack Obama for immediate interrogation."
- — Mission description
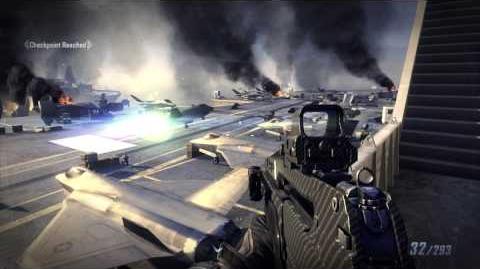
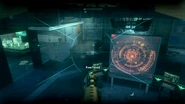
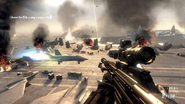
"Odysseus" is the ninth mission in Call of Duty: Black Ops II that takes place on the U.S.S. Barack Obama. After capturing Raul Menendez, the ship comes under attack.
Characters
- David Mason (playable)
- Raul Menendez (playable)
- Mike Harper (Alive/not present) (player-determined)
- Javier Salazar (K.I.A./P.O.W) (player-determined)
- Crosby (W.I.A.)
- Tommy Briggs (K.I.A./W.I.A) (player-determined)
- David Petraeus (cutscene only)
- Chloe Lynch (Alive/K.I.A/not present) (player-determined)
- Farid (K.I.A./not present) (player-determined)
- DeFalco (Alive/K.I.A/not present) (player-determined)
Plot
The level is preceded by a short cutscene on the deck of the Obama between Admiral Briggs and David Petraeus. The direction of this cutscene depends on the player's actions in the Strike Force missions. If they were all successfully completed (with the exception of Second Chance), the two will converse fondly about the recently developed alliance between China and the U.S. If the Strike Force missions were not all completed, then the conversation will be more sour and the Secretary of Defence will order DEFCON 3 due to China now being armed against the U.S. Regardless, the cutscene will end with the arrival of Mason and the captured Menendez.
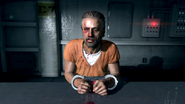
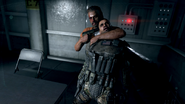
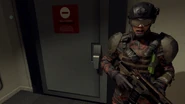
Odyessus opens with Menendez being interrogated by Salazar, before requesting to speak only with Mason, who then enters the interrogation room. The two converse briefly but Briggs interrupts Mason with news that the Obama is under attack by enemy drones. This leads to Menendez holding Salazar hostage and knocking Mason unconscious.
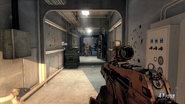
Mason is awoken by Salazar, who informs him that Menendez has escaped. Mason then fights his way throughout the contested Obama, fighting against invading mercenaries and the ship's own automated defense system, whilst communicating with Briggs, who suggests rebooting the ship's system. Salazar moves to Briggs' location, while Mason finds out that rebooting will allow Menendez access to the server room, but is unable to inform Briggs before the Admiral allows the operation to happen. If Harper's alive, he'll inform Section of the Jet Wings assault on the Obama and clear some PMCs using Jet Wings to board the Obama. He'll also take control of auto turrets to assist Section while proceeding to the bridge.
Server Room confrontation
At this point, several potential outcomes can happen as a result of the player's action in the previous missions Karma, Achilles' Veil and potentially Second Chance.
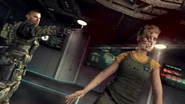
The player shifts control from Mason to Menendez, standing outside the server room with DeFalco, if he survived the events of Karma, or a random mercenary if he did not. Menendez enters the server room and takes Briggs hostage. Salazar, who is revealed to have been working with Menendez then opens fire on the sailors and potentially others depending the player's actions:
If Chloe was rescued in Karma (and DeFalco killed) and Farid survived the events of Achilles' Veil, Salazar will attempt to shoot Chloe, resulting in Farid jumping in front of her, taking the bullet and dying, whilst Chloe is then knocked unconscious by Salazar after trying to tackle him.
If Chloe was rescued in Second Chance and Farid survived Achilles' Veil, DeFalco will knock her unconscious before he is shot by Farid, who is then shot by Salazar.
If Chloe was rescued in Second Chance, but Farid did not survive Achilles' Veil, she will be killed by DeFalco, who slices her throat.
If Chloe was rescued in Karma, but Farid did not survive Achilles' Veil, she will surrender to Salazar, who will then shoot and kill her.
If Chloe was captured in Karma and was not rescued through Second Chance, but Farid survived Achilles' Veil, he will then shoot DeFalco, but is shot in return, resulting in the pair of them dying. This also results in the player unlocking the Showdown achievement.
If neither Chloe nor Farid are present, then Salazar will simply shoot the sailors and move on.
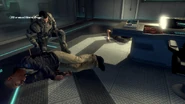
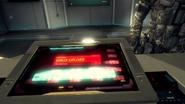
Menendez will then be given the chance to either kill Briggs by shooting him in the head, or sparing him at Salazar's urging by shooting him in the leg. If the player simply waits and doesn't shoot at all, Salazar will knock him unconcious, essentially leaving Briggs unharmed. He then proceeds to upload a virus into the U.S. satellite network that controls the entire U.S. military drone fleet, before the player shifts control back to Mason.
Mason then enters the server room and ascertains Menendez's goals. If Chloe survived the confrontation, she will awaken and suggest and start working on a method to try and stop Menendez. Briggs, if he survived too, will give Mason some advice before falling back unconscious. It is at this point that Harper can turn up, provided he survived the events of the previous mission.
Mason then chases after Menendez, who has escaped the Obama, encountering Salazar, who has surrendered. If Harper is present, he will execute Salazar for his betrayal. If not, Mason will simply order him off. Mason then makes his way to the deck of the ship, and boards a VTOL. A Merc manages to wound pilot Crosby, but Section (or Harper if he survived Achilles' Veil) will proceed to shoot the Merc and kick him off the VTOL as it is rising and thus concluding the mission.
Video Walkthrough
Challenges
Completing 2 challenges unlocks Hardness for the singleplayer loadout.
Completing 5 challenges unlocks the Assault Shield for singleplayer loadout.
- Locate gift in Mason's state room.
- Incapacitate enemy personnel (x20) using Combatant Suppression Knuckles.
- Provide sniper overwatch for SEAL team advance across flight deck.
- Eliminate enemy personnel (x10) with security turret.
- Destroy security turret (x3) while disabled.
- Eliminate airborne enemies (x8) before they land.
- Direct CLAW to eliminate enemy personnel (x5).
- Get to extraction in under 90 seconds.
- Collect intel (x3).
- 100% survivability rating.
Weapon Loadout
Interrogation
Menendez Loadout
Recommended loadout
Found in level
Access Kit
- Combatant Suppression Knuckles are available at the beginning of the mission, just after the interrogation scene. When Salazar opens the weapon room, the player can find a closed case on the nearby console. The knuckles are found inside.
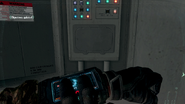
- Control over the security turrets. After Raul Menendez escapes the interrogation room and Section reaches the bridge, there will be a panel that grants access to the room's security turret. This happens again in the ship's pipe room.
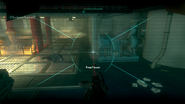
- Upon reaching the flight deck, immediately to the left is a control station which is blocked by a piece of debris. Accessing this station activates a CLAW that the player can use to clear a path to the VTOL.
Gallery
Trivia
- Main article: Odysseus/Trivia
Achievements/Trophies
- Ship Shape (10
 / Bronze Trophy
  ) - Reinforcements on the way.
 - Showdown (15
 / Bronze Trophy
  ) - A duel between rivals.
 - Good Karma (20
 / Bronze Trophy
  ) - Crack the Celerium worm.
 - Sinking Star (20
 / Bronze Trophy
  ) - Interrogate Menendez.
Transcript
- Main article: Odysseus/Transcript
References
- ↑ https://youtu.be/bVEbYbYd2ZE?t=10m1s Treyarch's Black Ops Timeline
| ||||||||

