RichardTofen (talk | contribs) |
No edit summary Tag: Source edit |
||
| (180 intermediate revisions by 51 users not shown) | |||
| Line 1: | Line 1: | ||
| − | {{game|waw|bo|bo2 |
+ | {{game|waw|bo|bo2|codo|bo3|bo4|bocw|vg|mwiii|z}} |
{{for|some versions of Perks in a different form|Persistent Upgrades}} |
{{for|some versions of Perks in a different form|Persistent Upgrades}} |
||
{{for|similar utilities featured in other installments|Exo Upgrade|Candy Perk}} |
{{for|similar utilities featured in other installments|Exo Upgrade|Candy Perk}} |
||
| + | [[File:Perks Feature Card BOCW.png|thumb|right|250px|A couple cans of Perk-a-Colas, specifically [[Quick Revive]], [[Stamin-Up]], and [[Juggernog|Jugger-nog]] in ''[[Call of Duty: Black Ops Cold War]]''.]] |
||
| + | '''Perk-a-Colas''' (known as '''Perk Altars''' in the [[Zombies (Treyarch)/Story#Chaos Story|Chaos Story]] and '''Demonic Fountains''' in ''[[Call of Duty: Vanguard]]'') are a feature that can be found in all [[Zombies (Treyarch)|Zombies]] maps, except for [[Dead Ops Arcade]], [[Bus Depot]], and the ''[[Call of Duty: World at War]]'' version of [[Nacht der Untoten]]. They also appear in ''[[Call of Duty Online|Call of Duty Online's]]'' [[Cyborg Rising]] game mode. Each drink gives the player a perk to help them survive and fend off the zombie hordes. Some are based off of perks found in multiplayer (such as [[Juggernog]] and [[Speed Cola]] mirroring [[Juggernaut (perk)|Juggernaut]] and [[Sleight of Hand]] respectively). Throughout most of their appearances, each Perk-a-Cola had a unique cost, however this changes in ''[[Call of Duty: Black Ops Cold War]]'' where the costs are unified and dependent on how many perks the player has. This cost is increased by 500 points for every perk the player has, with the first perk costing 2500 points and the final perk costing 7000 points. |
||
| + | The Perks spawn on fixed locations on each map, except for [[Shi No Numa]], [[Shangri-La]], [[Moon]], [[Nuketown Zombies]], [[Die Rise]], [[Shadows of Evil]], [[The Giant]], [[Zetsubou No Shima]], and [[Dead of the Night]] where the Perks will randomly spawn at a spawn point, with some exceptions. All Perk-a-Cola machines require that the [[Power Switch|power]] be turned on before they can be used, unless there is no power switch in the map. Exceptions to this are all maps from ''Black Ops'' onwards on solo containing [[Quick Revive]]; [[Mob of the Dead]], where each Perk-a-Cola machine must be individually powered through [[Afterlife]] before it can be used; [[Origins]], where each Perk-a-Cola machine must first be powered by its corresponding [[115 Generator]] before it can be bought; and [[Shadows of Evil]], where the system is the same as in Mob of the Dead, only activating perks individually through the [[Beast]]. Additionally, in [[TranZit]], a Perk-a-Cola machine can be activated prior to turning on the power through use of a [[Turbine (Zombies)|Turbine]]. In the Chaos Story maps, the Perk Altars can be used immediately upon discovery. In ''Black Ops Cold War'', some Perk machines are already being powered by an external generator and thus do not require Power to be turned on. In ''Vanguard'', the Demonic Fountains are not powered by any source of power, and can be drank immediately upon discovery. |
||
| − | '''Perk-a-Colas''' are a feature that can be found in all [[Zombies (mode)|Zombies]] maps, except for [[Dead Ops Arcade]], [[Bus Depot]], and the ''[[Call of Duty: World at War]]'' version of [[Nacht der Untoten]]. They also appear in ''[[Call of Duty Online|Call of Duty Online's]]'' [[Cyborg Rising]] game mode. Each drink gives the player a perk to help them survive and fend off the zombie hordes. Some are based off of perks found in multiplayer (such as [[Juggernog]] and [[Speed Cola]] mirroring [[Juggernaut (perk)|Juggernaut]] and [[Sleight of Hand]] respectively). |
||
| + | In the Aether Story, [[Group 935]] was involved in making a lot of the Perk-a-Colas, particularly Juggernog, Quick Revive, Speed Cola, Double Tap, Deadshot Daiquiri and Mule Kick. According to the timeline, [[Monty (Zombies)|Doctor Monty]] helped Group 935 make the perks, and he himself has a [[Dr Monty's Factory|factory]] that manufactures perks. Upon studying Group 935's elixir research, the Ascension group also develops the perks PhD Flopper and Stamin-Up. In the Chaos Story, the Perk Altars are one of many supernatural objects that appear during a [[Sentinel Artifact|Sentinel Trial]] with the intent of helping those undertaking the trial. In the Dark Aether Saga, the Perk-a-Cola machines were created by [[Kazimir Zykov]] for the use of [[Requiem]]. The Demonic Fountains are supposedly created in the [[Dark Aether]] itself with the use of "demon blood". |
||
| − | The machines spawn on fixed locations on each map, except for [[Shi No Numa]], [[Shangri-La]], [[Moon]], [[Nuketown Zombies]], [[Die Rise]], [[Shadows of Evil]], [[The Giant (Black Ops III)|The Giant]] and [[Zetsubou No Shima]], where the Perk-a-Cola machines will randomly spawn at a spawn point, with some exceptions. All Perk-a-Cola machines require that the [[Power Switch|power]] be turned on before they can be used, unless there is no power switch in the map. Exceptions to this are all maps from ''Black Ops'' onwards on solo containing [[Quick Revive]]; [[Mob of the Dead]], where each Perk-a-Cola machine must be individually powered through [[Afterlife]] before it can be used; [[Origins]], where each Perk-a-Cola machine must first be powered by its corresponding [[115 Generator]] before it can be bought; and [[Shadows of Evil]], where the system is the same as in Mob of the Dead, only activating perks individually through the [[Beast]]. Additionally, in [[TranZit]], a Perk-a-Cola machine can be activated prior to turning on the power through use of a [[Turbine (Zombies)|Turbine]]. |
||
| − | If a player is downed, they will lose all the perks they have purchased and will have to buy them again, unless they have obtained the [[Focusing Stone]], completed the [[Richtofen's Grand Scheme]], completed Maxis' or Richtofen's side of [[Mined Games]], successfully uses [[Tombstone Soda]] or [[Who's Who]], Aftertaste or Near Death Experience [[GobbleGum]], or if a teammate as acquired Near Death Experience or Phoenix Up GobbleGums. |
+ | If a player is downed, they will lose all the perks they have purchased and will have to buy them again, unless they have obtained the [[Focusing Stone]], completed the [[Richtofen's Grand Scheme]], completed Maxis' or Richtofen's side of [[Mined Games]], successfully uses [[Tombstone Soda]] or [[Who's Who]], Aftertaste or Near Death Experience [[GobbleGum]], or if a teammate as acquired Near Death Experience or Phoenix Up GobbleGums. In ''Call of Duty: Black Ops 4'' the player will lose 2 perks, and if in co-op gradually lose the other two depending on how long they have until they bleed out. A similar system is featured in ''Call of Duty: Black Ops Cold War'', where the player will lose one perk if their perk count is three or lower, or they will lose all but three perks if they have four or more. Any remaining perks after the initial perk loss will slowly decay until the player is revived, though this can be changed with the usage of [[Tombstone Soda]] or [[Healing Aura]] at Tier 5. Tombstone is always the first perk to be lost, making it an excellent perk to save more important perks. Quick Revive is the last perk to be lost, with the exception of its Tier 5 ability, which instantly removes the perk. |
==Juggernog== |
==Juggernog== |
||
| − | [[File:Juggernog |
+ | [[File:Juggernog HUD Icon BOCW.png|left|50px|Juggernog Icon]] |
| − | [[File:Juggernog Machine Render.png|thumb|130px|Juggernog]] |
||
| + | [[File:Juggernog Machine Render.png|thumb|200px|Juggernog]] |
||
| + | [[File:Juggernog Transparent BOCW.png|thumb|200px|Juggernog (Cold War)]] |
||
{{quote|When you need some help to get by, something to make you feel strong. Reach for Juggernog tonight, sugar seduction delight! When you need to feel big and strong, reach for Juggernog tonight!|Juggernog Jingle}} |
{{quote|When you need some help to get by, something to make you feel strong. Reach for Juggernog tonight, sugar seduction delight! When you need to feel big and strong, reach for Juggernog tonight!|Juggernog Jingle}} |
||
<center> |
<center> |
||
| − | [[File:VoiceSymbol.png|55px]]<br />[[File:Juggernog Jingle|155px]]<br /><sup>[[File:Quotation.png]] Juggernog Jingle </sup> |
+ | [[File:VoiceSymbol.png|55px]]<br />[[File:Juggernog Jingle WaW.ogg|155px]]<br /><sup>[[File:Quotation.png]] Juggernog Jingle </sup> |
[[File:QuotationReverse.png]]</center> |
[[File:QuotationReverse.png]]</center> |
||
{{Main|Juggernog}} |
{{Main|Juggernog}} |
||
| − | '''[[Juggernog]]''' increases the player's health from 100 to 250. In order for a player to be downed it will therefore require five hits instead of only two (three in ''Black Ops III'') from normal [[zombie]]s, [[Zombie Monkey]]s, [[Shrieker Zombie]]s, the [[Avogadro]] and [[Space Monkey]]s, six instead of three from [[ |
+ | '''[[Juggernog]]''' increases the player's health from 100 to 250. In order for a player to be downed it will therefore require five hits instead of only two (three in ''Black Ops III'') from normal [[zombie]]s, [[Zombie Monkey]]s, [[Shrieker Zombie]]s, the [[Avogadro]] and [[Space Monkey]]s, six instead of three from [[Hellhound]]s and [[Crawler Zombie]]s, eight instead of four from Jumping Jacks, and four instead of two from Brutus. [[George Romero|George A. Romero]] will down the player in two hits without Juggernog and three hits with it. The Panzersoldat has the most powerful melee attack out of all zombies with a devastating 125 damage; the Panzersoldat will down the player in one hit without Juggernog and two hits with Juggernog. It costs 2500 points and is generally considered by many players to be the most important perk to acquire, so one should prioritize purchasing it as soon as possible, regardless of solo or co-op. It is located in: |
*The German side of the starting room in [[Verrückt]] |
*The German side of the starting room in [[Verrückt]] |
||
| Line 31: | Line 34: | ||
*At the base of the top half of the ship in [[Call of the Dead]] |
*At the base of the top half of the ship in [[Call of the Dead]] |
||
*Opposite of the PM63 next to the [[Mud-Pit Maze]], or near the entrance to the cave system in the [[Mine Cart]] area in [[Shangri-La]] (changes place with [[Speed Cola]]) |
*Opposite of the PM63 next to the [[Mud-Pit Maze]], or near the entrance to the cave system in the [[Mine Cart]] area in [[Shangri-La]] (changes place with [[Speed Cola]]) |
||
| − | *Next to the teleporter in the [[No Man's Land]] in [[Moon]] (changes place with Speed Cola each time the area is visited) |
+ | *Next to the teleporter in the [[No Man's Land (disambiguation)|No Man's Land]] in [[Moon]] (changes place with Speed Cola each time the area is visited) |
*Spawns as one of the meteors in random order every five rounds in [[Nuketown Zombies]] |
*Spawns as one of the meteors in random order every five rounds in [[Nuketown Zombies]] |
||
| − | *In the small upstairs building in [[Town]] (in [[Survival]], [[Grief]] |
+ | *In the small upstairs building in [[Town]] (in [[Survival]], [[Grief]] and [[TranZit]]) |
*Top floor in the small house in [[Farm]] |
*Top floor in the small house in [[Farm]] |
||
*In one of the elevators in the skyscraper with access to the roof in [[Die Rise]] (changes place with [[Double Tap Root Beer]], [[Pack-a-Punch Machine]] and [[Mule Kick]]) |
*In one of the elevators in the skyscraper with access to the roof in [[Die Rise]] (changes place with [[Double Tap Root Beer]], [[Pack-a-Punch Machine]] and [[Mule Kick]]) |
||
*Near the [[Gondola]] at docks in [[Mob of the Dead]] |
*Near the [[Gondola]] at docks in [[Mob of the Dead]] |
||
| − | *Behind the debris near where the mystery box first spawns near the alley where the |
+ | *Behind the debris near where the mystery box first spawns near the alley where the [[Arthur]]'s cage is in [[Buried]] (the debris needs to be destroyed by Arthur to reach it) and [[Borough]] |
*By Generator 4, in a small alcove near the Excavation Site in [[Origins]] |
*By Generator 4, in a small alcove near the Excavation Site in [[Origins]] |
||
*Can be obtained as a [[Persistent Upgrades#200%_Health|Persistent Upgrade]] by being hit at least five times without Quick Revive (solo) in TranZit, Die Rise, and Buried |
*Can be obtained as a [[Persistent Upgrades#200%_Health|Persistent Upgrade]] by being hit at least five times without Quick Revive (solo) in TranZit, Die Rise, and Buried |
||
| Line 47: | Line 50: | ||
*In [[Gorod Krovi]] up the stairs that are right outside the first entrance of the Operations Bunker. |
*In [[Gorod Krovi]] up the stairs that are right outside the first entrance of the Operations Bunker. |
||
*In [[Revelations (Map)|Revelations]] in the Nacht Der Untoten area, up the stairs, to the left of the Death Rays. |
*In [[Revelations (Map)|Revelations]] in the Nacht Der Untoten area, up the stairs, to the left of the Death Rays. |
||
| + | *At the Crash Site to the right of the plane wing and to the left of the Mystery Box location on [[Die Maschine]]. |
||
| − | According to the machine, it is made with real eggs. Most of the characters enjoys its taste, the exceptions being [[Nikolai Belinski]] in [[Der Riese]] with a remark about it being the strangest vodka he's ever tasted and the characters in [[Mob of the Dead]]. With the exception of The Giant, all characters in Black Ops III will say that Juggernog does not taste good. It mirrors the [[Juggernaut (perk)|Juggernaut]] multiplayer perk. |
||
| + | **it can also be obtained by completing the Coffin Dance easter egg. |
||
| + | *In the Military Control room beside the stairs leading to Colonels Office in [[Firebase Z]]. |
||
| + | **it can also be obtained by completing the Bunny easter egg. |
||
| + | * Can be obtained through the [[Der Wunderfizz]] in [[Outbreak (Cold War)|Outbreak]]. |
||
| + | ** Can also be obtained through a Distress call or a random loot source. |
||
| + | |||
| + | According to the machine, it is made with real eggs. While most of the characters state that they enjoy the taste, Ultimis [[Nikolai Belinski]] in [[Der Riese]], [[Mob of the Dead]] cast and all of Primis in [[The Giant]] will remark in less positive light about the taste. It mirrors the [[Juggernaut (perk)|Juggernaut]] multiplayer perk. |
||
| + | |||
==Quick Revive== |
==Quick Revive== |
||
| − | [[File: |
+ | [[File:QuickRevive HUD Icon BOCW.png|left|50px|Quick Revive Icon]] |
[[File:Quick Revive Machine Render.png|thumb|150px|Quick Revive]] |
[[File:Quick Revive Machine Render.png|thumb|150px|Quick Revive]] |
||
| + | [[File:QuickRevive DieMaschine BOCW.png|thumb|150px|Quick Revive (Cold War)]] |
||
{{quote|When everything's, been draggin' you down, grabbed you by the hair and pulled you to the ground, if you wanna get up, you need a little revive. If you wanna get up... YOU NEED A LITTLE REVIVE!|Quick Revive Jingle}} |
{{quote|When everything's, been draggin' you down, grabbed you by the hair and pulled you to the ground, if you wanna get up, you need a little revive. If you wanna get up... YOU NEED A LITTLE REVIVE!|Quick Revive Jingle}} |
||
<center> |
<center> |
||
| − | [[File:VoiceSymbol.png|55px]]<br />[[File:Quick Revive |
+ | [[File:VoiceSymbol.png|55px]]<br />[[File:Quick Revive Jingle WaW.ogg|155px]]<br /><sup>[[File:Quotation.png]] Quick Revive Jingle [[File:QuotationReverse.png]]</sup> |
</center> |
</center> |
||
{{Main|Quick Revive}} |
{{Main|Quick Revive}} |
||
| − | '''[[Quick Revive]]''' halves a player's revive time |
+ | '''[[Quick Revive]]''' halves a player's revive time in co-op, and allows the player to revive themselves on solo (in ''[[Call of Duty: Black Ops]],'' ''[[Call of Duty: Black Ops II]]'', and ''[[Call of Duty: Black Ops III]]'') by automatically taking effect when the player goes down, and temporarily granting them that level's starting pistols upgrade, or whatever upgrades available if the player has an appropriate gun that can be used when down during the ten seconds it takes to be revived. It does not require power on Solo, but is only available three times, except for several Black Ops 2 maps. It costs 1500 points in co-op in all games and in solo in ''[[Call of Duty: World at War]]'', and 500 in solo ''Call of Duty: Black Ops'', ''Call of Duty: Black Ops II'', and ''Call of Duty: Black Ops III''. Quick Revive is not featured in [[Mob of the Dead]] due to the addition of the [[Afterlife]]. It is located in: |
*The American side of the starting room in [[Verrückt]] |
*The American side of the starting room in [[Verrückt]] |
||
| − | *Randomly spawns in one of huts in [[Shi No Numa]] |
+ | *Randomly spawns in one of huts in [[Shi No Numa]] (''World at War'' and ''Black Ops'') / In the starting room by the [[Sheiva]] (''Black Ops III'') |
*Near the Teleporter C in [[Der Riese]] |
*Near the Teleporter C in [[Der Riese]] |
||
| − | *In the starting room in [[Kino der Toten]], [["Five"]], [[Ascension]], [[Call of the Dead]], [[Shangri-La]], |
+ | *In the starting room in [[Kino der Toten]], [["Five"]], [[Ascension]], [[Call of the Dead]], [[Shangri-La]], and [[TranZit]] |
*In the [[Receiving Area]] in [[Moon]] |
*In the [[Receiving Area]] in [[Moon]] |
||
| − | *Spawns as one of the meteors in random order every five rounds in |
+ | *Spawns as one of the meteors in random order every five rounds in [[Nuketown Zombies]] (Always on Round 1 next to the moving truck in solo) |
*Top floor in the bar in [[Town]] |
*Top floor in the bar in [[Town]] |
||
*In front of the barn in [[Farm]] |
*In front of the barn in [[Farm]] |
||
*In an elevator near [[M14]] or the [[PDW-57]] in [[Die Rise]] |
*In an elevator near [[M14]] or the [[PDW-57]] in [[Die Rise]] |
||
*Can be seen after falling down from the starting room in [[Buried]] |
*Can be seen after falling down from the starting room in [[Buried]] |
||
| − | *In the church in |
+ | *In the church in [[Borough]]. Where [[Vulture Aid]] is in Buried |
*By Generator 1/spawn area in [[Origins]] |
*By Generator 1/spawn area in [[Origins]] |
||
**It can also be obtained vía [[Der Wunderfizz]]. |
**It can also be obtained vía [[Der Wunderfizz]]. |
||
| Line 84: | Line 96: | ||
**It can also be obtained vía [[Der Wunderfizz]]. |
**It can also be obtained vía [[Der Wunderfizz]]. |
||
*Right in front of the house in the spawn room of [[Revelations (Map)|Revelations]] |
*Right in front of the house in the spawn room of [[Revelations (Map)|Revelations]] |
||
| + | *In the Pond area outside of Nacht der Untoten in [[Die Maschine]]. |
||
| + | *Beside the first door leading to the teleporter in Village in [[Firebase Z]]. |
||
| + | *Can be obtained through the [[Der Wunderfizz]] in [[Outbreak (Cold War)|Outbreak]]. |
||
| + | ** Can also be obtained through a Distress call or a random loot source. |
||
| + | |||
According to characters, it tastes like fish. Every character, aside from [[Takeo Masaki]], greatly dislikes its taste. It partially mirrors [[Second Chance (perk)|Second Chance]], Last Stand and Final Stand. |
According to characters, it tastes like fish. Every character, aside from [[Takeo Masaki]], greatly dislikes its taste. It partially mirrors [[Second Chance (perk)|Second Chance]], Last Stand and Final Stand. |
||
| Line 89: | Line 106: | ||
==Speed Cola== |
==Speed Cola== |
||
| − | [[File: |
+ | [[File:SpeedCola HUD Icon BOCW.png|left|50px|Speed Cola Icon]] |
[[File:Speed Cola Machine Render.png|thumb|152px|Speed Cola]] |
[[File:Speed Cola Machine Render.png|thumb|152px|Speed Cola]] |
||
| + | [[File:SpeedCola DieMaschine BOCW.png|thumb|Speed Cola (Cold War)]] |
||
{{quote|Your hands are slow, your movement's sluggish, your lack of speed, just brings you anguish. Just take a sip, you will move faster. Just try it now! And speed is mastered! Press those lips against the only one that really moves you. Speed Cola speeds up your life!|Speed Cola jingle}} |
{{quote|Your hands are slow, your movement's sluggish, your lack of speed, just brings you anguish. Just take a sip, you will move faster. Just try it now! And speed is mastered! Press those lips against the only one that really moves you. Speed Cola speeds up your life!|Speed Cola jingle}} |
||
<center> |
<center> |
||
| − | [[File:VoiceSymbol.png|55px]]<br />[[File:Speed Cola Jingle|155px]]<br /><sup>[[File:Quotation.png]] Speed Cola Jingle [[File:QuotationReverse.png]]</sup> |
+ | [[File:VoiceSymbol.png|55px]]<br />[[File:Speed Cola Jingle WaW.ogg|155px]]<br /><sup>[[File:Quotation.png]] Speed Cola Jingle [[File:QuotationReverse.png]]</sup> |
</center> |
</center> |
||
{{Main|Speed Cola}} |
{{Main|Speed Cola}} |
||
| − | '''[[Speed Cola]]''' halves reload time and allows barriers to be built 60% faster, although the latter effect is absent in Black Ops 2. It costs 3000 points. It is located in: |
+ | '''[[Speed Cola]]''' halves reload time and allows barriers to be built 60% faster, although the latter effect is absent in Black Ops 2. It costs 3000 points. In Call of Duty Black Ops Cold War, Speed Cola was nerfed, with reload and barrier building speed being dropped to 15%, though it can be upgraded to 30% at tier 3 still making it half the speed as it was previously. It is located in: |
*Next to the kitchen in the American side in [[Verrückt]] |
*Next to the kitchen in the American side in [[Verrückt]] |
||
| − | * |
+ | *Randomly spawns in one of huts in [[Shi No Numa]] |
*Near the [[FG42]] in [[Der Riese]] |
*Near the [[FG42]] in [[Der Riese]] |
||
*In the room with the [[Stakeout]] and [[MP40]] in [[Kino der Toten]] |
*In the room with the [[Stakeout]] and [[MP40]] in [[Kino der Toten]] |
||
| Line 109: | Line 127: | ||
*At the bottom of the [[Ice Slide]] in [[Call of the Dead]] |
*At the bottom of the [[Ice Slide]] in [[Call of the Dead]] |
||
*Opposite of the [[MPL]] next to the [[Mud-Pit Maze]], or near the entrance to the cave system in the [[Mine Cart]] area in [[Shangri-La]] (changes place with [[Juggernog]]) |
*Opposite of the [[MPL]] next to the [[Mud-Pit Maze]], or near the entrance to the cave system in the [[Mine Cart]] area in [[Shangri-La]] (changes place with [[Juggernog]]) |
||
| − | *Next to the teleporter in the |
+ | *Next to the teleporter in the No Man's Land in [[Moon]] (changes place with Juggernog each time the area is visited) |
| − | *Spawns as one of the meteors in random order every five rounds in |
+ | *Spawns as one of the meteors in random order every five rounds in [[Nuketown Zombies]] |
*Inside the [[Diner]] in [[TranZit]] |
*Inside the [[Diner]] in [[TranZit]] |
||
*In the bank in [[Town]] |
*In the bank in [[Town]] |
||
| Line 128: | Line 146: | ||
**It can also be obtained vía [[Der Wunderfizz]]. |
**It can also be obtained vía [[Der Wunderfizz]]. |
||
*By a staircase on the Verruckt section in [[Revelations (Map)|Revelations]] |
*By a staircase on the Verruckt section in [[Revelations (Map)|Revelations]] |
||
| + | *Below the computer station of the Medical Bay in [[Die Maschine]]. |
||
| − | According to [[Edward Richtofen|Richtofen]], the main ingredient may rot the consumer's mind, and according to [[Nikolai Belinski]], it is spicy. Every character enjoys its taste. From a quote in [[Buried]] made by [[Marlton Johnson]] it appears that it does not contain sugar or dairy, but in Origins [[Dempsey]] says that he can't remember the last time he's tasted sugar and that his basic rations are barely edible. It mirrors [[Sleight of Hand]]. |
||
| + | *Next to the door leading to a jump pad in Data Center in [[Firebase Z]]. |
||
| + | *Can be obtained through the [[Der Wunderfizz]] in [[Outbreak (Cold War)|Outbreak]]. |
||
| + | ** Can also be obtained through a Distress call or a random loot source. |
||
| + | |||
| + | According to [[Edward Richtofen|Richtofen]], the main ingredient may rot the consumer's mind, and according to [[Nikolai Belinski]], it is spicy. Every character enjoys its taste. From a quote in [[Buried]] made by [[Marlton Johnson]] it appears that it does not contain sugar or dairy, but in Origins [["Tank" Dempsey]] says that he can't remember the last time he's tasted sugar and that his basic rations are barely edible. It mirrors [[Sleight of Hand]]. |
||
==Double Tap Root Beer== |
==Double Tap Root Beer== |
||
| − | [[File:Double |
+ | [[File:Double tap 1.png|alt=|left|50x50px|Icon]] |
| + | [[File:Double Tap II HUD Icon BO3.png|Icon|50px]] |
||
[[File:Double Tap Root Beer Machine Render.png|thumb|160px|Double Tap Root Beer]] |
[[File:Double Tap Root Beer Machine Render.png|thumb|160px|Double Tap Root Beer]] |
||
| + | [[File:Double Tap II machine BOII.png|thumb|Double Tap II Root Beer]] |
||
{{quote|Cowboys can't shoot slow or they'll end up below. When they need some help, they reach for the Root beer shelf (Ye-haa) Cowboys can't shoot slow, or they'll end up below, when they need some help, they reach for the Root beer shelf. YA THIRSTY PARTNER!?|Double Tap Root Beer Jingle}} |
{{quote|Cowboys can't shoot slow or they'll end up below. When they need some help, they reach for the Root beer shelf (Ye-haa) Cowboys can't shoot slow, or they'll end up below, when they need some help, they reach for the Root beer shelf. YA THIRSTY PARTNER!?|Double Tap Root Beer Jingle}} |
||
| − | <center>[[File:VoiceSymbol.png|55px]] [[File:Double |
+ | <center>[[File:VoiceSymbol.png|55px]] [[File:Double Tap Root Beer Jingle WaW.ogg|155px]]<br /><sup>[[File:Quotation.png]] Double Tap Root Beer Jingle [[File:QuotationReverse.png]]</sup></center> |
{{Main|Double Tap Root Beer}} |
{{Main|Double Tap Root Beer}} |
||
| − | '''[[Double Tap Root Beer]]''' ('''Double Tap II''' in ''[[Call of Duty: Black Ops II]]'' and ''[[Call of Duty: Black Ops III]]'') increases the player's fire rate by 33%, and in Call of Duty: Black Ops II and Call of Duty: Black Ops III also enables bullet weapons to fire two bullets per shot (twice the pellets on shotguns), effectively doubling damage. This can potentially be a double-edged sword; while the player can potentially kill zombies faster, the ammo consumption can be detrimental |
+ | '''[[Double Tap Root Beer]]''' ('''Double Tap II''' in ''[[Call of Duty: Black Ops II]]'' and ''[[Call of Duty: Black Ops III]]'') increases the player's fire rate by 33%, and in Call of Duty: Black Ops II and Call of Duty: Black Ops III also enables bullet weapons to fire two bullets per shot (twice the pellets on shotguns), effectively doubling damage. This can potentially be a double-edged sword; while the player can potentially kill zombies faster, the ammo consumption can be detrimental on weapons with an already high rate of fire and substantially decrease accuracy. It is therefore extremely useful on weapons with low rates of fire, such as pump-action shotguns, bolt-action rifles, [[BAR]], [[HK21]] etc. where the ammo will not drain uncontrollably but the weapon is even more lethal. This perk costs 2000 points. It is located in: |
*The German side next to the [[MP40]] in [[Verrückt]] |
*The German side next to the [[MP40]] in [[Verrückt]] |
||
| − | *Randomly spawns in one of the huts |
+ | *Randomly spawns in one of the huts in [[Shi No Numa]] |
*On the lower side of the bridge in [[Der Riese]] |
*On the lower side of the bridge in [[Der Riese]] |
||
*In the alley in [[Kino der Toten]] |
*In the alley in [[Kino der Toten]] |
||
*Next to the elevator leading to the starting room in the war room in [["Five"]] |
*Next to the elevator leading to the starting room in the war room in [["Five"]] |
||
*Not available in [[Ascension]] |
*Not available in [[Ascension]] |
||
| − | **However it can be obtained through |
+ | **However it can be obtained through the Der Wunderfizz in the ''Black Ops III'' version |
*In the far back end of the ship near the [[Claymore]] in [[Call of the Dead]] |
*In the far back end of the ship near the [[Claymore]] in [[Call of the Dead]] |
||
*In any of the rooms below ground in [[Shangri-La]] (changes place with [[Stamin-Up]], [[PhD Flopper]] and [[Deadshot Daiquiri]]) |
*In any of the rooms below ground in [[Shangri-La]] (changes place with [[Stamin-Up]], [[PhD Flopper]] and [[Deadshot Daiquiri]]) |
||
*In the lower room in the laboratories in [[Moon]] |
*In the lower room in the laboratories in [[Moon]] |
||
| − | *Spawns as one of the meteors in random order every five rounds in |
+ | *Spawns as one of the meteors in random order every five rounds in [[Nuketown Zombies]] |
*Top floor of the barn in [[Farm]] (in both [[Survival]] and [[TranZit]]) |
*Top floor of the barn in [[Farm]] (in both [[Survival]] and [[TranZit]]) |
||
*Next to the [[Mystery Box]] spawn in the alley in [[Town|Town ]] |
*Next to the [[Mystery Box]] spawn in the alley in [[Town|Town ]] |
||
| Line 158: | Line 183: | ||
*Inside the Mansion on [[Buried]] on the right of the entrance. |
*Inside the Mansion on [[Buried]] on the right of the entrance. |
||
*By spending 30000 points in [[Origins]] for a [[Rituals of the Ancients]] challenge. |
*By spending 30000 points in [[Origins]] for a [[Rituals of the Ancients]] challenge. |
||
| − | *On |
+ | *On [[Borough]] (grief mode) located on the left side of the mansion's porch |
| − | * |
+ | *Located in footlight, canals, or waterfront districts in Shadows of Evil (Switches randomly with Speed Cola and Juggernog) |
*In the room next to the Gate Trap in [[Der Eisendrache]]. |
*In the room next to the Gate Trap in [[Der Eisendrache]]. |
||
*Either dropped by a cargo plane at the end of Round 1 or 5 by the [[KRM-262]] or [[L-CAR 9]] or covered in webs behind Lab A or behind Lab B (changes places with Speed Cola, Stamin-Up, and either Quick Revive on solo or Juggernog on co-op) in [[Zetsubou No Shima]]. |
*Either dropped by a cargo plane at the end of Round 1 or 5 by the [[KRM-262]] or [[L-CAR 9]] or covered in webs behind Lab A or behind Lab B (changes places with Speed Cola, Stamin-Up, and either Quick Revive on solo or Juggernog on co-op) in [[Zetsubou No Shima]]. |
||
**It can also be obtained by eating a fruit. |
**It can also be obtained by eating a fruit. |
||
*To the right of the doorway to the Tank Station in [[Gorod Krovi]]. |
*To the right of the doorway to the Tank Station in [[Gorod Krovi]]. |
||
| − | *In Origins, opposite of where Speed cola would be, next to the barrier in Generator 3 in |
+ | *In Origins, opposite of where Speed cola would be, next to the barrier in Generator 3 in [[Revelations (Map)|Revelations]]. |
| − | *It can also be obtained through the |
+ | *It can also be obtained through the [[Der Wunderfizz]] on [[Origins]], [[Der Eisendrache]], [[Gorod Krovi|Gorod Krovi,]] and [[Revelations (Map)|Revelations]]. |
| − | According to [[Tank Dempsey]], it tastes chewy. Every character either comments on its effect(s) or its jingle. It mirrors the perk from multiplayer, [[Double Tap]], and the Rapid Fire attachment. |
+ | According to [["Tank" Dempsey]], it tastes chewy. Every character either comments on its effect(s) or its jingle. It mirrors the perk from multiplayer, [[Double Tap]], and the Rapid Fire attachment. |
==PhD Flopper== |
==PhD Flopper== |
||
| − | [[File:PhD |
+ | [[File:PhD Flopper HD.png|alt=|left|50x50px]] |
[[File:PhD Flopper Machine Render.png|thumb|150px|PhD Flopper]] |
[[File:PhD Flopper Machine Render.png|thumb|150px|PhD Flopper]] |
||
{{Quote|PhD, night-time scene. PhD, the streets are mean. PhD, the things I've seen, the good (PhD), the bad, and the in-between (Flopper). When you dive to prone, you are surely gonna own, PhD (Flopper)! When you dive to prone, it's gonna shake ya to the bone, all the zombies gonna groan, 'cause of PhD! PhD, the feelin's growing strong. PhD, so right that it feels wrong. PhD, like the chorus of a song (Flopper). PhD, not short but not too long. Slap your body to the floor, everybody needs some more, of your lovin', your explosive lovin'. When you dive to prone, it's gonna shake ya to the bone, all the zombies gonna groan, cause of PhD! (Flopper)! Damn straight!|The jingle of the PhD Flopper.}} |
{{Quote|PhD, night-time scene. PhD, the streets are mean. PhD, the things I've seen, the good (PhD), the bad, and the in-between (Flopper). When you dive to prone, you are surely gonna own, PhD (Flopper)! When you dive to prone, it's gonna shake ya to the bone, all the zombies gonna groan, 'cause of PhD! PhD, the feelin's growing strong. PhD, so right that it feels wrong. PhD, like the chorus of a song (Flopper). PhD, not short but not too long. Slap your body to the floor, everybody needs some more, of your lovin', your explosive lovin'. When you dive to prone, it's gonna shake ya to the bone, all the zombies gonna groan, cause of PhD! (Flopper)! Damn straight!|The jingle of the PhD Flopper.}} |
||
<center>[[File:VoiceSymbol.png|55px]] |
<center>[[File:VoiceSymbol.png|55px]] |
||
| + | [[File:PhD Flopper Jingle BOII.ogg|noicon]] |
||
| − | <youtube width="155" height="25">http://www.youtube.com/watch?v=SIhMQa7y5Fw |
||
| − | + | <sup>[[File:Quotation.png]] PhD Flopper Jingle [[File:QuotationReverse.png]]</sup></center> |
|
{{Main|PhD Flopper}} |
{{Main|PhD Flopper}} |
||
| − | '''[[PhD Flopper]]''' grants the player immunity against explosive and falling damage; this includes cooking grenades for too long, as well enabling the player to trigger a powerful blast by [[Dive to Prone|diving to prone]] from a height that would |
+ | '''[[PhD Flopper]]''' grants the player immunity against explosive and falling damage; this includes cooking grenades for too long, as well enabling the player to trigger a powerful blast by [[Dive to Prone|diving to prone]] from a height that would otherwise damage them. PhD Flopper was first introduced in Ascension. This perk is very useful if the player uses explosive weapons a lot, particularly the [[Ray Gun]], [[Scavenger (weapon)|Scavenger]] and [[Pack-a-Punched weapons#M1911 vs. Mustang and Sally|Mustang and Sally]]. Its explosive dive ability can also be used as a stand-alone up to approximately round 20. It costs 2000 points. Its locations are: |
*Near [[Lunar Lander]] Д (nearest to [[MP5K]]) in [[Ascension]] |
*Near [[Lunar Lander]] Д (nearest to [[MP5K]]) in [[Ascension]] |
||
*Under the lighthouse side entrance (near MP5K) in [[Call of the Dead]] |
*Under the lighthouse side entrance (near MP5K) in [[Call of the Dead]] |
||
| Line 189: | Line 214: | ||
* Can be obtained in part as a [[Persistent Upgrades|Persistent Upgrade]] in [[Buried]] by taking a significant amount of fall damage. |
* Can be obtained in part as a [[Persistent Upgrades|Persistent Upgrade]] in [[Buried]] by taking a significant amount of fall damage. |
||
*Can be obtained through [[Der Wunderfizz]] machine in [[Origins]] |
*Can be obtained through [[Der Wunderfizz]] machine in [[Origins]] |
||
| − | According to the characters, it is incredibly chewy (even suggesting it can be chewed before swallowed outright), and according to [[Robert Englund]], it is made of chemicals. |
+ | According to the characters, it is incredibly chewy (even suggesting it can be chewed before swallowed outright), and according to [[Robert Englund]], it is made of chemicals. The characters, such as [[Samantha Maxis]], comment on it tasting of prunes. Takeo Masaki comments how he is allergic to prunes, so this is his least favorite perk. It mirrors [[Lightweight]] Pro, Dead Silence Pro and partially [[Flak Jacket]]. |
==Stamin-Up== |
==Stamin-Up== |
||
| − | [[File: |
+ | [[File:StaminUp HUD Icon BOCW.png|left|50px|StiminUp icon]] |
[[File:Stamin-Up Machine Render.png|thumb|150px|Stamin-Up]] |
[[File:Stamin-Up Machine Render.png|thumb|150px|Stamin-Up]] |
||
| + | [[File:StaminUp BOCW.png|thumb|150px|Stamin-Up (Cold War)]] |
||
"''Stamin-up-Min-Up! (x3) When you need some extra runnin', when you need some extra time, when you want to keep on gunnin', when you like a twist of lime. When you need to keep on moving, when you need a get-away, when you need to keep on groovin', when you need that vitamin K, babe, you know you want me! Let's run the extra mile! I'll open your eyes and I'll make you see! I'll make it worth your while! Stamin-up-Min-Up! Sounds like it's Staaaaamin-Up time! Oh yeah, drink it baby. Drink it!''" |
"''Stamin-up-Min-Up! (x3) When you need some extra runnin', when you need some extra time, when you want to keep on gunnin', when you like a twist of lime. When you need to keep on moving, when you need a get-away, when you need to keep on groovin', when you need that vitamin K, babe, you know you want me! Let's run the extra mile! I'll open your eyes and I'll make you see! I'll make it worth your while! Stamin-up-Min-Up! Sounds like it's Staaaaamin-Up time! Oh yeah, drink it baby. Drink it!''" |
||
| Line 199: | Line 225: | ||
<center> |
<center> |
||
| − | [[File:VoiceSymbol.png|55px]]<br />[[File:Stamin- |
+ | [[File:VoiceSymbol.png|55px]]<br />[[File:Stamin-Up Jingle BOII.ogg|155px]]<br /><sup>[[File:Quotation.png]] Stamin-Up Jingle [[File:QuotationReverse.png]]</sup> |
</center> |
</center> |
||
{{Main|Stamin-Up}} |
{{Main|Stamin-Up}} |
||
| Line 215: | Line 241: | ||
**It can also be obtained vía [[Der Wunderfizz]]. |
**It can also be obtained vía [[Der Wunderfizz]]. |
||
*In the junction near a door leading to the rift in [[Shadows of Evil]] |
*In the junction near a door leading to the rift in [[Shadows of Evil]] |
||
| − | *Hidden in a pile of snow at the left Factory Room in [[ |
+ | *Hidden in a pile of snow at the left Factory Room in [[The Giant]]. In order to obtain it, the player must use the [[Monkey Bomb]] in a teleporter and activate the teleporter once the Monkey Bomb has started. Do this for the other two teleporters and the panel box next to the mainframe will start beeping, hold the use button while aiming at the panel box and the [[Giant Robot]] head will shoot a laser, reflecting off of the Der Riese sign, and it will hit and melt the pile of snow, revealing the perk. (Changes place with Deadshot Daquiri.) |
*In the power room in [[Der Eisendrache]] |
*In the power room in [[Der Eisendrache]] |
||
**It can also be obtained vía [[Der Wunderfizz]]. |
**It can also be obtained vía [[Der Wunderfizz]]. |
||
| Line 223: | Line 249: | ||
**It can also be obtained vía [[Der Wunderfizz]]. |
**It can also be obtained vía [[Der Wunderfizz]]. |
||
*In the Shangri-La spawn room in [[Revelations (Map)|Revelations]] |
*In the Shangri-La spawn room in [[Revelations (Map)|Revelations]] |
||
| + | *In the Bedroom on the second floor of Nacht Der Untoten just outside of the obstruction leading to the Crash Site in [[Die Maschine|Die Maschine.]] |
||
| + | *By the door leading to a jump pad in Mission Control in [[Firebase Z]]. |
||
| + | *Can be obtained through the [[Der Wunderfizz]] in [[Outbreak (Cold War)|Outbreak]]. |
||
| + | ** Can also be obtained through a Distress call or a random loot source. |
||
| + | |||
According to the characters, it has a sour taste. It mirrors [[Marathon]], [[Lightweight]], and [[Extreme Conditioning]]. |
According to the characters, it has a sour taste. It mirrors [[Marathon]], [[Lightweight]], and [[Extreme Conditioning]]. |
||
==Deadshot Daiquiri== |
==Deadshot Daiquiri== |
||
| − | [[File:Deadshot |
+ | [[File:Deadshot Daiquiri HUD Icon BO3.png|alt=|left|50x50px|Icon]] |
| + | [[File:DeadshotDaiquiri HUD Icon BOCW.png|Icon|50px]] |
||
| − | {{quote|To err is human, to forgive is divine. Well I'm not forgiving, and the error ain't mine! They ain't quite human; least they're not to my eyes. One sip of this and I'll give 'em the shock of their lives! Yeah, we got the guns and we got the bombs! In deadshot heaven, we pop skulls for fun! Zero in baby, zero on that spot, the hot spot baby, give it all you got! |
+ | {{quote|To err is human, to forgive is divine. Well I'm not forgiving, and the error ain't mine! They ain't quite human; least they're not to my eyes. One sip of this and I'll give 'em the shock of their lives! Yeah, we got the guns and we got the bombs! In deadshot heaven, we pop skulls for fun! Zero in baby, zero on that spot, the hot spot baby, give it all you got! So quit complainin', about your bad aimin'! Just try, try again for me! With the headshot power of Deadshot Daiquiri!|The jingle of [[Deadshot Daiquiri]].}} |
[[File:Deadshot Daiquiri Machine Render.png|thumb|150px|Deadshot Daiquiri]] |
[[File:Deadshot Daiquiri Machine Render.png|thumb|150px|Deadshot Daiquiri]] |
||
| + | [[File:Deadshot daiquiri transparent BOCW.png|thumb|150px|Deadshot Daiquiri (Cold War)]] |
||
| − | <center> |
||
| + | <center> |
||
| − | [[File:VoiceSymbol.png|55px]] [[File:Deadshot Daiquiri jingle|155px]]<br /><sup>[[File:Quotation.png]] Deadshot Daiquiri Jingle [[File:QuotationReverse.png]]</sup> |
||
| + | [[File:VoiceSymbol.png|55px]] [[File:Deadshot Daiquiri Jingle BOII.ogg|155px]]<br /><sup>[[File:Quotation.png]] Deadshot Daiquiri Jingle [[File:QuotationReverse.png]]</sup> |
||
</center> |
</center> |
||
| − | '''[[Deadshot Daiquiri]]''' increases hip fire accuracy by 35%, reduces recoil on all weapons (most notably on sniper rifles), removes idle sway on sniper rifles, and adjusts the Aim Assist to target the zombies' heads instead of their torsos (except on wonder weapons and explosive weapons). Deadshot Daiquiri was first introduced in Call of the Dead. It costs 1500 points on consoles, and 1000 on PC as the latter does not support auto-aim, giving less benefit of the perk. |
+ | '''[[Deadshot Daiquiri]]''' increases hip fire accuracy by 35%, reduces recoil on all weapons (most notably on sniper rifles), removes idle sway on sniper rifles, and adjusts the Aim Assist to target the zombies' heads instead of their torsos (except on wonder weapons and explosive weapons). Deadshot Daiquiri was first introduced in Call of the Dead. It costs 1500 points on consoles, and 1000 on PC as the latter does not support auto-aim, giving less benefit of the perk. Within ''[[Call of Duty: Black Ops Cold War]]'', '''Deadshot Daiquiri''' was given a visual makeover with a new rock theme with the effects changed to instead entirely remove scope sway on all weaponry rather than just on sniper rifles alongside changing the Aim Assist to target "Critical locations" rather than just heads, as targets may have critical locations that differ from their head. Alongside the changes, Deadshot Daiquiri and all the other perks in ''Call of Duty: Black Ops Cold War'' received the ability to be upgraded via [[Aetherium Crystals]] with three additional tiers possible. <br /> |
| + | The Aetherium Skills are: <br> |
||
| + | *'''Tier I''': Deal 100% extra critical damage if an enemy is at full health. |
||
| + | *'''Tier II''': Increase damage against armor pieces by 50%. |
||
| + | *'''Tier III''': Reduces hip-fire spread. |
||
| + | |||
| + | Deadshot Daiquiri machines can be located in: |
||
*On the lighthouse catwalk next to the [[zipline]] in [[Call of the Dead]] |
*On the lighthouse catwalk next to the [[zipline]] in [[Call of the Dead]] |
||
*In any of the rooms below ground in [[Shangri-La]] (changes place with [[Double Tap Root Beer]], [[Stamin-Up]] and [[PhD Flopper]]) |
*In any of the rooms below ground in [[Shangri-La]] (changes place with [[Double Tap Root Beer]], [[Stamin-Up]] and [[PhD Flopper]]) |
||
| Line 246: | Line 285: | ||
*In the Cafeteria in [[Cell Block]]. |
*In the Cafeteria in [[Cell Block]]. |
||
*It can only be obtained vía [[Der Wunderfizz]] in [[Origins]]. |
*It can only be obtained vía [[Der Wunderfizz]] in [[Origins]]. |
||
| − | *Hidden in a pile of snow at the Left Factory Room in [[ |
+ | *Hidden in a pile of snow at the Left Factory Room in [[The Giant]]. In order to obtain it, the player must use the [[Monkey Bomb]] in a teleporter and activate the teleporter once the Monkey Bomb has started. Do this for the other two teleporters and the panel box next to the mainframe will start beeping, activate the panel box and the [[Giant Robot]] head will shoot a laser, reflecting off of the Der Riese sign and will hit and melt the pile of snow. There is a chance of getting [[Stamin-Up]] instead of this Perk-a-Cola.<ref>https://www.youtube.com/watch?v=1bf0fa6sxdk</ref> |
*It can only be obtained vía [[Der Wunderfizz]] in [[Der Eisendrache]]. |
*It can only be obtained vía [[Der Wunderfizz]] in [[Der Eisendrache]]. |
||
*On [[Zetsubou No Shima]] it can only be obtained through the fruit plant. |
*On [[Zetsubou No Shima]] it can only be obtained through the fruit plant. |
||
*It can only be obtained vía [[Der Wunderfizz]] on [[Gorod Krovi]]. |
*It can only be obtained vía [[Der Wunderfizz]] on [[Gorod Krovi]]. |
||
*It can only be obtained vía [[Der Wunderfizz]] on [[Revelations (Map)|Revelations]]. |
*It can only be obtained vía [[Der Wunderfizz]] on [[Revelations (Map)|Revelations]]. |
||
| + | *On the bottom floor of the Weapons Lab in [[Die Maschine]]. |
||
| − | According to the characters, it has a very sweet taste, even resembling yogurt and strawberries to [[Takeo Masaki]] and [[Samantha Maxis]], respectively. It somewhat mirrors [[Steady Aim]], and Scout, while also resembling the Kick, Breath and Stability proficencies. |
||
| + | *It can only be obtained vía [[Der Wunderfizz]] on [[Firebase Z]]. |
||
| + | *Can be obtained through the [[Der Wunderfizz]] in [[Outbreak (Cold War)|Outbreak]]. |
||
| + | ** Can also be obtained through a Distress call or a random loot source. |
||
| + | |||
| + | According to the characters, it has a very sweet taste, even resembling yogurt and strawberries to [[Takeo Masaki]] and [[Samantha Maxis]], respectively. It somewhat mirrors [[Steady Aim]], and Scout, while also resembling the Kick, Breath and Stability proficiencies. |
||
==Mule Kick== |
==Mule Kick== |
||
| − | [[File: |
+ | [[File:MuleKick HUD Icon BOCW.png|left|50px|Mule Kick icon]] |
| − | [[File:Mule Kick Machine Render.png|thumb| |
+ | [[File:Mule Kick Machine Render.png|thumb|150px|Mule Kick]] |
| + | [[File:Mule Kick Machine Mauer der Toten BOCW.png|thumb|150px|Mule Kick (Cold War)]] |
||
{{Quote|Legend tells us of a man, a hero in a tortured land, where Señoritas lived in fear. Their lonely nights in deep despair, he was EL BURRO! (Hee-Haw, Hee-Haw). Across the fields, across the plains. He ran so fast he dodged the rain. He was El Burro! He hurried in to save the day, gun in hand, and thrice they say. He was strong like a Mule, he was stubborn like a Mule, he even kicked like a Mule, El Burro! (El Burro!). A man of equal soul they say. But some men more, it's just the way! He was El Burro! He was EL BURRO! EL BURRO!|The jingle of Mule Kick, cut from [[Moon]] due to the fact that the machine is in an airless environment. The jingle can be heard in-game at [[Die Rise]]}} |
{{Quote|Legend tells us of a man, a hero in a tortured land, where Señoritas lived in fear. Their lonely nights in deep despair, he was EL BURRO! (Hee-Haw, Hee-Haw). Across the fields, across the plains. He ran so fast he dodged the rain. He was El Burro! He hurried in to save the day, gun in hand, and thrice they say. He was strong like a Mule, he was stubborn like a Mule, he even kicked like a Mule, El Burro! (El Burro!). A man of equal soul they say. But some men more, it's just the way! He was El Burro! He was EL BURRO! EL BURRO!|The jingle of Mule Kick, cut from [[Moon]] due to the fact that the machine is in an airless environment. The jingle can be heard in-game at [[Die Rise]]}} |
||
| − | <center>[[File:VoiceSymbol.png|55px]]<br />[[File: |
+ | <center>[[File:VoiceSymbol.png|55px]]<br />[[File:Call of Duty Zombies - Mule Kick.ogg|155px]]<br /><sup>[[File:Quotation.png]] Mule Kick Jingle [[File:QuotationReverse.png]]</sup> |
<p style="text-align:left;"> |
<p style="text-align:left;"> |
||
</p> |
</p> |
||
| Line 267: | Line 312: | ||
'''[[Mule Kick]]''' grants the player a third weapon slot, so as to be able to carry a third gun (when purchased off the wall or from the [[Mystery Box]]), however, if the player goes down and loses the perk, they will lose the third weapons slot ''and'' whichever weapon was being held in that slot. Mule Kick was first introduced in Moon, but on September 27th, 2011, it was made available on all maps in ''Call of Duty: Black Ops'' (except [[Dead Ops Arcade]]) via a hotfix. It costs 4000 points and is located in: |
'''[[Mule Kick]]''' grants the player a third weapon slot, so as to be able to carry a third gun (when purchased off the wall or from the [[Mystery Box]]), however, if the player goes down and loses the perk, they will lose the third weapons slot ''and'' whichever weapon was being held in that slot. Mule Kick was first introduced in Moon, but on September 27th, 2011, it was made available on all maps in ''Call of Duty: Black Ops'' (except [[Dead Ops Arcade]]) via a hotfix. It costs 4000 points and is located in: |
||
*In the starting room, next to the [[M1A1 Carbine]] in [[Nacht der Untoten]] |
*In the starting room, next to the [[M1A1 Carbine]] in [[Nacht der Untoten]] |
||
| − | *In the first cell block near |
+ | *In the first cell block near Thompson in [[Verrückt]] |
*In the starting room, near [[Gewehr 43]] in [[Shi No Numa]] |
*In the starting room, near [[Gewehr 43]] in [[Shi No Numa]] |
||
| − | *In the melting room near [[Thompson]] in [[Der Riese]] |
+ | *In the melting room near [[Thompson (weapon)|Thompson]] in [[Der Riese]] |
*Near [[PM63]] in [[Kino der Toten]] |
*Near [[PM63]] in [[Kino der Toten]] |
||
*In the war room near [[Juggernog]] in [["Five"]] |
*In the war room near [[Juggernog]] in [["Five"]] |
||
| Line 291: | Line 336: | ||
*In the cafeteria of Mob of the Dead on [[Revelations (Map)|Revelations]] |
*In the cafeteria of Mob of the Dead on [[Revelations (Map)|Revelations]] |
||
**It can also be obtained vía Der Wunderfizz. |
**It can also be obtained vía Der Wunderfizz. |
||
| − | According to [[Tank Dempsey]], it tastes like beer, while according to [[Takeo Masaki]], it tastes like cola, suggesting that it may taste different depending on the individual. It partially mirrors [[Overkill]]. |
+ | According to [["Tank" Dempsey]], it tastes like beer, while according to [[Takeo Masaki]], it tastes like cola, suggesting that it may taste different depending on the individual. It partially mirrors [[Overkill]]. |
==Tombstone Soda== |
==Tombstone Soda== |
||
| − | [[File:Tombstone |
+ | [[File:Tombstone HD.png|alt=|left|50x50px]] |
| − | [[File: |
+ | [[File:Tombstone Soda Icon BOCW.png|left|50px]] |
| + | [[File:Tombstone Machine BOII.png|thumb|150px|Tombstone Soda]] |
||
| − | |||
| + | [[File:Tombstone machine transparent BOCW.png|thumb|150px|Tombstone Soda (Cold War)]] |
||
{{Quote|Rest in pieces, down for the count. No revival, you're bleedin' out. Your epitaph says you died a wealthy man, but you can have it all come back and seal the master plan with Tombstone! It's Tombstone! It's Tombstone! It's Tombstone! Health is drainin' you're on the ropes. Death is waitin', don't lose your hopes. Your will and testament ain't making that much sense, you're listed as the only heir to whom you may bequest. It's Tombstone! It's Tombstone! It's Tombstone! It's Tombstone! Tombstone|The Tombstone Soda jingle.}} |
{{Quote|Rest in pieces, down for the count. No revival, you're bleedin' out. Your epitaph says you died a wealthy man, but you can have it all come back and seal the master plan with Tombstone! It's Tombstone! It's Tombstone! It's Tombstone! Health is drainin' you're on the ropes. Death is waitin', don't lose your hopes. Your will and testament ain't making that much sense, you're listed as the only heir to whom you may bequest. It's Tombstone! It's Tombstone! It's Tombstone! It's Tombstone! Tombstone|The Tombstone Soda jingle.}} |
||
<center> |
<center> |
||
| − | [[File:VoiceSymbol.png|55px]]<br />[[File: |
+ | [[File:VoiceSymbol.png|55px]]<br />[[File:Tombstone Soda Jingle BOII.ogg|155px]]<br /><sup>[[File:Quotation.png]] Tombstone Soda Jingle [[File:QuotationReverse.png]]</sup> |
</center> |
</center> |
||
{{Main|Tombstone Soda}} |
{{Main|Tombstone Soda}} |
||
| Line 308: | Line 354: | ||
*In the alley leading to [[Double Tap Root Beer|Double Tap Root Beer II]] in [[Town]] ([[Survival]] only) |
*In the alley leading to [[Double Tap Root Beer|Double Tap Root Beer II]] in [[Town]] ([[Survival]] only) |
||
*Can be Obtained as a perma-perk variant by getting four perk-a-colas before round four in Buried. |
*Can be Obtained as a perma-perk variant by getting four perk-a-colas before round four in Buried. |
||
| + | *It can only be obtained vía [[Der Wunderfizz]] on [[Die Maschine]]. |
||
| − | Its taste and characters' opinions of it are unknown, although [[Stuhlinger]] mentions that it "Tastes like liquid chalk" using a negative tone. Tombstone is similar to the multiplayer perks [[Second Chance]], [[Last stand|Last Stand]] and to the deathstreak [[Final Stand]]. |
||
| + | *At Helipad in the opposing corner of the teleporter in [[Firebase Z]]. |
||
| + | *Can be obtained through the [[Der Wunderfizz]] in [[Outbreak (Cold War)|Outbreak]]. |
||
| + | ** Can also be obtained through a Distress call or a random loot source. |
||
| + | |||
| + | Its taste and characters' opinions of it are unknown, although [[Samuel J. Stuhlinger|Stuhlinger]] mentions that it "Tastes like liquid chalk" using a negative tone. Tombstone is similar to the multiplayer perks [[Second Chance (perk)|Second Chance]], [[Last Stand]] and to the deathstreak [[Final Stand]]. |
||
==Who's Who== |
==Who's Who== |
||
| − | [[File: |
+ | [[File:WhosWho HD.png|alt=|left|50x50px]] |
[[File:Who's Who machine BOII.png|thumb|Who's Who]] |
[[File:Who's Who machine BOII.png|thumb|Who's Who]] |
||
| Line 317: | Line 368: | ||
<center> |
<center> |
||
| − | [[File:VoiceSymbol.png|55px]]<br />[[File:Who's Who |
+ | [[File:VoiceSymbol.png|55px]]<br />[[File:Who's Who Jingle BOII.ogg|155px]]<br /><sup>[[File:Quotation.png]] Who's Who Jingle [[File:QuotationReverse.png]]</sup> |
</center> |
</center> |
||
{{Main|Who's Who}} |
{{Main|Who's Who}} |
||
| Line 325: | Line 376: | ||
==Electric Cherry== |
==Electric Cherry== |
||
| − | [[File:Electric Cherry HUD |
+ | [[File:Electric Cherry HUD Icon BO3.png|left|50px]] |
[[File:Electric_Cherry_machine_BOII.png|thumb|140px|Electric Cherry]] |
[[File:Electric_Cherry_machine_BOII.png|thumb|140px|Electric Cherry]] |
||
{{Main|Electric Cherry}} |
{{Main|Electric Cherry}} |
||
| − | '''[[Electric Cherry]]''' creates a lethal electric shockwave around the player whenever they reload their weapon or when they go down. It costs 2000 points to purchase. The color for this perk is light blue (although the color of the drink is cherry red), and the icon is a red cherry. The effect of the perks is dependent on the amount of rounds left when reloading. Replacing an almost full magazine will produce a very small blast, whereas replacing an empty magazine will produce the largest possible reload blast. When the player dies, they will create a significantly larger explosion capable of killing several zombies, similarly to the death streaks [[Dead Man's Hand]] and [[Martyrdom |
+ | '''[[Electric Cherry]]''' creates a lethal electric shockwave around the player whenever they reload their weapon or when they go down. It costs 2000 points to purchase. The color for this perk is light blue (although the color of the drink is cherry red), and the icon is a red cherry. The effect of the perks is dependent on the amount of rounds left when reloading. Replacing an almost full magazine will produce a very small blast, whereas replacing an empty magazine will produce the largest possible reload blast. When the player dies, they will create a significantly larger explosion capable of killing several zombies, similarly to the death streaks [[Dead Man's Hand]] and [[Martyrdom]]. The perk is found in [[Mob of the Dead]], [[Origins]], [[Zetsubou No Shima]], [[Der Eisendrache]], and [[Gorod Krovi]]. It has no jingle beyond the unusual chiming noises all perks make in the map. It is very useful in close quarter maps such as Mob of the Dead. Its locations are |
*Is near the above entrance to the Gondola, and is also next to a crafting station in [[Mob of the Dead]]. |
*Is near the above entrance to the Gondola, and is also next to a crafting station in [[Mob of the Dead]]. |
||
*It can only be obtained vía [[Der Wunderfizz]] in [[Origins]]. |
*It can only be obtained vía [[Der Wunderfizz]] in [[Origins]]. |
||
| Line 342: | Line 393: | ||
==Vulture Aid Elixir== |
==Vulture Aid Elixir== |
||
| − | [[File: |
+ | [[File:Vulture Aid icon BOII.png|left|50px]] |
| − | [[File:Vulture Aid |
+ | [[File:Vulture Aid Elixir Machine.png|thumb|140px|Vulture Aid]] |
{{Quote|I was looking for redemption, I was looking for a sign. I was searching for an answer, be it yours or be it mine. I was hoping for some insight, I was looking far too hard. I was searching for the wrong thing, now I don't know where to start! I spy with my little eye, something beginning with V! It's Vulture Aid, and it's not too late! Get Vulture Aid!|Vulture Aid Jingle}} |
{{Quote|I was looking for redemption, I was looking for a sign. I was searching for an answer, be it yours or be it mine. I was hoping for some insight, I was looking far too hard. I was searching for the wrong thing, now I don't know where to start! I spy with my little eye, something beginning with V! It's Vulture Aid, and it's not too late! Get Vulture Aid!|Vulture Aid Jingle}} |
||
| − | <center>[[File:VoiceSymbol.png|55px]] |
+ | <center>[[File:VoiceSymbol.png|55px]]<br />[[File:Vulture Aid jingle BOII.ogg|155px]]<br /><sup>[[File:Quotation.png]] Vulture Aid Jingle [[File:QuotationReverse.png]]</sup></center> |
| − | <youtube width="155" height="25">http://www.youtube.com/watch?v=sq53GYd9IFM</youtube><br /><sup>[[File:Quotation.png]] Vulture Aid Jingle [[File:QuotationReverse.png]]</sup></center> |
||
{{Main|Vulture Aid}} |
{{Main|Vulture Aid}} |
||
| Line 362: | Line 412: | ||
*Certain zombies will release a cloud of green gas upon death, which will cause players standing inside it to be ignored by other zombies. |
*Certain zombies will release a cloud of green gas upon death, which will cause players standing inside it to be ignored by other zombies. |
||
*Zombies' eyes will glow brighter, making them easier to see and distinguish from perk and weapon locations. |
*Zombies' eyes will glow brighter, making them easier to see and distinguish from perk and weapon locations. |
||
| − | The perk is located in the back of the church near the altar in [[Buried]]; where [[Quick Revive]] |
+ | The perk is located in the back of the church near the altar in [[Buried]]; where [[Quick Revive]] is located in [[Borough]]. To enter the church, [[Arthur]] must break down the barrier. The characters often comment on their eyesight after consuming the perk. The perk partially mirrors [[Scavenger (perk)|Scavenger]], [[SitRep]], and [[Engineer]]. |
==Der Wunderfizz== |
==Der Wunderfizz== |
||
| Line 368: | Line 418: | ||
[[File:Der Wunderfizz model BOII.png|150px|thumb|Der Wunderfizz]] |
[[File:Der Wunderfizz model BOII.png|150px|thumb|Der Wunderfizz]] |
||
| + | [[File:DerWunderfizz Transparent BOCW.png|150px|thumb|Der Wunderfizz (Cold War)]] |
||
| − | '''[[Der Wunderfizz]] '''is a machine in [[Origins]], [[Der Eisendrache]], [[Gorod Krovi]], and Revelations that provides the player a random perk bottle for 1500 points. It will relocate itself to one of several locations if used a certain amount of times, similar to the Mystery Box. It requires power to function properly. In order to know its actual location, the player will have to look at the sky and look for a lightning strike. |
||
| + | '''[[Der Wunderfizz]] '''is a machine in [[Origins]], [[Der Eisendrache]], [[Gorod Krovi]], and Revelations that provides the player a random perk bottle for 1500 points. It will relocate itself to one of several locations if used a certain amount of times, similar to the Mystery Box. It requires power to function properly. In order to know its actual location, the player will have to look at the sky and look for a lightning strike. It is also featured in [[Die Maschine]] where it functions a bit differently, as it is only accessible 10 rounds after switching on the power, or if the player is in the dark aether, and allows the player to purchase any perk they choose. In [[Firebase Z]], it is accessible after the player turns power on by activating all of the Aether Reactors, and is can be found across the map as well as at an activated beacon in [[Outbreak (Cold War)|Outbreak]]. |
||
| − | === |
+ | === ''Call of Duty: Black Ops II'' === |
*[[Juggernog]] |
*[[Juggernog]] |
||
*[[Quick Revive]] |
*[[Quick Revive]] |
||
| Line 381: | Line 432: | ||
*[[Electric Cherry]] |
*[[Electric Cherry]] |
||
| − | === |
+ | === ''Call of Duty: Black Ops III'' === |
* [[Juggernog]] |
* [[Juggernog]] |
||
* [[Quick Revive]] |
* [[Quick Revive]] |
||
| Line 389: | Line 440: | ||
* [[Mule Kick]] |
* [[Mule Kick]] |
||
* [[Deadshot Daiquiri]] |
* [[Deadshot Daiquiri]] |
||
| − | *[[Electric Cherry]] |
+ | * [[Electric Cherry]] |
| − | *[[Widow's Wine]] |
+ | * [[Widow's Wine]] |
| + | === ''Call of Duty: Black Ops Cold War'' === |
||
| − | == Widow's Wine == |
||
| − | [[File:Widow's Wine Icon BO3.png|left|20px]] |
||
| + | * [[Juggernog]] |
||
| − | [[File:Widow's Wine model BO3.png|thumb]] |
||
| + | * [[Quick Revive]] |
||
| + | * [[Speed Cola]] |
||
| + | * [[Stamin-Up]] |
||
| + | * [[Deadshot Daiquiri]] |
||
| + | * [[Elemental Pop]] |
||
| + | * [[Tombstone Soda]] <small>([[Season One (Cold War)|S1]])</small> |
||
| + | * [[Mule Kick]] <small>([[Season Four (Cold War)|S4]])</small> |
||
| + | * [[Death Perception]] <small>([[Season Five (Cold War)|S5]])</small> |
||
| + | * [[PhD Slider]] <small>([[Season Six (Cold War)|S6]])</small> |
||
| + | |||
| + | == Widow's Wine == |
||
| + | [[File:Widows Wine HUD Icon BO3.png|alt=|left|50x50px]] |
||
| + | [[File:Widow's Wine model BO3.png|thumb|Widow's Wine]] |
||
{{Quote|When you're feeling kinda lonely, and your spouse is kinda dead, you feel like curling up with someone, in your empty little bed. There is danger around the corner, (CORNER!) And your love life's in decline, (DECLIIINNNEE!) You'll no longer be a martyr, with a little Widow's Wine (x3). With a little Widow's Wine you're mine... with Widow's Wine, you're mine!|Widow's Wine jingle.}} |
{{Quote|When you're feeling kinda lonely, and your spouse is kinda dead, you feel like curling up with someone, in your empty little bed. There is danger around the corner, (CORNER!) And your love life's in decline, (DECLIIINNNEE!) You'll no longer be a martyr, with a little Widow's Wine (x3). With a little Widow's Wine you're mine... with Widow's Wine, you're mine!|Widow's Wine jingle.}} |
||
| − | <center>[[File:VoiceSymbol.png|55px]] |
+ | <center>[[File:VoiceSymbol.png|55px]]<br />[[File: Widow's Wine Jingle.ogg|155px]]<br /><sup>[[File:Quotation.png]] Widow's Wine jingle[[File:QuotationReverse.png]]</sup></center> |
| − | <youtube width="155" height="25">https://www.youtube.com/watch?v=aNAE4NpaTuI</youtube><br /><sup>[[File:Quotation.png]] Widow's Wine jingle[[File:QuotationReverse.png]]</sup><p style="text-align:left;"> |
||
| − | </p> |
||
| − | </center> |
||
{{Main|Widow's Wine}} |
{{Main|Widow's Wine}} |
||
| − | '''[http://callofduty.wikia.com/wiki/Widow%27s_Wine Widow's Wine]''' gives the player a [[Widow's Wine Grenade|special type of grenade]] similar to the [[Semtex]] which creates a spider web when it detonates, as well as increasing melee damage, changing the sound for the default knife, adding a green trail to the default knife, and causing melee attacks to have a random chance to ensnare zombies without consuming grenade ammo. The web slows zombies down momentarily and deals some damage to the zombies, but none to the player. The player will automatically detonate the grenades in their pocket when hurt by zombies, enabling them to make a quick escape when they would normally be cornered. It is important to note that being slapped by zombies will cause the player's [[Widow's Wine Grenade]] ammo to deplete without throwing one, and can also kill the last zombie of a round if they are trying to keep it alive. In this situation, it is preferable to throw all remaining grenades out of map to avoid accidentally detonating them. The player can replenish grenades all at once with a [[Max Ammo]], two at a time by starting a new round similarly to [[Fragmentation Grenades|frag grenades]] and [[Semtex]]es, or one at a time by killing zombies ensnared in a web, which have a random chance of creating a blue drop that looks like the spider on the perk icon. It is possible to melee zombies in an attempt to ensnare them and kill them for additional grenades without consuming any, or when the player is out of them. |
+ | '''[http://callofduty.wikia.com/wiki/Widow%27s_Wine Widow's Wine]''' gives the player a [[Widow's Wine Grenade|special type of grenade]] similar to the [[Semtex]] which creates a spider web when it detonates, as well as increasing melee damage, changing the sound for the default knife, adding a green trail to the default knife, and causing melee attacks to have a random chance to ensnare zombies without consuming grenade ammo. The web slows zombies down momentarily and deals some damage to the zombies, but none to the player. The player will automatically detonate the grenades in their pocket when hurt by zombies, enabling them to make a quick escape when they would normally be cornered. It is important to note that being slapped by zombies will cause the player's [[Widow's Wine Grenade]] ammo to deplete without throwing one, and can also kill the last zombie of a round if they are trying to keep it alive. In this situation, it is preferable to throw all remaining grenades out of map to avoid accidentally detonating them. The player can replenish grenades all at once with a [[Max Ammo]], two at a time by starting a new round similarly to [[Fragmentation Grenades|frag grenades]] and [[Semtex]]es, or one at a time by killing zombies ensnared in a web, which have a random chance of creating a blue drop that looks like the spider on the perk icon. It is possible to melee zombies in an attempt to ensnare them and kill them for additional grenades without consuming any, or when the player is out of them. Its locations are: |
* Located in the rift, next to the portal which leads between the Canal and the Rift in [[Shadows of Evil]]. |
* Located in the rift, next to the portal which leads between the Canal and the Rift in [[Shadows of Evil]]. |
||
* Only obtainable via Der Wunderfizz in [[Der Eisendrache]] |
* Only obtainable via Der Wunderfizz in [[Der Eisendrache]] |
||
| Line 412: | Line 472: | ||
* Where the [[Pack-a-Punch Machine|Pack-a-Punch]] would be in the projector room in [[Kino der Toten]] on [[Revelations (Map)|Revelations]] |
* Where the [[Pack-a-Punch Machine|Pack-a-Punch]] would be in the projector room in [[Kino der Toten]] on [[Revelations (Map)|Revelations]] |
||
| + | == Elemental Pop == |
||
| − | ==Call of Duty: Black Ops 4== |
||
| + | [[File:ElementalPop HUD Icon BOCW.png|left|50px]] |
||
| − | [[File:Perk-a-Cola machines BO4.jpg|right|thumb|All Perk-a-Colas in ''Black Ops 4'']] |
||
| − | ''[[Call of Duty: Black Ops 4]]'' Zombies completely reworks the classic Perk-a-Cola system. |
||
| + | [[File:ElementalPopMachine BOCW.png|thumb|140px|Elemental Pop]] |
||
| − | There are currently four machines within the game corresponding to four distinct purchasing models, beverage names, and so on. They are Brew, Cola, Soda, and Tonic. Each machine starts at a pre-determined area on each map and resides there permanently, but the Perk-a-Cola it holds can be modified in-game in [[Create-a-Class]]. Every machine functions the same except for Tonic which enables the player to get a modifier for the Perk-a-Cola they get from it. This functions as an additional effect. To receive this effect, the player must have all four perks. In addition to the modifier, when all 4 perks are bought, the player's reload will increase. There are currently 14 Perk-a-Colas in-game to chose from. |
||
| + | |||
| + | {{Quote|So many elements for you to consider when you're trying to fix yourself up to be sure you deliver. The kinda hint that no one in your sights can resist. The kinda hint that looks just like a sweet sober kiss. You bring out the best in me it's fundamental (it's fundamental). I'll bring out the best in you it's elemental (it's elemental) (x2). You bring out the best in me. I'll bring out the best in you (x2). |Elemental Pop Jingle}} |
||
| + | <center>[[File:VoiceSymbol.png|55px]]<br />[[File: ElementalPop Jingle BOCW.ogg|155px]]<br /><sup>[[File:Quotation.png]] Elemental Pop jingle[[File:QuotationReverse.png]]</sup></center> |
||
| + | |||
| + | |||
| + | {{Main|Elemental Pop}} |
||
| + | |||
| + | Every bullet fired by the player a small chance to apply a random base Ammo Mod effect at the base tier. Tier 1 enables equipment damage to also have a small chance of applying a random base Ammo Mode effect. Tier 2 reduces Ammo Mod cooldowns by 20%. Tier 3 allows for the Ammo Mod to utilize the Skill Tree level rather than the base level of the mod. Tier 4 increases the elemental damage weakness by 50%. Tier 5 causes electric damage when reloading. Its locations are: |
||
| + | * Next to the Power button inside the Main Power room in [[Die Maschine]]. |
||
| + | * Can be randomly acquired by the [[Random Perk Bottle|Random Perk]] power-up in [[Zombies Onslaught]]. |
||
| + | *It can only be obtained vía [[Der Wunderfizz]] in [[Firebase Z]]. |
||
| + | *Can be obtained through the [[Der Wunderfizz]] in [[Outbreak (Cold War)|Outbreak]]. |
||
| + | ** Can also be obtained through a Distress call or a random loot source. |
||
| + | * In the Power Room, adjacent to the [[Power Switch]] and the [[Milano 821]] in [[Mauer der Toten]]. |
||
| + | * In Burger Town, to the left of the [[FFAR|FFAR 1]] in [[Forsaken]]. |
||
| + | |||
| + | == Death Perception == |
||
| + | [[File:DeathPerception HUD Icon BOCW.png|left|50px]] |
||
| + | |||
| + | [[File:Death Perception Machine BOCW.png|thumb|right|140px|Death Perception]] |
||
| + | |||
| + | {{Quotation|Some say seek and you will find. Just don't let this blow your mind. And when you need precision, we'll enhance your vision. Death Perception! Seek and you will find. Death Perception! Ohh, it just might save your life! Too many undead on your trail. Rest assured you can prevail. And when you need precision, we'll enhance your vision. Death Perception! See what you can find. Death Perception! But it might change your mind. Death Perception! Well it just might save your life!|Death Perception's Jingle}} |
||
| + | <center><sup>[[File:Quotation.png]] Death Perception Jingle [[File:DeathPerceptionJingle BOCW.ogg]]</sup></center> |
||
| + | |||
| + | |||
| + | {{Main|Death Perception}} |
||
| + | |||
| + | Death Perception gives the player an outline of nearby enemies through walls, similar to a thermal optic. Tier 1 increases the update rate of the player's minimap. Tier 2 gives the player danger indicators when enemies are behind them. Tier 3 allows the player to gain 20% more looted Salvage and High-Grade Salvage. Tier 4 increases armor penetration damage by 25%, and Tier 5 allows nearby chests, resources, and item drops to be keylined through walls. |
||
| + | |||
| + | ==PhD Slider== |
||
| + | [[File:PHDSlider HUD Icon BOCW.png|left|50px]] |
||
| + | |||
| + | [[File:PhD Slider Machine BOCW.png|thumb|right|140px|PhD Slider]] |
||
| + | |||
| + | {{Quotation|(PhD) Night-time scene. (PhD) The streets are mean. (PhD) The things I have seen. The good, (PhD) the bad, and the in-between. When you dive to prone, you are surely gonna own, PhD (Flopper)! When you dive to prone, it's gonna shake ya to the bone, all the zombies gonna groan, 'cause of PhD! (PhD) The feelin's growing strong. (PhD) So right that it feels wrong. (PhD) Like the chorus of a song. (PhD) Not short but not too long. Slap your body to the floor, everybody needs some more, of your lovin', your explosive lovin'. When you dive to prone, it's gonna shake ya to the bone, all the zombies gonna groan, cause of PhD! (PhD) (Flopper)! Damn straight.|Jingle<br> [[File:PhD Flopper Jingle BOII.ogg|noicon|center]]}} |
||
| + | |||
| + | |||
| + | |||
| + | {{Main|PhD Slider}} |
||
| + | |||
| + | |||
| + | PhD Slider is the successor to previously introduced Perk-a-Cola PhD Flopper. It will allow the player to generate an explosive burst of [[Aetherium]] energy upon sliding into a zombie, with the size and damage of the burst being dependent on the distance the player slid before impacting a target. Tier 1 gives the player immunity to environmental damage while sliding. Tier 2 gives the player an increased slide duration. Tier 3 gives the player immunity to self-inflicted explosive damage. Tier 4 gives the player increased slide speed, and Tier 5 makes it so that falling from a large height triggers an explosion, with the size and damage increasing the higher the player falls. |
||
| + | ==''Call of Duty: Black Ops 4''== |
||
| + | [[File:Perk-a-Cola_machines_BO4.jpg|thumb|All of the launch Perk-a-Colas within ''Black Ops 4''.]] |
||
| + | ''[[Call of Duty: Black Ops 4]]'' Zombies completely reworks the classic Perk system. |
||
| + | [[File:Black-ops-4-zombies-classes.jpg|thumb|left|250px|The Chaos Story Perk Altars.]] |
||
| + | In the Aether Story maps, there are four machines within the game corresponding to four distinct purchasing models, beverage names, and so on. They are Brew, Cola, Soda, and Tonic. However, in the Chaos Story, there are four unique statues corresponding to four deities from mythologies ([https://en.wikipedia.org/wiki/Danu_(Irish_goddess) Danu] of Irish folklore, [https://en.wikipedia.org/wiki/Ra Ra] of ancient Egypt, [https://en.wikipedia.org/wiki/Zeus Zeus] of classical mythology, and [https://en.wikipedia.org/wiki/Odin Odin] of Norse mythology). Each machine/statue starts at a pre-determined area on each map and resides there permanently, but the Perk it holds can be modified in-game in [[Create-a-Class]]. Every machine/statue functions the same except for the Tonic machine in Aether and the Odin statue in Chaos, which enables the player to get a modifier for the Perk they get from it. This functions as an additional effect. To receive this effect, the player must have all four Perks. In addition to the modifier, when all 4 Perks are bought, the player's reload will increase. There are currently 18 Perks in-game to chose from. |
||
===Locations=== |
===Locations=== |
||
| − | ==== |
+ | ====[[Voyage of Despair]]==== |
| + | *Danu - Located on the bow of the ship in the starting area. |
||
| + | *Ra - Located in the dining hall. |
||
| + | *Zeus - Located in the first class lounge. |
||
| + | *Odin - Located in the engine room. |
||
| + | ====[[IX]]==== |
||
| + | *Danu - Located in the Danu shrine on the top floor. |
||
| + | *Ra - Located in the Ra shrine on the top floor. |
||
| + | *Zeus - Located in the Zeus shrine on the top floor. |
||
| + | *Odin - Located in the Odin shrine on the top floor. |
||
| + | ====[[Blood of the Dead]]==== |
||
*Brew - Found next to the power building for New industries. |
*Brew - Found next to the power building for New industries. |
||
* Cola - Next to the gondolas where Juggernog was located in [[Mob of the Dead]]. |
* Cola - Next to the gondolas where Juggernog was located in [[Mob of the Dead]]. |
||
* Soda - In the room connecting the infirmary to the stairs leading to the roof. |
* Soda - In the room connecting the infirmary to the stairs leading to the roof. |
||
* Tonic - In the warden's office. |
* Tonic - In the warden's office. |
||
| − | ====Classified |
+ | ====[[Classified]]==== |
*Brew - Main offices. |
*Brew - Main offices. |
||
*Cola - Lower level of the War room next to the panic room entrance. |
*Cola - Lower level of the War room next to the panic room entrance. |
||
*Soda - Located in the Laboratories next to the power room. |
*Soda - Located in the Laboratories next to the power room. |
||
*Tonic - Porcine research. |
*Tonic - Porcine research. |
||
| + | ====[[Dead of the Night]]==== |
||
| − | |||
| + | *Danu - Located in the Entrance Hall. |
||
| − | |||
| + | *Ra - Randomizes locations between the Forest Terrace, Wine Cellar, Gardens, and Mausoleum. |
||
| − | ===The Perk-a-Colas=== |
||
| + | *Zeus - Randomizes locations between the Forest Terrace, Wine Cellar, Gardens, and Mausoleum. |
||
| − | ====Timeslip==== |
||
| + | *Odin - Randomizes locations between the Forest Terrace, Wine Cellar, Gardens, and Mausoleum. |
||
| + | ====[[Ancient Evil]]==== |
||
| + | *Danu - Located in the Offering of the Attilids. |
||
| + | *Ra - Located in the Gymnasium Bathhouse. |
||
| + | *Zeus - Located in the Spartan Monument next to the Pegasus. |
||
| + | *Odin - Located on the dark side of the world in the River of Sorrow. |
||
| + | ====[[Alpha Omega]]==== |
||
| + | *Brew - Center street next to the [[GKS]] wall buy. |
||
| + | *Cola - Garage of the Yellow House. |
||
| + | *Soda - Located in the Diner area of the bunker. |
||
| + | *Tonic - The Generator Room inside the bunker. |
||
| + | ====[[Tag der Toten]]==== |
||
| + | *Brew - Across from the bottom of the slide in the Lighthouse. |
||
| + | *Cola - In the hull of the ship, where [[Juggernog]] was originally located. |
||
| + | *Soda - On the opposite end of the ship, across from the Power Room. |
||
| + | *Tonic - In the shower room, located in the Facility. |
||
| + | ===List of Perks found in ''Black Ops 4''=== |
||
| + | ====[[Timeslip]]==== |
||
| + | [[File:Timeslip HUD Icon BO4.png|thumb|left|50px]] |
||
Equipment cooldown rate increased. Mystery Box and Pack-a-Punch weapons appear faster. Greatly reduce Trap and Fast Travel cooldowns. |
Equipment cooldown rate increased. Mystery Box and Pack-a-Punch weapons appear faster. Greatly reduce Trap and Fast Travel cooldowns. |
||
Modifier: Special Weapon charge rate and Elixir cooldown rate are slightly increased. |
Modifier: Special Weapon charge rate and Elixir cooldown rate are slightly increased. |
||
| − | ====Quick Revive==== |
+ | ====[[Quick Revive]]==== |
| + | [[File:QuickRevive HUD Icon BO4.png|thumb|left|50px]] |
||
Shorter delay before regenerating health and increased regeneration rate. Revive players faster. |
Shorter delay before regenerating health and increased regeneration rate. Revive players faster. |
||
Modifier: Gain a movement speed boost after health regeneration starts. Reviving grants both players full health and a movement speed boost. |
Modifier: Gain a movement speed boost after health regeneration starts. Reviving grants both players full health and a movement speed boost. |
||
| − | ====Death Perception==== |
+ | ====[[Death Perception]]==== |
| + | [[File:DeathPerception HUD Icon BO4.png|thumb|left|50px]] |
||
See nearby enemies through walls. Receive screen indicators when enemies approach the player from off screen. |
See nearby enemies through walls. Receive screen indicators when enemies approach the player from off screen. |
||
Modifier: Deal increased damage to special enemy weak points. |
Modifier: Deal increased damage to special enemy weak points. |
||
| − | ====Stamin |
+ | ====[[Stamin-Up]]==== |
| + | [[File:StaminUp HUD Icon BO4.png|thumb|left|50px]] |
||
Increased movement and sprint speed. Stamina regenerates faster. |
Increased movement and sprint speed. Stamina regenerates faster. |
||
Modifier: Unlimited sprint. Player can fire weapons while sprinting. |
Modifier: Unlimited sprint. Player can fire weapons while sprinting. |
||
| − | ==== |
+ | ====[[Ethereal Razor]]==== |
| + | [[File:Ethereal Razor icon BO4.png|thumb|left|50px]] |
||
| + | Offhand melee swipes affect multiple enemies in an arc. Offhand swipe and lunge give bonus damage and restores a small amount of health. |
||
| + | |||
| + | Modifier: Offhand lunge attacks instantly kill basic zombies, do greater bonus damage to others. |
||
| + | |||
| + | ====[[Electric Burst]]==== |
||
| + | [[File:ElectricBurst HUD Icon BO4.png|thumb|left|50px]] |
||
Reloading causes an electric discharge that damages and stuns nearby enemies. The more empty the magazine, the stronger the damage. |
Reloading causes an electric discharge that damages and stuns nearby enemies. The more empty the magazine, the stronger the damage. |
||
Modifier: Reloading stores an electric charge on the player's melee weapon. The next melee attack empower's the weapon to shock enemies for a limited time. The emptier the magazine, the longer the time. |
Modifier: Reloading stores an electric charge on the player's melee weapon. The next melee attack empower's the weapon to shock enemies for a limited time. The emptier the magazine, the longer the time. |
||
| − | ====Dying Wish==== |
+ | ====[[Dying Wish]]==== |
| + | [[File:DyingWish HUD Icon BO4.png|thumb|left|50px]] |
||
Instead of entering a downed state, the player goes Berserk for nine seconds. While Berserk, they are invulnerable and melee damage is greatly increased. Afterwards, the player is left with one health. Cooldown increases with every use. |
Instead of entering a downed state, the player goes Berserk for nine seconds. While Berserk, they are invulnerable and melee damage is greatly increased. Afterwards, the player is left with one health. Cooldown increases with every use. |
||
Modifier: Player will receive full health when no longer Beserk. |
Modifier: Player will receive full health when no longer Beserk. |
||
| − | ====Stone Cold Stronghold==== |
+ | ====[[Stone Cold Stronghold]]==== |
| + | [[File:Stone Cold Stronghold icon BO4.png|thumb|left|50px]] |
||
Standing your ground creates a defensive circle which boosts damage and armor over time while inside. |
Standing your ground creates a defensive circle which boosts damage and armor over time while inside. |
||
Modifier: Enemies killed inside the defensive circle also boost damage and armor. |
Modifier: Enemies killed inside the defensive circle also boost damage and armor. |
||
| − | ====Victorious Tortoise==== |
+ | ====[[Victorious Tortoise]]==== |
| + | [[File:Victorious Tortoise icon BO4.png|thumb|left|50px]] |
||
Shields block damage from all directions when held. When a Shield breaks it will trigger a defensive explosion. |
Shields block damage from all directions when held. When a Shield breaks it will trigger a defensive explosion. |
||
Modifier: Shield bash attacks can knock down Heavy and Mini-Boss enemies. |
Modifier: Shield bash attacks can knock down Heavy and Mini-Boss enemies. |
||
| − | ====Deadshot Dealer==== |
+ | ====[[Deadshot Dealer]]==== |
| + | [[File:Deadshot Dealer icon BO4.png|thumb|left|50px]] |
||
Aiming down sight snaps to the enemy's head. Reduced hip-spread and recoil when firing. Removes scope sway. |
Aiming down sight snaps to the enemy's head. Reduced hip-spread and recoil when firing. Removes scope sway. |
||
| Line 478: | Line 627: | ||
====[[Bandolier Bandit]]==== |
====[[Bandolier Bandit]]==== |
||
| + | [[File:Bandolier Bandit icon BO4.png|thumb|left|50px]] |
||
Carry increased ammo stock. |
Carry increased ammo stock. |
||
Modifier: Refill ammo of stowed weapons from ammo stock over time. |
Modifier: Refill ammo of stowed weapons from ammo stock over time. |
||
| − | ====Winter's Wail==== |
+ | ====[[Winter's Wail]]==== |
| + | [[File:Winter's Wail icon BO4.png|thumb|left|50px]] |
||
When hit by a melee attack generate, a frost explosion that will freeze or slow enemies nearby. Player can store two charges. |
When hit by a melee attack generate, a frost explosion that will freeze or slow enemies nearby. Player can store two charges. |
||
Modifier: Frost explosion triggers a slowing field around the player for a limited time. Store an additional charge. |
Modifier: Frost explosion triggers a slowing field around the player for a limited time. Store an additional charge. |
||
| − | ====Mule Kick==== |
+ | ====[[Mule Kick]]==== |
| + | [[File:Mule Kick icon BO4.png|thumb|left|50px]] |
||
Carry an additional weapon. |
Carry an additional weapon. |
||
Modifier: Switch weapons faster. The additional weapon will be saved and restored on next Mule Kick Perk purchase. |
Modifier: Switch weapons faster. The additional weapon will be saved and restored on next Mule Kick Perk purchase. |
||
| − | ====PhD Slider==== |
+ | ====[[PhD Slider]]==== |
| + | [[File:PhD Slider icon BO4.png|thumb|left|50px]] |
||
| − | Slide to build up a charge. Once fully charged slide into an enemy to trigger an explosion. Gain resistance to explosive damage. It does not prevent all explosive damage only reduce the amount taken. |
||
| + | Slide to build up a charge. Once fully charged slide into an enemy to trigger an explosion. Gain immunity to explosive damage. |
||
Modifier: Improved slide distance. Trap immunity while sliding. Increased explosion damage when entering a slide from greater heights. |
Modifier: Improved slide distance. Trap immunity while sliding. Increased explosion damage when entering a slide from greater heights. |
||
| − | ==== |
+ | ====[[Zombshell]]==== |
| + | [[File:Zombshell icon BO4.png|thumb|left|50px]] |
||
| + | Creates a contamination field that lasts 5-10 seconds, slowing down zombies and increase damage done to them. |
||
| + | |||
| + | Modifier: When the player stands in the field, they will be ignored by zombies. |
||
| + | |||
| + | ====[[Blood Wolf Bite]]==== |
||
| + | [[File:BloodWolfBite HUD Icon BO4.png|thumb|left|50px]] |
||
| + | Call in a Wolf to help the player when dealing a decent amount of damage for 45 seconds. |
||
| + | |||
| + | Modifier: Chances for zombies to drop small amounts of ammo and points, as well as special weapon charge when killed by the Wolf. |
||
| + | ====[[Blaze Phase]]==== |
||
| + | [[File:Blaze Phase Icon BO4.png|thumb|left|50px]] |
||
| + | When the player crouches, they build up a charge. Uncrouching during this will send the user straight forward at extreme speeds, killing or knocking down zombies in the way. |
||
| + | |||
| + | Modifier: Allows the player to charge it into an additional state, which is infinite until hitting a surface. |
||
| + | |||
| + | ====[[Secret Sauce]]==== |
||
| + | [[File:Secret Sauce icon BO4.png|thumb|left|50px]] |
||
Receive a random Perk not assigned to another slot. |
Receive a random Perk not assigned to another slot. |
||
Modifier: The modifier of the random Perk received. |
Modifier: The modifier of the random Perk received. |
||
| + | <br /> |
||
| − | ==Cut Perk-a-Colas== |
||
| + | |||
| + | ===Jingles=== |
||
| + | In the Aether Story maps, the Perk-a-Cola Machines will randomly play from a selection of "Wunderfizz" jingles due to the removal of unique Perk machines. All of the jingles are written by Jack Wall. |
||
| + | {{Quotation|Wunderfizz! The wonderful sodas of Wunderfizz! They make you strong, they make you fast, they give you health, they bring you wealth! The marvelous wonderment, drinking the supplement, Wunderfizz. It'll make you tingle!|50's Girls}} |
||
| + | <center><sup>[[File:Quotation.png]] 50's Girls [[File:QuotationReverse.png]]</sup></center>[[File:50sGirls Jingle BO4.ogg|center]]<br> |
||
| + | |||
| + | {{Quotation|Are you in the know? (I think so, yeah) You wanna go, go, go. (That sounds swell) What'll make you a whiz, ace every quiz, be the boss of your 'biz? (What'll do that?) Wunderfizz. (What'd you say?) Incredible Wunderfizz. (Where - Where can I get some?) Sensational Wunderfizz. (Should it be foaming?) Wonderful Wunder- (*soda cap popping* *gulp* Oh.) Fizz. Yeah, yeah, yeah! Wonderful Wunderfizz! It'll make you tingle!|Are You In The Know?}} |
||
| + | <center><sup>[[File:Quotation.png]] Are You In The Know? [[File:QuotationReverse.png]]</sup></center>[[File:AreYouInTheKnow Jingle BO4.ogg|center]]<br> |
||
| + | |||
| + | {{Quotation|Old man Fringle, well, he sat up in his bed! He said: "Oh my stars, there's an idea in my head!" Don't know how it works, but it'll give you lots of Perks! It's dangerous & glowin', Wunderfizz. You won't know where you're goin', Wunderfizz. Drink yourself plenty of Wunderfizz! Wonderful Wunderfizz! It'll make you tingle! (Wunderfizz is banned in six states.)|Origins}} |
||
| + | <center><sup>[[File:Quotation.png]] Origins [[File:QuotationReverse.png]]</sup></center>[[File:Origins Jingle BO4.ogg|center]]<br> |
||
| + | |||
| + | {{Quotation|Wonderful Wunder, Wunderfizz! (What's that?) Wonderful Wunder, it's Wunderfizz! (What's it called?) And if you don't know what that is, (I don't!) It's Wonderful Wunder, it's Wunderfizz! (Ohoh!) It's a soda pop that'll never stop! And it'll make you say: "Gee whiz, I'm gonna blow my top!" Wonderful Wunder, it's Wunderfizz! (What's that?) Wonderful Wunder, it's Wunderfizz! (What?) Wonderful Wunder, it's Wunderfizz! (One more time!) Wonderful Wunder, it's Wunderfizz! Hey, it's Wonderful Wunderfizz! Wonderful Wunderfizz! It'll make you tingle!|Wonderful Wunderfizz}} |
||
| + | <center><sup>[[File:Quotation.png]] Cut Juggernog Jingle [[File:QuotationReverse.png]]</sup></center>[[File:WonderfulWunderfizz Jingle BO4.ogg|center]] |
||
| + | |||
| + | {{Quotation|Makes your hair full and thick! (Say, that's quite a trick) Makes you muscled & strong! (More right than wrong)'' Your math scores will soar! (Brains galore!) It'll straighten your tie! (My, oh my) It'll improve your IQ (Better than 102?) You'll be a real man... (She's talkin' about me, now) Be more popular at parties! (More un-stupid smarties!) It can clear up your pimples (Uh, those are dimples) Wunderfizz is more than a soda, but nobody really knows what Wunderfizz is... ha ha, Wonderful Wunderfizz Soda! (Wunderfizz may cause anal fissures, sexual side effects in men and women, may cause {{w|Elephantiasis|elephantitis}}{{sic}} of the {{w|uvula}}. Do not operate heavy machinery or consume pork or dairy products immediately after consuming Wunderfizz. And if you're over 50, please consult your physician before enjoying the Wonderful Wunderfizz family of sodas!) Wunderfizz is more than a soda, but nobody really knows what Wunderfizz is... Wonderful Wunderfizz! It'll make you tingle!|Attributes}} |
||
| + | |||
| + | <center><sup>[[File:Quotation.png]] Attributes [[File:QuotationReverse.png]]</sup></center>[[File:Attributes Jingle BO4.ogg|center]] |
||
| + | |||
| + | ===Gallery=== |
||
| + | <gallery> |
||
| + | Zeus Statue BO4.png|The Zeus altar. |
||
| + | Ra Icon BO4.png|The Ra altar. |
||
| + | Danu Icon BO4.png|The Danu altar. |
||
| + | Odin Icon BO4.png|The Odin altar. |
||
| + | Brew Icon BO4.png|The Brew Machine. |
||
| + | Cola Icon BO4.png|The Cola Machine. |
||
| + | Soda Icon BO4.png|The Soda Machine. |
||
| + | Tonic Icon BO4.png|The Tonic Machine. |
||
| + | Brew Machine BO4.png|The Brew Machine in-game. |
||
| + | Cola Machine BO4.png|The Cola Machine in-game. |
||
| + | Soda Machine BO4.png|The Soda Machine in-game. |
||
| + | Tonic Machine BO4.png|The Tonic Machine in-game. |
||
| + | Zeus Statue IX BO4.png|The Zeus altar in-game. |
||
| + | Ra Statue BO4.png|The Ra altar in-game. |
||
| + | Gaia Statue BO4.png|The Danu altar in-game. |
||
| + | Odin Statue BO4.png|The Odin altar in-game. |
||
| + | Odin Altar VOD BO4.png|The Odin altar in the [[Voyage of Despair]] intro. |
||
| + | </gallery> |
||
| + | |||
| + | ==''Call of Duty: Vanguard''== |
||
| + | In ''[[Call of Duty: Vanguard]]'', the Perks are now known as '''Demonic Fountains''', featuring new Perks which are similar to older, previously featured Perk-a-Colas. Perk Fountains feature 4 Tier Upgrades with the base Tier being free and every subsequent Tier having an increased cost: 2500 [[Points (Zombies)|Essences]] for Tier 2, 5000 for Tier 3, and 7500 for Tier 4. When downed, the player will keep the Perk but will lose one Tier. |
||
| + | ===List of Demonic Fountains=== |
||
| + | ====Aethereal Haste==== |
||
| + | {{Main|Aethereal Haste}} |
||
| + | [[File:AetherealHaste VG.png|thumb|right|150px]] |
||
| + | [[File:AetherealHaste HUD Icon CODV.png|thumb|left|50px]] |
||
| + | '''Aethereal Haste''' allows the player to increase their movement speed, similarly to [[Stamin-Up]]. |
||
| + | {{Clear}} |
||
| + | ====Demonic Frenzy==== |
||
| + | {{Main|Demonic Frenzy}} |
||
| + | [[File:DemonicFrenzy HUD Icon CODV.png|thumb|left|50px]] |
||
| + | [[File:DemonicFrenzy VG.png|thumb|right|150px]] |
||
| + | '''Demonic Frenzy''' allows the player to increase their reload speed, similarly to [[Speed Cola]]. |
||
| + | {{Clear}} |
||
| + | ====Diabolical Damage==== |
||
| + | {{Main|Diabolical Damage}} |
||
| + | [[File:DiabolicalDamage HUD Icon CODV.png|thumb|left|50px]] |
||
| + | [[File:DiabolicalDamage VG.png|thumb|right|150px]] |
||
| + | '''Diabolical Damage''' allows the player to increase the damage dealt while getting critical hits on enemies, similarly to [[Deadshot Daiquiri]] in ''Black Ops Cold War''. |
||
| + | {{Clear}} |
||
| + | ====Fiendish Fortitude==== |
||
| + | {{Main|Fiendish Fortitude}} |
||
| + | [[File:FiendishFortitude HUD Icon CODV.png|thumb|left|50px]] |
||
| + | [[File:FiendishFortitude VG.png|thumb|right|150px]] |
||
| + | '''Fiendish Fortitude''' allows the player to increase their health, similarly to [[Juggernog]]. |
||
| + | {{Clear}} |
||
| + | ====Venomous Vigor==== |
||
| + | {{Main|Venomous Vigor}} |
||
| + | [[File:VenomousVigor HUD Icon CODV.png|thumb|left|50px]] |
||
| + | [[File:VenomousVigor VG.png|thumb|right|150px]] |
||
| + | '''Venomous Vigor''' allows the player's health regeneration speed to increase, similarly to [[Quick Revive]] in ''Black Ops 4'' and ''Black Ops Cold War''. |
||
| + | {{Clear}} |
||
| + | |||
| + | == Cut Perk-a-Colas == |
||
===Amm-O-Matic=== |
===Amm-O-Matic=== |
||
{{Main|Amm-O-Matic}} [[File:Amm-o-matic.jpg|thumb|The unused texture for the Amm-O-Matic]] |
{{Main|Amm-O-Matic}} [[File:Amm-o-matic.jpg|thumb|The unused texture for the Amm-O-Matic]] |
||
| Line 511: | Line 757: | ||
{{Main|Candolier}} |
{{Main|Candolier}} |
||
| − | '''[[Candolier]]''' is a Perk-a-Cola machine that was originally set to appear in ''[[Call of Duty: World at War]]'', but was cut from the game. Not much is known about the machine, but it is most likely going to be the same function as the perk [[Bandolier]] from [[Call of Duty 4: Modern Warfare|''Call of Duty 4'']] and ''World at War ''by giving the player the ability to carry extra ammo. Its color is light green, and its symbol is a row of bullets, implying the idea of carrying extra ammo upon the perk being bought and used. |
+ | '''[[Candolier]]''' is a Perk-a-Cola machine that was originally set to appear in ''[[Call of Duty: World at War]]'', but was cut from the game. Not much is known about the machine, but it is most likely going to be the same function as the perk [[Bandolier]] from [[Call of Duty 4: Modern Warfare|''Call of Duty 4'']] and ''World at War ''by giving the player the ability to carry extra ammo. Its color is light green, and its symbol is a row of bullets, implying the idea of carrying extra ammo upon the perk being bought and used. This idea was eventually reimplimented in Call of Duty: Black Ops 4 as the perk Bandolier Bandit. |
===Tufbrew=== |
===Tufbrew=== |
||
| Line 530: | Line 776: | ||
In [[Tranzit]], players can obtain over four perks by buying any three perks, then buying [[Tombstone Soda]]. The player must then down themselves, and "Not Feed the Zombies". After the player respawns, they will have to collect the other two perks they didn't have and buy Tombstone again. The player must be quick, otherwise their tombstone power-up will disappear. On TranZit, this can extremely difficult due to the large distances to travel. The only location to actually obtain enough perks to overcome the limit would be the [[Town]], where [[Juggernog]] and [[Stamin-Up]] are located (provided the player was downed here so that the Tombstone would spawn here as well, and the player has bought all the other perks). |
In [[Tranzit]], players can obtain over four perks by buying any three perks, then buying [[Tombstone Soda]]. The player must then down themselves, and "Not Feed the Zombies". After the player respawns, they will have to collect the other two perks they didn't have and buy Tombstone again. The player must be quick, otherwise their tombstone power-up will disappear. On TranZit, this can extremely difficult due to the large distances to travel. The only location to actually obtain enough perks to overcome the limit would be the [[Town]], where [[Juggernog]] and [[Stamin-Up]] are located (provided the player was downed here so that the Tombstone would spawn here as well, and the player has bought all the other perks). |
||
| − | In [[Die Rise]], killing all of the [[ |
+ | In [[Die Rise]], killing all of the [[Jumping Jack]]s with 100% accuracy (or using the Trample Steam or knifing) during their respective round will award players a free perk bottle. The player is also able to obtain the six perks on the map by completing the [[High Maintenance|easter egg]]. |
| − | In [[Buried]], the player can obtain a free perk bottle by navigating through the |
+ | In [[Buried]], the player can obtain a free perk bottle by navigating through the [[Ghost (Zombies)|Ghost's]] mansion when the lights are on, the lights should come back on after three to five rounds of the previous navigation. The player also acquires all seven perks upon completion of the "[[Mined Games]]" easter egg on Buried. Another way to get another free perk is to get a [[Ballistic Knife]] from the [[Mystery Box]] and then go to the Saloon. Once the player is at the Saloon, the player must then look on the floor for a white line. When they see the white line they must then be behind it and then shoot a knife at the dartboard. If the player's knife lands in the middle, they will get 100 points and then the piano behind them will play. This means that they triggered an Easter Egg. Go to the mansion, and then when you're at the entrance near the hedge maze, go to the opening to the mansion on the other side. Once the player is inside again, they will see the Ghost playing the piano, go to the right side of the piano and you will see an indicator saying to hold the action button and tip 10 points. Once you tip 10 points, you will get a free perk. You'll have 90 seconds to get a free perk using this method, if the player fails to get the perk, he/she must wait the next round and then attempt it again. Also, if the player can't shoot their knife at the dartboard in the middle, they must wait for the next round and try it again. |
In Origins, the player can dig in orange spots if they have the Golden Shovel and are in Zombie Blood. Digging up an orange dig spot rewards the player with an empty perk bottle, which adds an extra perk slot. However, only four empty perk bottles can be acquired through digging through orange bone piles, the last perk should be Double Tap, for it comes free with one of the rewards at the stone chests at Generators 1 and 6. |
In Origins, the player can dig in orange spots if they have the Golden Shovel and are in Zombie Blood. Digging up an orange dig spot rewards the player with an empty perk bottle, which adds an extra perk slot. However, only four empty perk bottles can be acquired through digging through orange bone piles, the last perk should be Double Tap, for it comes free with one of the rewards at the stone chests at Generators 1 and 6. |
||
| − | In ''[[Call of Duty: Black Ops III]]'' [[Zombies ( |
+ | In ''[[Call of Duty: Black Ops III]]'' [[Zombies (Treyarch)|Zombies]], the player can use the Perkaholic, On The House, Soda Fountain, or Unquenchable [[GobbleGum]]s to obtain more than four perks. With Soda Fountain, a player will obtain a free Perk-a-Cola with purchase of another Perk-a-Cola, provided that player does not have all existing Perk-a-Cola effects on the map. More than 4 perks can be obtained on Der Eisendrache, Zetsubou No Shima and Gorod Krovi by completing their respective Easter Eggs. More perks can be also be obtained on Zetsubou No Shima, Gorod Krovi and Revelations through completing challenges. Additionally, perks can be obtained on Zetsubou No Shima by growing fruit plants, or receiving a Blue Perk.Bottle Power-up from a plant. On Revelations, the player can obtain a random Perk by wall-running and jumping across a sequence of walls in the Der Eisendrache area of the map, when anti-gravity has been activated. Each player in the game can do this one time each, allowing every player to receive all 9 perks (providing they also complete the challenge on the map to get their ninth perk), without the use of GobbleGums. |
| + | |||
| + | In ''[[Call of Duty: Black Ops 4]]'', there are 2 ways to get more perks in the map [[IX|IX]]. The first involves completing challenges. After completing a certain amount of challenges, the player will be rewarded with a random Perk Vapor. The second involves gathering a Viking Helmet, Sword, and Mug and placing it on the corpse of a Viking found in the Odin Temple. Afterwards, the player must have [[Wraith Fire]] equipped in order to throw it on the corpse from the Zeus temple. When done correctly, the corpse should remain lit on fire. The player must then wait 7 rounds before a specific power-up drop will spawn which has a resemblance to Odin. When picking up the drop, the player will be automatically given a random perk that will stack on top of the pre-selected 4 perks (and the extra 5th perk from the challenge, if gained). |
||
| + | In ''[[Call of Duty: Black Ops Cold War]]'', however, the Perk-limit is removed entirely, allowing the player to get more than 4 perks by default. This continues in ''[[Call of Duty: Vanguard]]'', where the player can purchase all five Demonic Fountains. |
||
| − | In ''[[Call of Duty: Black Ops 4]]'', there are 2 ways to get more perks in the map [[IX|IX.]] The first involves completing [[File:Odin_powerup.png|thumb|101px|The Odin power up as seen in [[IX]].]]challenges. After completing a certain amount of challenges, the player will be rewarded with a random Perk Vapor. The second involves gathering a Viking Helmet, Sword, and Mug and placing it on the corpse of a Viking found in the Odin Temple. Afterwards, the player must have [[Wraith Fire]] equipped in order to throw it on the corpse from the Zeus temple. When done correctly, the corpse should remain lit on fire. The player must then wait 7 rounds before a specific power-up drop will spawn which has a resembelance to Odin. When picking up the drop, the player will be automatically given a random perk that will stack on top of the pre-selected 4 perks (and the extra 5th perk from the challenge, if gained). |
||
== Trivia == |
== Trivia == |
||
| − | *The original four perk machines are based on old soft drink vending machines. Juggernog resembles [ |
+ | *The original four perk machines are based on old soft drink vending machines. Juggernog resembles [https://grandamericajukebox.com/wp-content/uploads/2015/06/V-44-Outside.jpg an old Coca-Cola machine], Speed Cola resembles [http://www.vintagevending.com/wp-content/uploads/2008/07/vmc81_7up.jpg an old 7up machine], Quick Revive resembles [http://www.vintagevending.com/wp-content/uploads/2008/08/pepsi_cooler_1.jpg an old Pepsi 5 cent machine], and Double Tap resembles [http://cf.collectorsweekly.com/stories/lJP0zIwMfclAZ6H7xEJ.hg.jpg an old 6 cent Coca-Cola machine]. |
| − | *In [[Der Riese]] |
+ | *In [[Der Riese]] and [[Origins]], going prone in front of the perk machines will give the player 25 points, although visually showing as 20 or 30 in ''Call of Duty: World at War'', referring to finding change under vending machines in real life. |
| − | **In [[ |
+ | **In ''[[Call of Duty: Black Ops III]]'' and ''[[Call of Duty: Black Ops Cold War]]'', going prone in front of the perk machines will give 100 points. This feature is known as "Loose Change" in ''Black Ops Cold War''. |
| − | ***On |
+ | ***On [[Shadows of Evil]] this method is harder to perform for Stamin-Up, as the machine is on a raised floor - it does work if the player goes prone before the machine and then crawls into it. |
| + | ***On [[Die Maschine]], it is harder to retrieve the Loose Change from Quick Revive because it is in the water of the Pond area. It will work if the player goes prone from an angle where they are on the wooden platform the perk is sitting on. |
||
| − | ***However, players can get 100 points from Stamin-Up in Revelations. |
||
| − | ***The amount of points that the player will get by going to prone in front of perks is not affected by Double Points. |
+ | ***The amount of points that the player will get by going to prone in front of perks is not affected by Double Points, except for in ''[[Call of Duty: Black Ops Cold War]]'', where the player will receive 200 essence. |
| + | ***Mule Kick doesn't give 100 points on [[Zetsubou No Shima]] due to the machine being partially submerged in water. |
||
| − | ***Two of the machines on The Giant don't work properly when going prone in front of them, the machine near the Trip Mine wallbuy has the points on the right side of the machine, and the machine near Teleporter B has the points on the other side (The back of the machine) - the perk can also be bought from that side. |
||
| − | ***Only four perk machines will give 100 points on Zetsubou No Shima; both of the machines dropped by cargo plane, the one connecting Spawn and Lab A has the points on the right side of the machine, at an awkward angle, the one by the [[ICR-1]] wall-buy behind Lab B, and the one in the main bunker. |
||
*Bumping into a Perk-a-Cola machine will make the sound of glass bottles clacking against each other. |
*Bumping into a Perk-a-Cola machine will make the sound of glass bottles clacking against each other. |
||
*An unusable [[Juggernog]] bottle can be found on the table near the pool in the multiplayer map [[Villa]] in the Wii version of ''[[Call of Duty: Black Ops]]''. |
*An unusable [[Juggernog]] bottle can be found on the table near the pool in the multiplayer map [[Villa]] in the Wii version of ''[[Call of Duty: Black Ops]]''. |
||
*An unusable Juggernog, [[Double Tap]], [[Speed Cola]] and two [[Quick Revive]] bottles can be found in the glass case just in front of the Quick Revive vending machine in [[Kino der Toten]]. |
*An unusable Juggernog, [[Double Tap]], [[Speed Cola]] and two [[Quick Revive]] bottles can be found in the glass case just in front of the Quick Revive vending machine in [[Kino der Toten]]. |
||
| − | *In [[Samantha]]'s destroyed room, there are soda bottles for Juggernog, Quick Revive, Speed Cola and Double Tap Root Beer on the floor. |
+ | *In [[Samantha Maxis]]'s destroyed room, there are soda bottles for Juggernog, Quick Revive, Speed Cola and Double Tap Root Beer on the floor. |
| − | *When drinking in the Wii and iOS version, the bottle does not come close to the character's lips, however in the iOS version, the bottle comes slightly closer. |
+ | *When drinking in the Wii and iOS version, the bottle does not come close to the character's lips, however, in the iOS version, the bottle comes slightly closer. |
| − | *All Perk-a-Cola machines except for [[Mule Kick]] in ''Call of Duty: Black Ops'' have a bloody |
+ | *All Perk-a-Cola machines except for [[Mule Kick]] in ''Call of Duty: Black Ops'' have a bloody handprint on them. |
*In [[Mob of the Dead]], all the Perk-a-Colas and the [[Pack-a-Punch]], with the exception of Electric Cherry, have a strange static effect on them. |
*In [[Mob of the Dead]], all the Perk-a-Colas and the [[Pack-a-Punch]], with the exception of Electric Cherry, have a strange static effect on them. |
||
*In Mob of the Dead, the perk machines play a heavily distorted version of their jingles, resembling a bell toll. |
*In Mob of the Dead, the perk machines play a heavily distorted version of their jingles, resembling a bell toll. |
||
*As of the June 27, 2013 update, all Perk-a-Colas in Mob of the Dead and [[Buried]] have an updated HUD icon. |
*As of the June 27, 2013 update, all Perk-a-Colas in Mob of the Dead and [[Buried]] have an updated HUD icon. |
||
| − | *In the map [[Metro]] |
+ | *In the map [[Metro]], there are unusable perk bottles that can be found beside the yellow hut to the right of the red entrance (where the "A" flag spawns). Inside there is a glass cabinet that holds [[Tombstone]], [[Quick Revive]], [[Deadshot Daiquiri]], [[Stamin-Up]], and Juggernog. |
*In [[Dr Monty's Factory]], various Perk-a-Cola bottles can be seen on conveyor belts in the background. This is most visible on the sides of the screen. |
*In [[Dr Monty's Factory]], various Perk-a-Cola bottles can be seen on conveyor belts in the background. This is most visible on the sides of the screen. |
||
| + | **This is due to the fact that Monty helped create the Perk-a-Colas. |
||
| + | **In an [[Moon|Easter Egg]] on [[Revelations (map)|Revelations]], Dr. Monty will sing an early version of the jingles. To hear these, the player must have both [[Widow's Wine]] and [[Electric Cherry]] and knife one of the original four perk machines. |
||
| + | *Unlike other perk machines, when standing next to the [[Quick Revive]] machine it will sometimes play glitched and garbled parts of its jingle. |
||
| + | *In ''[[Call of Duty: Black Ops 4]]'', the Vapors dispensed by the Perk Altars are stated to smell extremely bad. All characters, with the exception of [[Stanton Shaw]], hate the smells. |
||
| + | **According to [[Scarlett Rhodes]], they smell like paint thinner. |
||
| + | **[[Bruno Delacroix]] states they smell like "gunpowder, dirt, blood, and screams". |
||
| + | *In [[Call of Duty: Black Ops Cold War]], all of the perk machines have changes to them, ranging from minor color and material differences, to a full remake of the machine. |
||
| + | *While inside of the [[Dark Aether]], all of the perk jingles are modified. They sound similar to that of a bent record, with a slowed, deeper sounding jingle. A similar effect is also applied to [[Pack-a-Punch]]. |
||
| + | *In ''[[Call of Duty: Vanguard]]'', the [[Operators]] will comment that the Demonic Fountains taste terrible, and is frequently compared to urine. |
||
| + | **However, the [[Elder God (disambiguation)|Elder Gods]] seem to revere the demon blood of the Fountains as "nectar", according to [[Bellekar]]. |
||
| + | **[[Thomas Bolt]] will oddly, in a quote while drinking a Demonic Fountain, compare the flavor to that of "real maple syrup". |
||
| + | **[[Snoop Dogg]] compares the flavor to "cognac mixed with puke". |
||
| + | *A goblet for the Demonic Fountains first appeared in intel for ''Black Ops Cold War'', where it was dubbed the "Archaic Goblet". |
||
==References== |
==References== |
||
| + | {{Reflist}} |
||
| − | <references /> |
||
{{Zombies mode}} |
{{Zombies mode}} |
||
[[Category:Call of Duty: World at War Zombies Utilities]] |
[[Category:Call of Duty: World at War Zombies Utilities]] |
||
| Line 569: | Line 829: | ||
[[Category:Call of Duty: Black Ops III Zombies Utilities]] |
[[Category:Call of Duty: Black Ops III Zombies Utilities]] |
||
[[Category:Call of Duty: Black Ops 4 Zombies Utilities]] |
[[Category:Call of Duty: Black Ops 4 Zombies Utilities]] |
||
| + | [[Category:Call of Duty: Black Ops Cold War Zombies Utilities]] |
||
| + | [[Category:Call of Duty: Vanguard Zombies Utilities]] |
||
| + | [[Category:Call of Duty: Modern Warfare III Zombies Utilities]] |
||
Latest revision as of 03:39, 18 November 2023
- For some versions of Perks in a different form, see Persistent Upgrades.
- For similar utilities featured in other installments, see Exo Upgrade and Candy Perk.
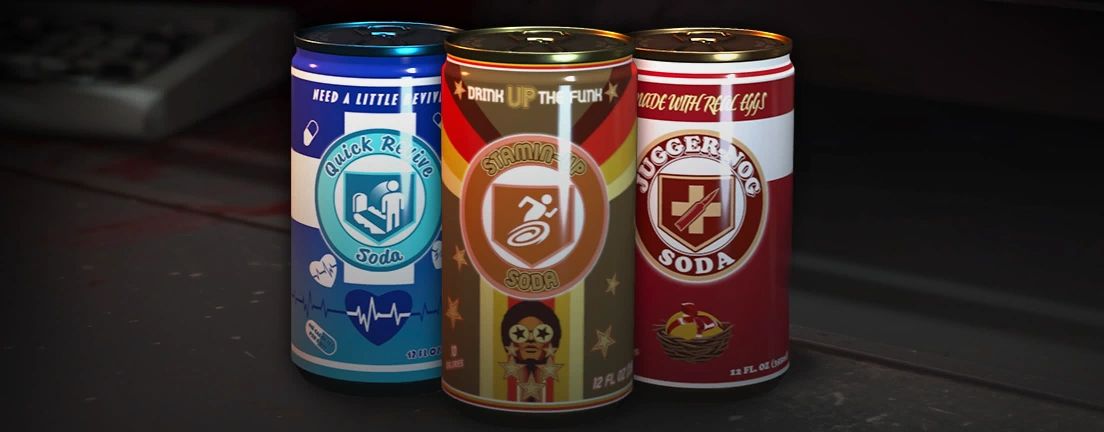

A couple cans of Perk-a-Colas, specifically Quick Revive, Stamin-Up, and Jugger-nog in Call of Duty: Black Ops Cold War.
Perk-a-Colas (known as Perk Altars in the Chaos Story and Demonic Fountains in Call of Duty: Vanguard) are a feature that can be found in all Zombies maps, except for Dead Ops Arcade, Bus Depot, and the Call of Duty: World at War version of Nacht der Untoten. They also appear in Call of Duty Online's Cyborg Rising game mode. Each drink gives the player a perk to help them survive and fend off the zombie hordes. Some are based off of perks found in multiplayer (such as Juggernog and Speed Cola mirroring Juggernaut and Sleight of Hand respectively). Throughout most of their appearances, each Perk-a-Cola had a unique cost, however this changes in Call of Duty: Black Ops Cold War where the costs are unified and dependent on how many perks the player has. This cost is increased by 500 points for every perk the player has, with the first perk costing 2500 points and the final perk costing 7000 points.
The Perks spawn on fixed locations on each map, except for Shi No Numa, Shangri-La, Moon, Nuketown Zombies, Die Rise, Shadows of Evil, The Giant, Zetsubou No Shima, and Dead of the Night where the Perks will randomly spawn at a spawn point, with some exceptions. All Perk-a-Cola machines require that the power be turned on before they can be used, unless there is no power switch in the map. Exceptions to this are all maps from Black Ops onwards on solo containing Quick Revive; Mob of the Dead, where each Perk-a-Cola machine must be individually powered through Afterlife before it can be used; Origins, where each Perk-a-Cola machine must first be powered by its corresponding 115 Generator before it can be bought; and Shadows of Evil, where the system is the same as in Mob of the Dead, only activating perks individually through the Beast. Additionally, in TranZit, a Perk-a-Cola machine can be activated prior to turning on the power through use of a Turbine. In the Chaos Story maps, the Perk Altars can be used immediately upon discovery. In Black Ops Cold War, some Perk machines are already being powered by an external generator and thus do not require Power to be turned on. In Vanguard, the Demonic Fountains are not powered by any source of power, and can be drank immediately upon discovery.
In the Aether Story, Group 935 was involved in making a lot of the Perk-a-Colas, particularly Juggernog, Quick Revive, Speed Cola, Double Tap, Deadshot Daiquiri and Mule Kick. According to the timeline, Doctor Monty helped Group 935 make the perks, and he himself has a factory that manufactures perks. Upon studying Group 935's elixir research, the Ascension group also develops the perks PhD Flopper and Stamin-Up. In the Chaos Story, the Perk Altars are one of many supernatural objects that appear during a Sentinel Trial with the intent of helping those undertaking the trial. In the Dark Aether Saga, the Perk-a-Cola machines were created by Kazimir Zykov for the use of Requiem. The Demonic Fountains are supposedly created in the Dark Aether itself with the use of "demon blood".
If a player is downed, they will lose all the perks they have purchased and will have to buy them again, unless they have obtained the Focusing Stone, completed the Richtofen's Grand Scheme, completed Maxis' or Richtofen's side of Mined Games, successfully uses Tombstone Soda or Who's Who, Aftertaste or Near Death Experience GobbleGum, or if a teammate as acquired Near Death Experience or Phoenix Up GobbleGums. In Call of Duty: Black Ops 4 the player will lose 2 perks, and if in co-op gradually lose the other two depending on how long they have until they bleed out. A similar system is featured in Call of Duty: Black Ops Cold War, where the player will lose one perk if their perk count is three or lower, or they will lose all but three perks if they have four or more. Any remaining perks after the initial perk loss will slowly decay until the player is revived, though this can be changed with the usage of Tombstone Soda or Healing Aura at Tier 5. Tombstone is always the first perk to be lost, making it an excellent perk to save more important perks. Quick Revive is the last perk to be lost, with the exception of its Tier 5 ability, which instantly removes the perk.
Juggernog
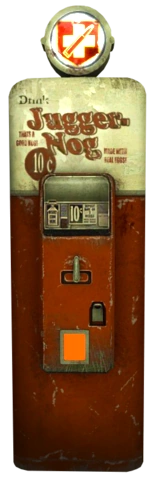
Juggernog
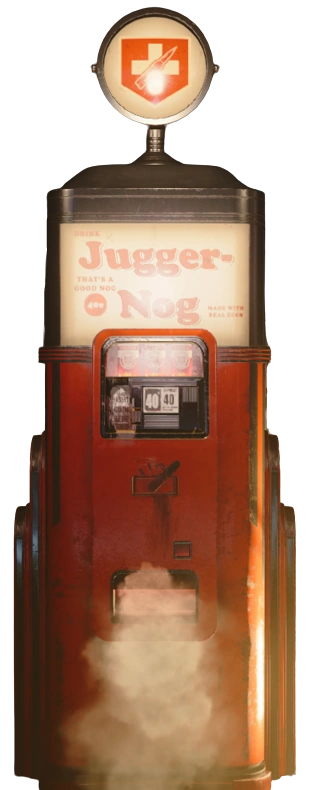
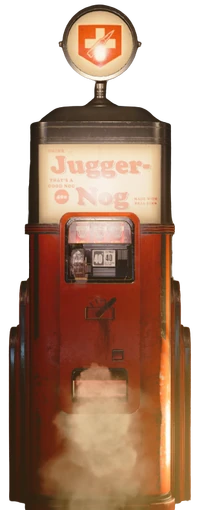
Juggernog (Cold War)
- "When you need some help to get by, something to make you feel strong. Reach for Juggernog tonight, sugar seduction delight! When you need to feel big and strong, reach for Juggernog tonight!"
- — Juggernog Jingle
![]()
![]() Juggernog Jingle
Juggernog Jingle
- Main article: Juggernog
Juggernog increases the player's health from 100 to 250. In order for a player to be downed it will therefore require five hits instead of only two (three in Black Ops III) from normal zombies, Zombie Monkeys, Shrieker Zombies, the Avogadro and Space Monkeys, six instead of three from Hellhounds and Crawler Zombies, eight instead of four from Jumping Jacks, and four instead of two from Brutus. George A. Romero will down the player in two hits without Juggernog and three hits with it. The Panzersoldat has the most powerful melee attack out of all zombies with a devastating 125 damage; the Panzersoldat will down the player in one hit without Juggernog and two hits with Juggernog. It costs 2500 points and is generally considered by many players to be the most important perk to acquire, so one should prioritize purchasing it as soon as possible, regardless of solo or co-op. It is located in:
- The German side of the starting room in Verrückt
- Randomly spawns in one of the huts in Shi No Numa
- Near the Bouncing Betty in Der Riese
- In a small corner next to the Bowie Knife in Kino der Toten
- In the war room next to the panic room in "Five"
- In the PM63 room in Ascension
- At the base of the top half of the ship in Call of the Dead
- Opposite of the PM63 next to the Mud-Pit Maze, or near the entrance to the cave system in the Mine Cart area in Shangri-La (changes place with Speed Cola)
- Next to the teleporter in the No Man's Land in Moon (changes place with Speed Cola each time the area is visited)
- Spawns as one of the meteors in random order every five rounds in Nuketown Zombies
- In the small upstairs building in Town (in Survival, Grief and TranZit)
- Top floor in the small house in Farm
- In one of the elevators in the skyscraper with access to the roof in Die Rise (changes place with Double Tap Root Beer, Pack-a-Punch Machine and Mule Kick)
- Near the Gondola at docks in Mob of the Dead
- Behind the debris near where the mystery box first spawns near the alley where the Arthur's cage is in Buried (the debris needs to be destroyed by Arthur to reach it) and Borough
- By Generator 4, in a small alcove near the Excavation Site in Origins
- Can be obtained as a Persistent Upgrade by being hit at least five times without Quick Revive (solo) in TranZit, Die Rise, and Buried
- Located in footlight, canals, or waterfront districts in Shadows of Evil (Switches randomly with Speed Cola and Double Tap)
- In Der Eisendrache it is located in a small room between the Pyramid Room and the Tram room.
- Can be obtained vía the Der Wunderfizz in Origins, Der Eisendrache, Gorod Krovi and Revelations.
- In Zetsubou No Shima in the main bunker (solo) or switches randomly with Speed Cola, Double Tap Root Beer and Stamin-Up (co-op).
- It can also be obtained by eating a fruit.
- In Gorod Krovi up the stairs that are right outside the first entrance of the Operations Bunker.
- In Revelations in the Nacht Der Untoten area, up the stairs, to the left of the Death Rays.
- At the Crash Site to the right of the plane wing and to the left of the Mystery Box location on Die Maschine.
- it can also be obtained by completing the Coffin Dance easter egg.
- In the Military Control room beside the stairs leading to Colonels Office in Firebase Z.
- it can also be obtained by completing the Bunny easter egg.
- Can be obtained through the Der Wunderfizz in Outbreak.
- Can also be obtained through a Distress call or a random loot source.
According to the machine, it is made with real eggs. While most of the characters state that they enjoy the taste, Ultimis Nikolai Belinski in Der Riese, Mob of the Dead cast and all of Primis in The Giant will remark in less positive light about the taste. It mirrors the Juggernaut multiplayer perk.
Quick Revive
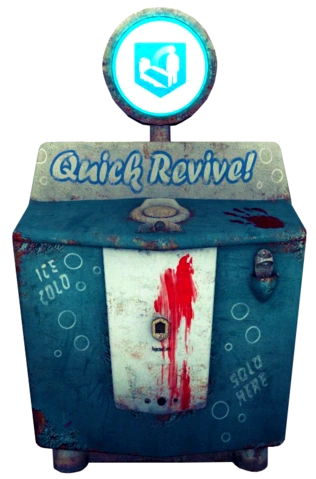
Quick Revive
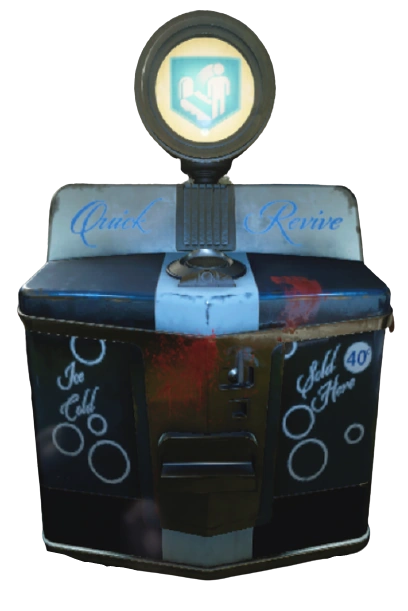
Quick Revive (Cold War)
- "When everything's, been draggin' you down, grabbed you by the hair and pulled you to the ground, if you wanna get up, you need a little revive. If you wanna get up... YOU NEED A LITTLE REVIVE!"
- — Quick Revive Jingle
![]()
![]() Quick Revive Jingle
Quick Revive Jingle ![]()
- Main article: Quick Revive
Quick Revive halves a player's revive time in co-op, and allows the player to revive themselves on solo (in Call of Duty: Black Ops, Call of Duty: Black Ops II, and Call of Duty: Black Ops III) by automatically taking effect when the player goes down, and temporarily granting them that level's starting pistols upgrade, or whatever upgrades available if the player has an appropriate gun that can be used when down during the ten seconds it takes to be revived. It does not require power on Solo, but is only available three times, except for several Black Ops 2 maps. It costs 1500 points in co-op in all games and in solo in Call of Duty: World at War, and 500 in solo Call of Duty: Black Ops, Call of Duty: Black Ops II, and Call of Duty: Black Ops III. Quick Revive is not featured in Mob of the Dead due to the addition of the Afterlife. It is located in:
- The American side of the starting room in Verrückt
- Randomly spawns in one of huts in Shi No Numa (World at War and Black Ops) / In the starting room by the Sheiva (Black Ops III)
- Near the Teleporter C in Der Riese
- In the starting room in Kino der Toten, "Five", Ascension, Call of the Dead, Shangri-La, and TranZit
- In the Receiving Area in Moon
- Spawns as one of the meteors in random order every five rounds in Nuketown Zombies (Always on Round 1 next to the moving truck in solo)
- Top floor in the bar in Town
- In front of the barn in Farm
- In an elevator near M14 or the PDW-57 in Die Rise
- Can be seen after falling down from the starting room in Buried
- In the church in Borough. Where Vulture Aid is in Buried
- By Generator 1/spawn area in Origins
- It can also be obtained vía Der Wunderfizz.
- Can be obtained as a perma-perk (co-op version) from reviving players several times without failing in TranZit, Die Rise and Buried
- In the starting room in Shadows of Evil
- In the upper section of the Tram room in Der Eisendrache
- It can also be obtained vía Der Wunderfizz.
- Dropped from a cargo plane at the end of the first round near either KRM-262 or L-CAR 9 (solo) or in the main bunker (co-op) in Zetsubou No Shima.
- It can also be obtained by eating a fruit.
- At the upper left side of Belinski Square, right next to the first door in Gorod Krovi.
- It can also be obtained vía Der Wunderfizz.
- Right in front of the house in the spawn room of Revelations
- In the Pond area outside of Nacht der Untoten in Die Maschine.
- Beside the first door leading to the teleporter in Village in Firebase Z.
- Can be obtained through the Der Wunderfizz in Outbreak.
- Can also be obtained through a Distress call or a random loot source.
According to characters, it tastes like fish. Every character, aside from Takeo Masaki, greatly dislikes its taste. It partially mirrors Second Chance, Last Stand and Final Stand.
Speed Cola
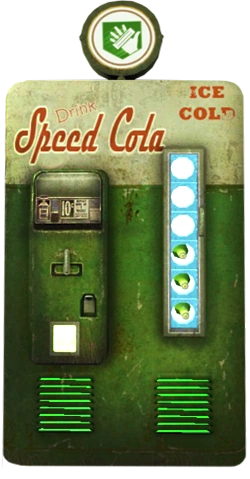
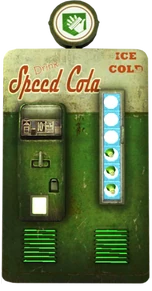
Speed Cola
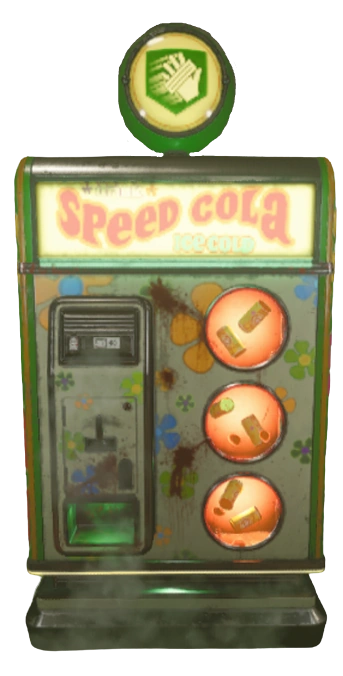

Speed Cola (Cold War)
- "Your hands are slow, your movement's sluggish, your lack of speed, just brings you anguish. Just take a sip, you will move faster. Just try it now! And speed is mastered! Press those lips against the only one that really moves you. Speed Cola speeds up your life!"
- — Speed Cola jingle
![]()
![]() Speed Cola Jingle
Speed Cola Jingle ![]()
- Main article: Speed Cola
Speed Cola halves reload time and allows barriers to be built 60% faster, although the latter effect is absent in Black Ops 2. It costs 3000 points. In Call of Duty Black Ops Cold War, Speed Cola was nerfed, with reload and barrier building speed being dropped to 15%, though it can be upgraded to 30% at tier 3 still making it half the speed as it was previously. It is located in:
- Next to the kitchen in the American side in Verrückt
- Randomly spawns in one of huts in Shi No Numa
- Near the FG42 in Der Riese
- In the room with the Stakeout and MP40 in Kino der Toten
- In the hallway leading to the elevator to other floors in the starting floor in "Five"
- In a small room leading to Lunar Lander Б (nearest to the Pack-a-Punch Machine) in Ascension
- At the bottom of the Ice Slide in Call of the Dead
- Opposite of the MPL next to the Mud-Pit Maze, or near the entrance to the cave system in the Mine Cart area in Shangri-La (changes place with Juggernog)
- Next to the teleporter in the No Man's Land in Moon (changes place with Juggernog each time the area is visited)
- Spawns as one of the meteors in random order every five rounds in Nuketown Zombies
- Inside the Diner in TranZit
- In the bank in Town
- Bottom floor in the small house in Farm
- In one of the elevators in the starting skyscraper in Die Rise (changes place with Who's Who)
- In the corner of the Warden's Office near the table in Mob of the Dead and Cell Block
- On the second floor of the Courthouse in Buried
- On the second floor of the General Store in Borough
- Next to Generator 3 in Origins
- It can also be obtained vía Der Wunderfizz.
- Located in footlight, canals, or waterfront districts in Shadows of Evil (switches randomly with Juggernog and Double Tap).
- In the computers room in Der Eisendrache
- It can also be obtained vía Der Wunderfizz.
- Either dropped by a cargo plane at the end of Round 1 or 5 by the KRM-262 or L-CAR 9 or covered in webs behind Lab A or behind Lab B (changes places with Double Tap Root Beer, Stamin-Up, and either Quick Revive on solo or Juggernog on co-op) in Zetsubou No Shima.
- It can also be obtained by eating a fruit.
- On the balcony of the Supply Depot in Gorod Krovi.
- It can also be obtained vía Der Wunderfizz.
- By a staircase on the Verruckt section in Revelations
- Below the computer station of the Medical Bay in Die Maschine.
- Next to the door leading to a jump pad in Data Center in Firebase Z.
- Can be obtained through the Der Wunderfizz in Outbreak.
- Can also be obtained through a Distress call or a random loot source.
According to Richtofen, the main ingredient may rot the consumer's mind, and according to Nikolai Belinski, it is spicy. Every character enjoys its taste. From a quote in Buried made by Marlton Johnson it appears that it does not contain sugar or dairy, but in Origins "Tank" Dempsey says that he can't remember the last time he's tasted sugar and that his basic rations are barely edible. It mirrors Sleight of Hand.
Double Tap Root Beer

![]()
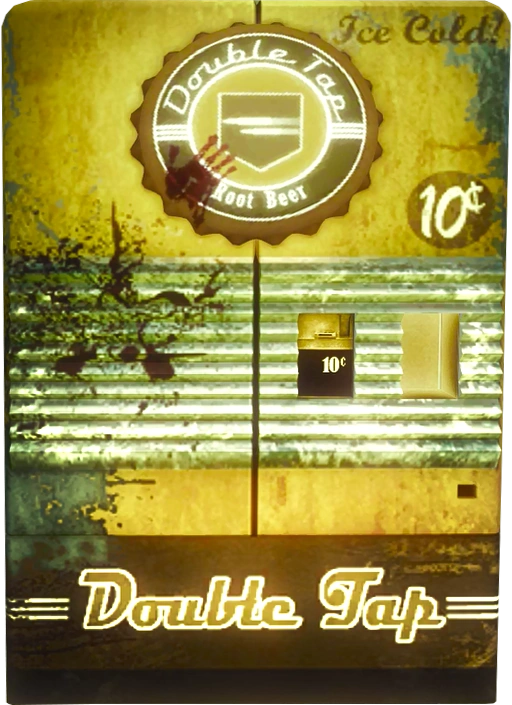
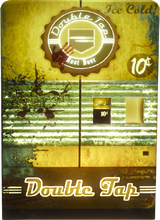
Double Tap Root Beer
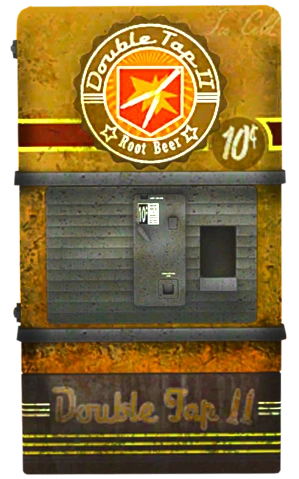
Double Tap II Root Beer
- "Cowboys can't shoot slow or they'll end up below. When they need some help, they reach for the Root beer shelf (Ye-haa) Cowboys can't shoot slow, or they'll end up below, when they need some help, they reach for the Root beer shelf. YA THIRSTY PARTNER!?"
- — Double Tap Root Beer Jingle
- Main article: Double Tap Root Beer
Double Tap Root Beer (Double Tap II in Call of Duty: Black Ops II and Call of Duty: Black Ops III) increases the player's fire rate by 33%, and in Call of Duty: Black Ops II and Call of Duty: Black Ops III also enables bullet weapons to fire two bullets per shot (twice the pellets on shotguns), effectively doubling damage. This can potentially be a double-edged sword; while the player can potentially kill zombies faster, the ammo consumption can be detrimental on weapons with an already high rate of fire and substantially decrease accuracy. It is therefore extremely useful on weapons with low rates of fire, such as pump-action shotguns, bolt-action rifles, BAR, HK21 etc. where the ammo will not drain uncontrollably but the weapon is even more lethal. This perk costs 2000 points. It is located in:
- The German side next to the MP40 in Verrückt
- Randomly spawns in one of the huts in Shi No Numa
- On the lower side of the bridge in Der Riese
- In the alley in Kino der Toten
- Next to the elevator leading to the starting room in the war room in "Five"
- Not available in Ascension
- However it can be obtained through the Der Wunderfizz in the Black Ops III version
- In the far back end of the ship near the Claymore in Call of the Dead
- In any of the rooms below ground in Shangri-La (changes place with Stamin-Up, PhD Flopper and Deadshot Daiquiri)
- In the lower room in the laboratories in Moon
- Spawns as one of the meteors in random order every five rounds in Nuketown Zombies
- Top floor of the barn in Farm (in both Survival and TranZit)
- Next to the Mystery Box spawn in the alley in Town
- In one of the elevators in the skyscraper with access to the roof in Die Rise (changes place with Juggernog, Pack-a-Punch Machine and Mule Kick)
- In the Citadel Tunnels in Mob Of The Dead
- On the top floor near the Gondola, also where Electric Cherry is when playing Mob of the Dead, in Cell Block
- Inside the Mansion on Buried on the right of the entrance.
- By spending 30000 points in Origins for a Rituals of the Ancients challenge.
- On Borough (grief mode) located on the left side of the mansion's porch
- Located in footlight, canals, or waterfront districts in Shadows of Evil (Switches randomly with Speed Cola and Juggernog)
- In the room next to the Gate Trap in Der Eisendrache.
- Either dropped by a cargo plane at the end of Round 1 or 5 by the KRM-262 or L-CAR 9 or covered in webs behind Lab A or behind Lab B (changes places with Speed Cola, Stamin-Up, and either Quick Revive on solo or Juggernog on co-op) in Zetsubou No Shima.
- It can also be obtained by eating a fruit.
- To the right of the doorway to the Tank Station in Gorod Krovi.
- In Origins, opposite of where Speed cola would be, next to the barrier in Generator 3 in Revelations.
- It can also be obtained through the Der Wunderfizz on Origins, Der Eisendrache, Gorod Krovi, and Revelations.
According to "Tank" Dempsey, it tastes chewy. Every character either comments on its effect(s) or its jingle. It mirrors the perk from multiplayer, Double Tap, and the Rapid Fire attachment.
PhD Flopper

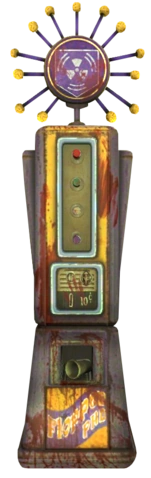
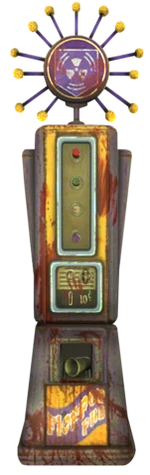
PhD Flopper
- "PhD, night-time scene. PhD, the streets are mean. PhD, the things I've seen, the good (PhD), the bad, and the in-between (Flopper). When you dive to prone, you are surely gonna own, PhD (Flopper)! When you dive to prone, it's gonna shake ya to the bone, all the zombies gonna groan, 'cause of PhD! PhD, the feelin's growing strong. PhD, so right that it feels wrong. PhD, like the chorus of a song (Flopper). PhD, not short but not too long. Slap your body to the floor, everybody needs some more, of your lovin', your explosive lovin'. When you dive to prone, it's gonna shake ya to the bone, all the zombies gonna groan, cause of PhD! (Flopper)! Damn straight!"
- — The jingle of the PhD Flopper.
- Main article: PhD Flopper
PhD Flopper grants the player immunity against explosive and falling damage; this includes cooking grenades for too long, as well enabling the player to trigger a powerful blast by diving to prone from a height that would otherwise damage them. PhD Flopper was first introduced in Ascension. This perk is very useful if the player uses explosive weapons a lot, particularly the Ray Gun, Scavenger and Mustang and Sally. Its explosive dive ability can also be used as a stand-alone up to approximately round 20. It costs 2000 points. Its locations are:
- Near Lunar Lander Д (nearest to MP5K) in Ascension
- Under the lighthouse side entrance (near MP5K) in Call of the Dead
- In any of the rooms below ground in Shangri-La (changes place with Double Tap Root Beer, Stamin-Up and Deadshot Daiquiri)
- In the bio dome in Moon
- The Library area (Mob of the Dead spawn area) in Cell Block
- It is unavailable but can be seen in Die Rise and Mob of the Dead
- Can be obtained in part as a Persistent Upgrade in Buried by taking a significant amount of fall damage.
- Can be obtained through Der Wunderfizz machine in Origins
According to the characters, it is incredibly chewy (even suggesting it can be chewed before swallowed outright), and according to Robert Englund, it is made of chemicals. The characters, such as Samantha Maxis, comment on it tasting of prunes. Takeo Masaki comments how he is allergic to prunes, so this is his least favorite perk. It mirrors Lightweight Pro, Dead Silence Pro and partially Flak Jacket.
Stamin-Up
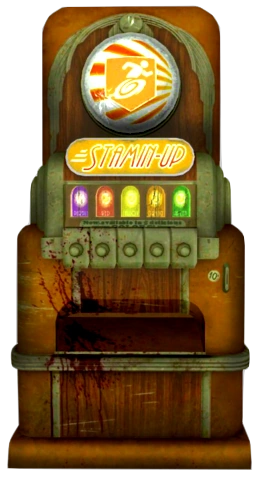
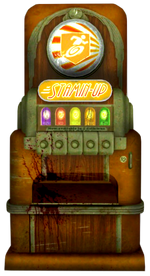
Stamin-Up
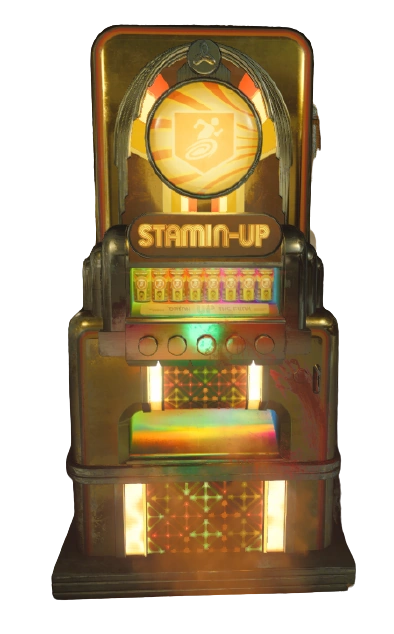
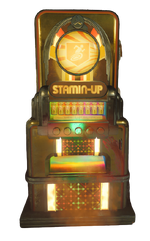
Stamin-Up (Cold War)
"Stamin-up-Min-Up! (x3) When you need some extra runnin', when you need some extra time, when you want to keep on gunnin', when you like a twist of lime. When you need to keep on moving, when you need a get-away, when you need to keep on groovin', when you need that vitamin K, babe, you know you want me! Let's run the extra mile! I'll open your eyes and I'll make you see! I'll make it worth your while! Stamin-up-Min-Up! Sounds like it's Staaaaamin-Up time! Oh yeah, drink it baby. Drink it!"
![]()
![]() Stamin-Up Jingle
Stamin-Up Jingle ![]()
- Main article: Stamin-Up
Stamin-Up affects the player's overall mobility, as it increases movement speed by 7% and sprint duration by 100%. Stamin-Up was first introduced in Ascension. It can greatly assist the player in large maps such as Call of the Dead to get to other places faster, as well as with heavy weaponry, such as light machine guns and launchers, to allow the player more mobility, or it can also be used to escape an incoming swarm. It is also very useful with a light weapon, since the player's movement is significantly faster. It costs 2000 points. Its locations are:
- Near the AK-74u in Ascension, also next to one of the Mystery Box locations
- Behind the lighthouse in a small building near the Stakeout in Call of the Dead
- In any of the rooms below ground in Shangri-La (changes place with Double Tap Root Beer, PhD Flopper and Deadshot Daiquiri)
- In Tunnel 11 near Semtex in Moon
- Ground floor of the bar in Town (in TranZit)
- Outside the bar in a small corner near M14 in Town (in Survival)
- End of the hedge maze in Buried, near Pack-A-Punch
- In the area to the left of the Church in Borough
- By Generator 5 in Origins
- It can also be obtained vía Der Wunderfizz.
- In the junction near a door leading to the rift in Shadows of Evil
- Hidden in a pile of snow at the left Factory Room in The Giant. In order to obtain it, the player must use the Monkey Bomb in a teleporter and activate the teleporter once the Monkey Bomb has started. Do this for the other two teleporters and the panel box next to the mainframe will start beeping, hold the use button while aiming at the panel box and the Giant Robot head will shoot a laser, reflecting off of the Der Riese sign, and it will hit and melt the pile of snow, revealing the perk. (Changes place with Deadshot Daquiri.)
- In the power room in Der Eisendrache
- It can also be obtained vía Der Wunderfizz.
- Either dropped by a cargo plane at the end of Round 1 or 5 by the KRM-262 or L-CAR 9 or covered in webs behind Lab A or behind Lab B (changes places with Speed Cola, Double Tap Root Beer, and either Quick Revive on solo or Juggernog on co-op) in Zetsubou No Shima.
- It can also be obtained by eating a fruit.
- In the Infirmary in Gorod Krovi.
- It can also be obtained vía Der Wunderfizz.
- In the Shangri-La spawn room in Revelations
- In the Bedroom on the second floor of Nacht Der Untoten just outside of the obstruction leading to the Crash Site in Die Maschine.
- By the door leading to a jump pad in Mission Control in Firebase Z.
- Can be obtained through the Der Wunderfizz in Outbreak.
- Can also be obtained through a Distress call or a random loot source.
According to the characters, it has a sour taste. It mirrors Marathon, Lightweight, and Extreme Conditioning.
Deadshot Daiquiri
![]()
- "To err is human, to forgive is divine. Well I'm not forgiving, and the error ain't mine! They ain't quite human; least they're not to my eyes. One sip of this and I'll give 'em the shock of their lives! Yeah, we got the guns and we got the bombs! In deadshot heaven, we pop skulls for fun! Zero in baby, zero on that spot, the hot spot baby, give it all you got! So quit complainin', about your bad aimin'! Just try, try again for me! With the headshot power of Deadshot Daiquiri!"
- — The jingle of Deadshot Daiquiri.
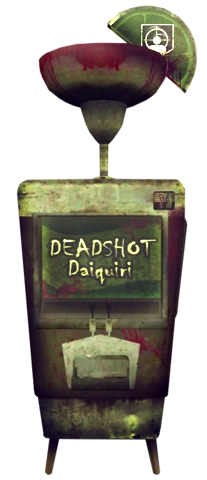
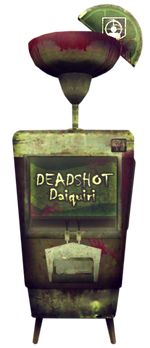
Deadshot Daiquiri
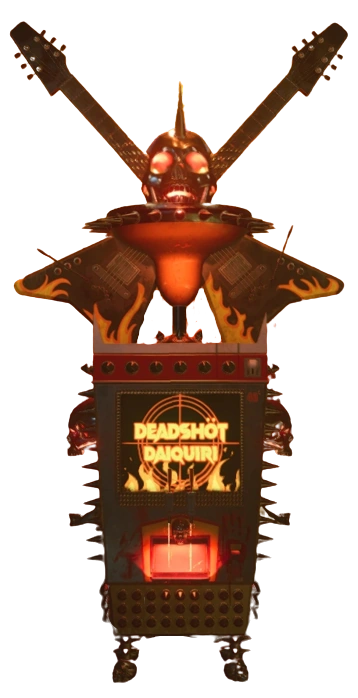
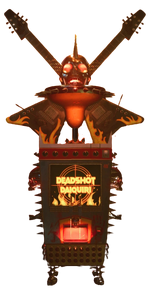
Deadshot Daiquiri (Cold War)
![]()
![]() Deadshot Daiquiri Jingle
Deadshot Daiquiri Jingle ![]()
Deadshot Daiquiri increases hip fire accuracy by 35%, reduces recoil on all weapons (most notably on sniper rifles), removes idle sway on sniper rifles, and adjusts the Aim Assist to target the zombies' heads instead of their torsos (except on wonder weapons and explosive weapons). Deadshot Daiquiri was first introduced in Call of the Dead. It costs 1500 points on consoles, and 1000 on PC as the latter does not support auto-aim, giving less benefit of the perk. Within Call of Duty: Black Ops Cold War, Deadshot Daiquiri was given a visual makeover with a new rock theme with the effects changed to instead entirely remove scope sway on all weaponry rather than just on sniper rifles alongside changing the Aim Assist to target "Critical locations" rather than just heads, as targets may have critical locations that differ from their head. Alongside the changes, Deadshot Daiquiri and all the other perks in Call of Duty: Black Ops Cold War received the ability to be upgraded via Aetherium Crystals with three additional tiers possible.
The Aetherium Skills are:
- Tier I: Deal 100% extra critical damage if an enemy is at full health.
- Tier II: Increase damage against armor pieces by 50%.
- Tier III: Reduces hip-fire spread.
Deadshot Daiquiri machines can be located in:
- On the lighthouse catwalk next to the zipline in Call of the Dead
- In any of the rooms below ground in Shangri-La (changes place with Double Tap Root Beer, Stamin-Up and PhD Flopper)
- Top floor in the laboratories in Moon
- Roof access room in the Infirmary next to the room with the Uzi and Cerberus wall in Mob of the Dead
- In the Cafeteria in Cell Block.
- It can only be obtained vía Der Wunderfizz in Origins.
- Hidden in a pile of snow at the Left Factory Room in The Giant. In order to obtain it, the player must use the Monkey Bomb in a teleporter and activate the teleporter once the Monkey Bomb has started. Do this for the other two teleporters and the panel box next to the mainframe will start beeping, activate the panel box and the Giant Robot head will shoot a laser, reflecting off of the Der Riese sign and will hit and melt the pile of snow. There is a chance of getting Stamin-Up instead of this Perk-a-Cola.[1]
- It can only be obtained vía Der Wunderfizz in Der Eisendrache.
- On Zetsubou No Shima it can only be obtained through the fruit plant.
- It can only be obtained vía Der Wunderfizz on Gorod Krovi.
- It can only be obtained vía Der Wunderfizz on Revelations.
- On the bottom floor of the Weapons Lab in Die Maschine.
- It can only be obtained vía Der Wunderfizz on Firebase Z.
- Can be obtained through the Der Wunderfizz in Outbreak.
- Can also be obtained through a Distress call or a random loot source.
According to the characters, it has a very sweet taste, even resembling yogurt and strawberries to Takeo Masaki and Samantha Maxis, respectively. It somewhat mirrors Steady Aim, and Scout, while also resembling the Kick, Breath and Stability proficiencies.
Mule Kick
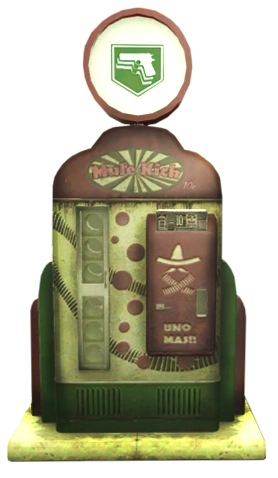
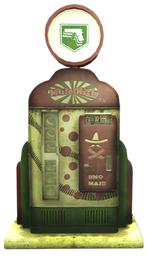
Mule Kick
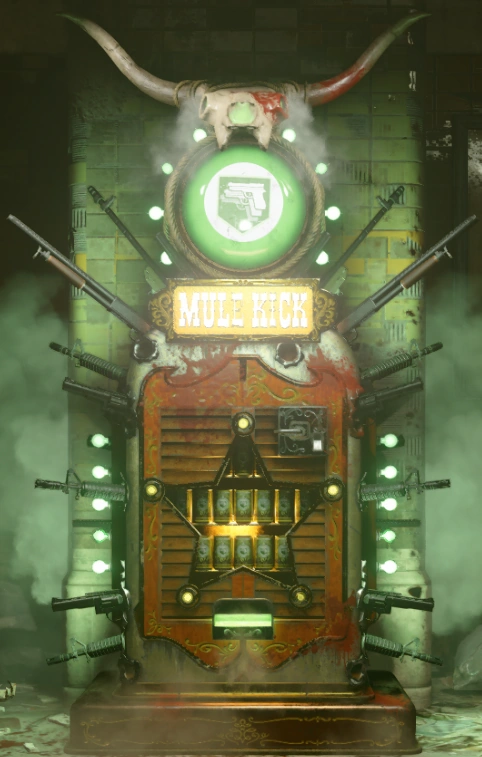
Mule Kick (Cold War)
- "Legend tells us of a man, a hero in a tortured land, where Señoritas lived in fear. Their lonely nights in deep despair, he was EL BURRO! (Hee-Haw, Hee-Haw). Across the fields, across the plains. He ran so fast he dodged the rain. He was El Burro! He hurried in to save the day, gun in hand, and thrice they say. He was strong like a Mule, he was stubborn like a Mule, he even kicked like a Mule, El Burro! (El Burro!). A man of equal soul they say. But some men more, it's just the way! He was El Burro! He was EL BURRO! EL BURRO!"
- — The jingle of Mule Kick, cut from Moon due to the fact that the machine is in an airless environment. The jingle can be heard in-game at Die Rise
- Main article: Mule Kick
Mule Kick grants the player a third weapon slot, so as to be able to carry a third gun (when purchased off the wall or from the Mystery Box), however, if the player goes down and loses the perk, they will lose the third weapons slot and whichever weapon was being held in that slot. Mule Kick was first introduced in Moon, but on September 27th, 2011, it was made available on all maps in Call of Duty: Black Ops (except Dead Ops Arcade) via a hotfix. It costs 4000 points and is located in:
- In the starting room, next to the M1A1 Carbine in Nacht der Untoten
- In the first cell block near Thompson in Verrückt
- In the starting room, near Gewehr 43 in Shi No Numa
- In the melting room near Thompson in Der Riese
- Near PM63 in Kino der Toten
- In the war room near Juggernog in "Five"
- Below Speed Cola in Ascension
- On the top far end of the ship in Call of the Dead
- In the waterfall in Shangri-La
- Near the AK-74u in Moon
- In one of the elevators in the skyscraper with access to the roof in Die Rise (changes place with Juggernog, Pack-a-Punch Machine and Double Tap Root Beer)
- Unavailable but visible with PhD Flopper on the dock in Mob Of The Dead
- In the area near the M14 in Cell Block
- On the top of the gunsmith shop in Buried
- Can be obtained in the Excavation Site at the very bottom near the staff chamber in Origins.
- It can also be obtained vía Der Wunderfizz.
- Found in the Rift in Shadows of Evil
- Can randomly spawn in The Giant
- In Der Eisendrache, in the transition room between the Tram room (passing through the Door that is in front of Quick Revive) and the Oval room.
- It can also be obtained vía Der Wunderfizz.
- In the room before the underwater tunnels in Zetsubou No Shima.
- In the Operations Bunker in Gorod Krovi.
- It can also be obtained vía Der Wunderfizz.
- In the cafeteria of Mob of the Dead on Revelations
- It can also be obtained vía Der Wunderfizz.
According to "Tank" Dempsey, it tastes like beer, while according to Takeo Masaki, it tastes like cola, suggesting that it may taste different depending on the individual. It partially mirrors Overkill.
Tombstone Soda

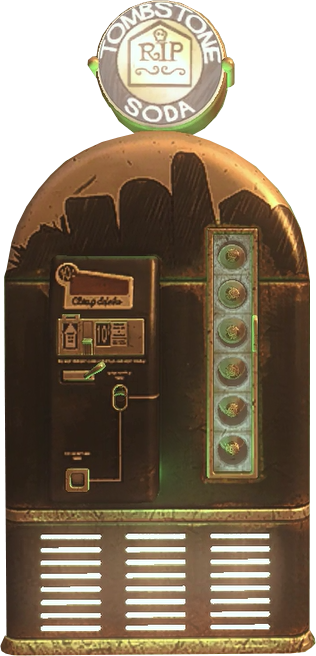
Tombstone Soda
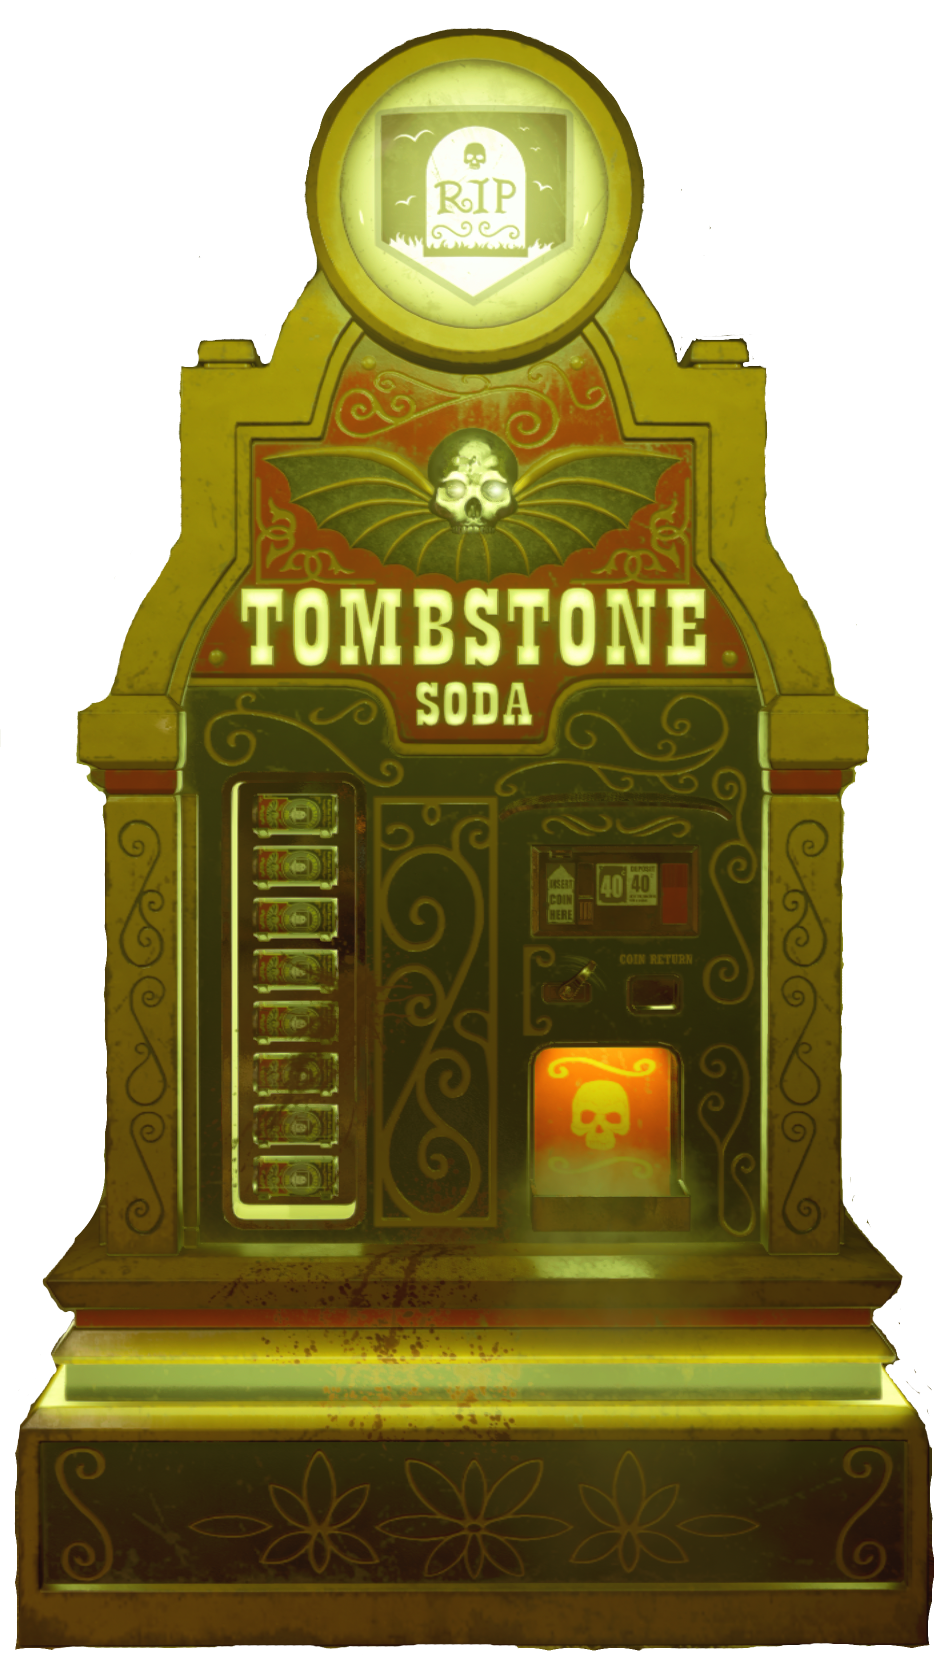
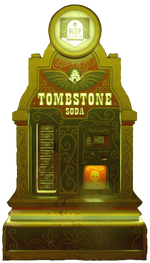
Tombstone Soda (Cold War)
- "Rest in pieces, down for the count. No revival, you're bleedin' out. Your epitaph says you died a wealthy man, but you can have it all come back and seal the master plan with Tombstone! It's Tombstone! It's Tombstone! It's Tombstone! Health is drainin' you're on the ropes. Death is waitin', don't lose your hopes. Your will and testament ain't making that much sense, you're listed as the only heir to whom you may bequest. It's Tombstone! It's Tombstone! It's Tombstone! It's Tombstone! Tombstone"
- — The Tombstone Soda jingle.
![]()
![]() Tombstone Soda Jingle
Tombstone Soda Jingle ![]()
- Main article: Tombstone Soda
Tombstone Soda allows the player to kill themselves while down, and recover their equipment via a Tombstone power-up if they get to it in time. This gives the player all of their weapons, equipment and perks back, with the exception of Tombstone itself. As the player goes down, the player can hold the 'use' button to die prematurely. When the round ends, the player will respawn and be able to collect the power-up, which is shaped like a tombstone, left in the same spot that the player went down. Only the player who killed themselves can collect the power-up, and the power-up will disappear after 90 seconds. Being revived will cancel the perks effects, and the player will have to re-acquire all their perks again. Tombstone Soda only appears in Green Run, and is not available in solo. It costs 2000 points. Its locations are:
- In the room available after turning on the power in the Power Plant (in TranZit)
- In the alley leading to Double Tap Root Beer II in Town (Survival only)
- Can be Obtained as a perma-perk variant by getting four perk-a-colas before round four in Buried.
- It can only be obtained vía Der Wunderfizz on Die Maschine.
- At Helipad in the opposing corner of the teleporter in Firebase Z.
- Can be obtained through the Der Wunderfizz in Outbreak.
- Can also be obtained through a Distress call or a random loot source.
Its taste and characters' opinions of it are unknown, although Stuhlinger mentions that it "Tastes like liquid chalk" using a negative tone. Tombstone is similar to the multiplayer perks Second Chance, Last Stand and to the deathstreak Final Stand.
Who's Who

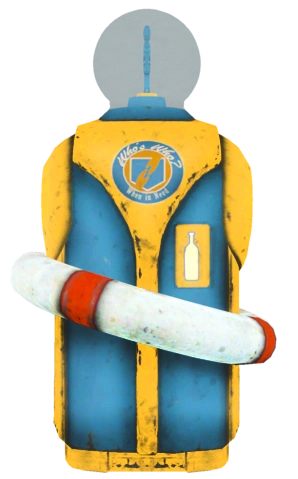
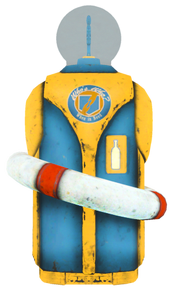
Who's Who
- "I was talkin' to myself just the other day, I was hearin' lots of things I never thought I'd say, but one thing I said really blew my mind (Who's who?) I said I don't know me, but I know you, and if you listen closely we can talk it through, it ain't as simple as we're gonna find (Who's who?) I think I will save you, I think I don't blame you, 'cause I like you and you like me. I was talkin' to myself just the other day, then the bad man came and took me away, I feel bad, but not as bad as me (Get off me, man!) I was talkin' to myself just the other day, (You've got the wrong man!) then the bad man came and took me away, (I'm not that man!) I feel bad, but not as bad as me (Not who I am!) (Who's Who?)"
- — Who's Who Jingle
![]()
![]() Who's Who Jingle
Who's Who Jingle ![]()
- Main article: Who's Who
Who's Who allows the player to take control of a doppleganger when they go down, allowing them to revive themselves or even keep zombies busy so others can revive the original character. The doppelganger spawns near the original character, has altered vision and is equipped with only an M1911. If the player succeeds in reviving oneself, they will retain all weapons, equipment and perks aside from Who's Who. In addition, dying in a way that the player cannot be revived, such as falling down the gaps between buildings, Who's Who will respawn the player without having to wait for the round's end. It currently only appears in Die Rise. It costs 2000 points. Its location is:
- In one of the elevators in the starting skyscraper in Die Rise
Electric Cherry
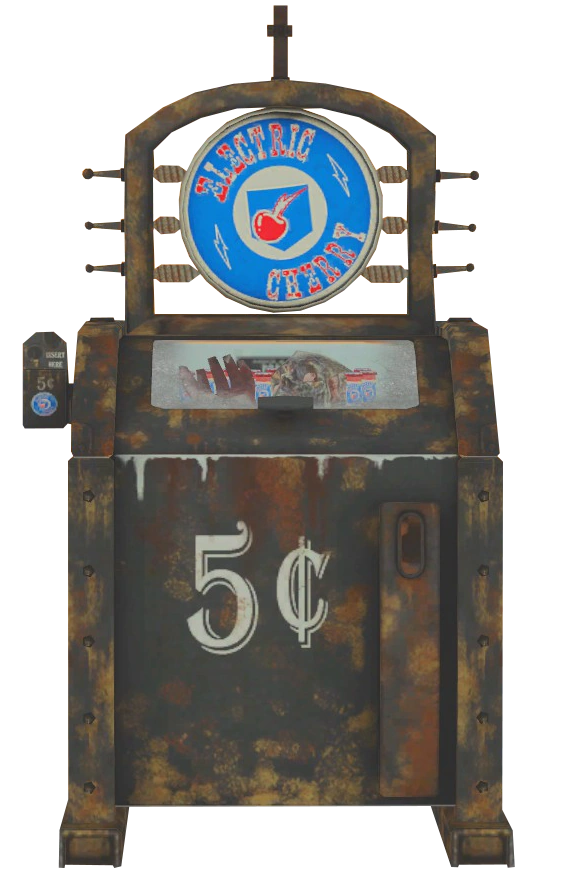
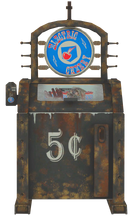
Electric Cherry
- Main article: Electric Cherry
Electric Cherry creates a lethal electric shockwave around the player whenever they reload their weapon or when they go down. It costs 2000 points to purchase. The color for this perk is light blue (although the color of the drink is cherry red), and the icon is a red cherry. The effect of the perks is dependent on the amount of rounds left when reloading. Replacing an almost full magazine will produce a very small blast, whereas replacing an empty magazine will produce the largest possible reload blast. When the player dies, they will create a significantly larger explosion capable of killing several zombies, similarly to the death streaks Dead Man's Hand and Martyrdom. The perk is found in Mob of the Dead, Origins, Zetsubou No Shima, Der Eisendrache, and Gorod Krovi. It has no jingle beyond the unusual chiming noises all perks make in the map. It is very useful in close quarter maps such as Mob of the Dead. Its locations are
- Is near the above entrance to the Gondola, and is also next to a crafting station in Mob of the Dead.
- It can only be obtained vía Der Wunderfizz in Origins.
- It can only be obtained vía Der Wunderfizz in Der Eisendrache
- On Zetsubou No Shima, it can only be obtained by eating a fruit.
- It can only be obtained vía Der Wunderfizz in Gorod Krovi
- It can only be obtained vía Der Wunderfizz in Revelations
This beverage is necessary to complete the A Burst of Flavor achievement/trophy, requiring killing ten zombies within the given radius of one entire shockwave.
In Mob of the Dead, when the player approaches the Electric Cherry machine, it makes an unusual chiming noise but does not have a known perk jingle.
Vulture Aid Elixir
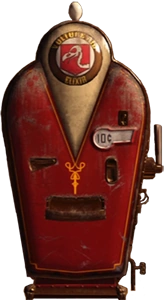
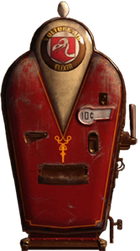
Vulture Aid
- "I was looking for redemption, I was looking for a sign. I was searching for an answer, be it yours or be it mine. I was hoping for some insight, I was looking far too hard. I was searching for the wrong thing, now I don't know where to start! I spy with my little eye, something beginning with V! It's Vulture Aid, and it's not too late! Get Vulture Aid!"
- — Vulture Aid Jingle
- Main article: Vulture Aid
Vulture Aid bestows four unique effects to the player. It costs 3000 points, and is located in the church. This perk is also necessary to complete either the Richtofen or Maxis side of the Mined Games Easter Egg.
When a player has Vulture Aid:
- They will be able to see perks, wall weapons, pack-a-punch, places to draw chalk weapon outlines, and the Mystery Box through walls over a short distance.
- Zombies will occasionally drop small packets of ammo or points.
- Certain zombies will release a cloud of green gas upon death, which will cause players standing inside it to be ignored by other zombies.
- Zombies' eyes will glow brighter, making them easier to see and distinguish from perk and weapon locations.
The perk is located in the back of the church near the altar in Buried; where Quick Revive is located in Borough. To enter the church, Arthur must break down the barrier. The characters often comment on their eyesight after consuming the perk. The perk partially mirrors Scavenger, SitRep, and Engineer.
Der Wunderfizz
- Main article: Der Wunderfizz
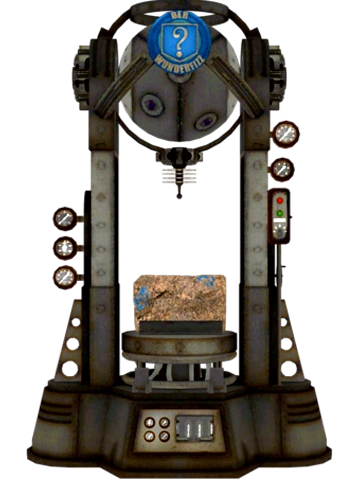
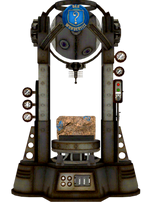
Der Wunderfizz
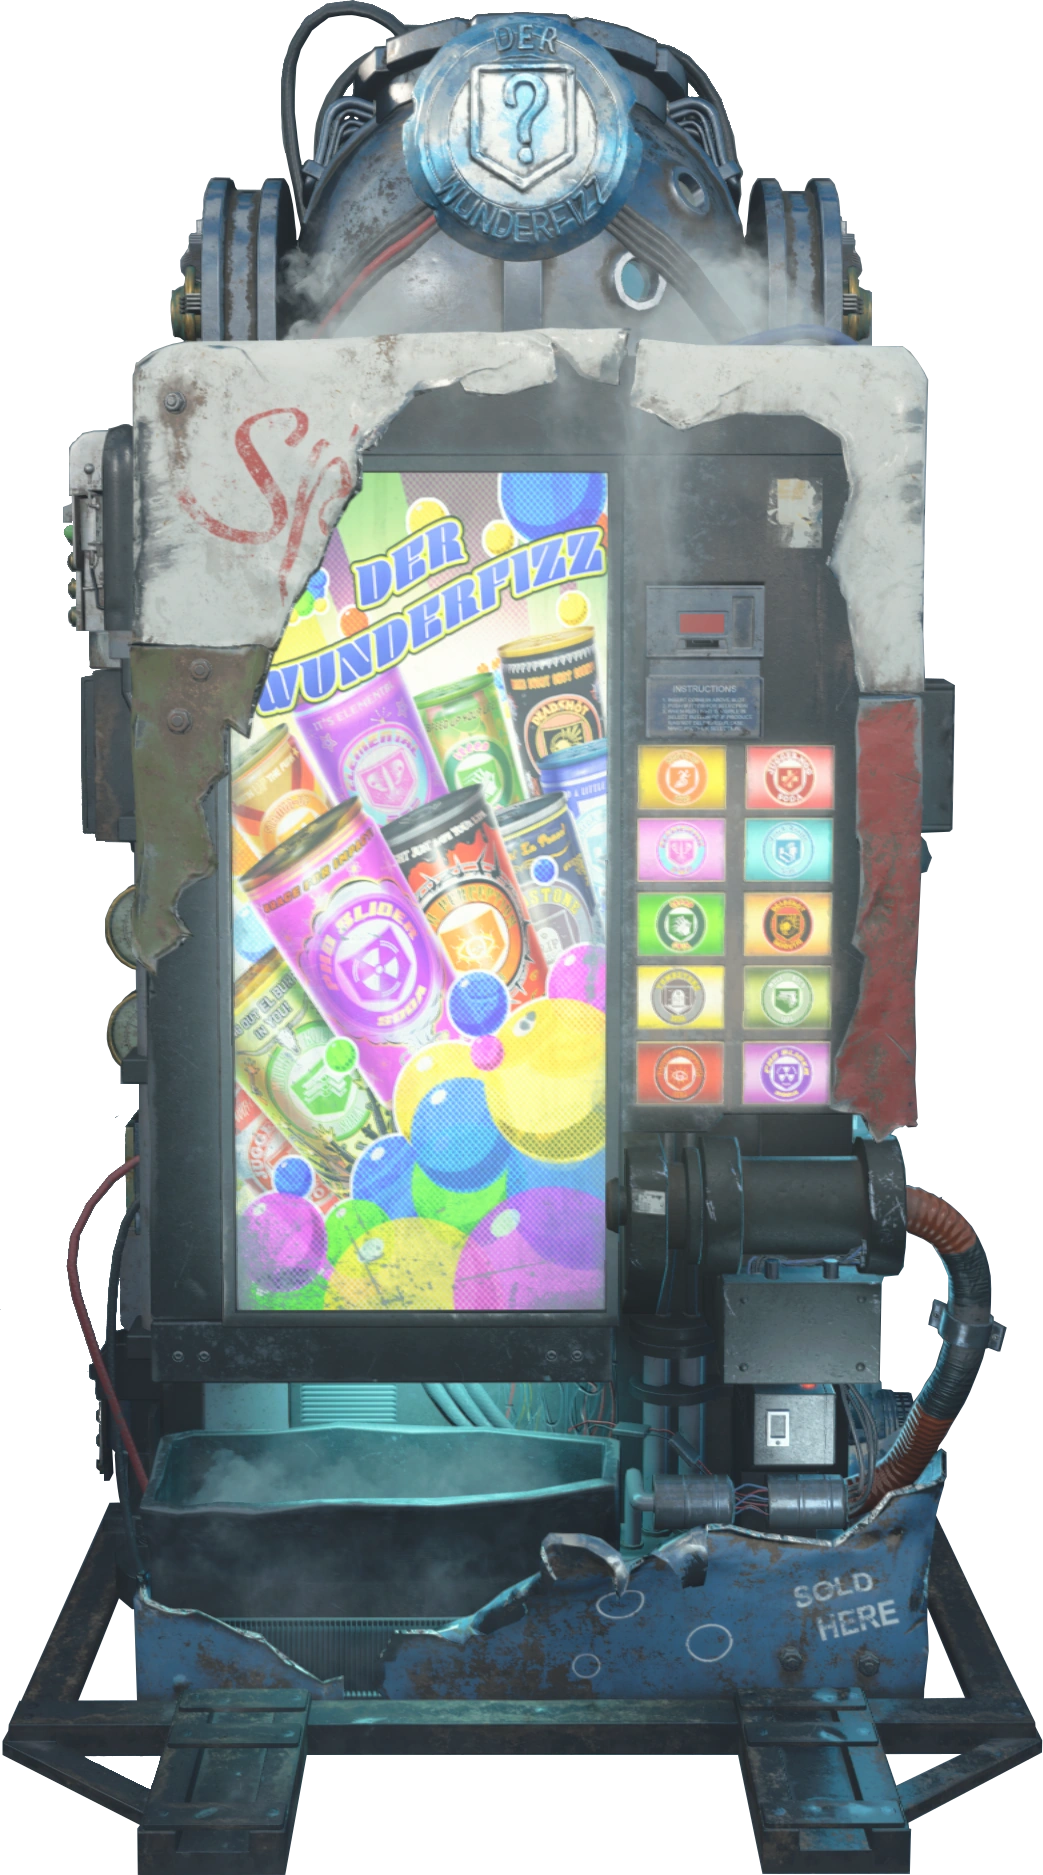

Der Wunderfizz (Cold War)
Der Wunderfizz is a machine in Origins, Der Eisendrache, Gorod Krovi, and Revelations that provides the player a random perk bottle for 1500 points. It will relocate itself to one of several locations if used a certain amount of times, similar to the Mystery Box. It requires power to function properly. In order to know its actual location, the player will have to look at the sky and look for a lightning strike. It is also featured in Die Maschine where it functions a bit differently, as it is only accessible 10 rounds after switching on the power, or if the player is in the dark aether, and allows the player to purchase any perk they choose. In Firebase Z, it is accessible after the player turns power on by activating all of the Aether Reactors, and is can be found across the map as well as at an activated beacon in Outbreak.
Call of Duty: Black Ops II
- Juggernog
- Quick Revive
- Speed Cola
- Double Tap Root Beer
- PHD Flopper
- Stamin-Up
- Deadshot Daiquiri
- Mule Kick
- Electric Cherry
Call of Duty: Black Ops III
- Juggernog
- Quick Revive
- Speed Cola
- Double Tap Root Beer
- Stamin-Up
- Mule Kick
- Deadshot Daiquiri
- Electric Cherry
- Widow's Wine
Call of Duty: Black Ops Cold War
- Juggernog
- Quick Revive
- Speed Cola
- Stamin-Up
- Deadshot Daiquiri
- Elemental Pop
- Tombstone Soda (S1)
- Mule Kick (S4)
- Death Perception (S5)
- PhD Slider (S6)
Widow's Wine
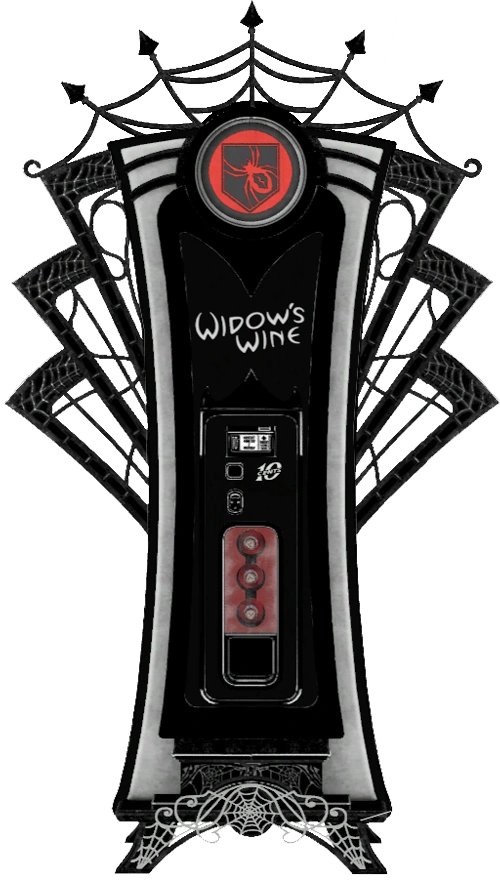
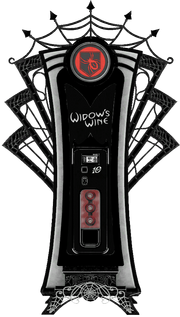
Widow's Wine
- "When you're feeling kinda lonely, and your spouse is kinda dead, you feel like curling up with someone, in your empty little bed. There is danger around the corner, (CORNER!) And your love life's in decline, (DECLIIINNNEE!) You'll no longer be a martyr, with a little Widow's Wine (x3). With a little Widow's Wine you're mine... with Widow's Wine, you're mine!"
- — Widow's Wine jingle.
- Main article: Widow's Wine
Widow's Wine gives the player a special type of grenade similar to the Semtex which creates a spider web when it detonates, as well as increasing melee damage, changing the sound for the default knife, adding a green trail to the default knife, and causing melee attacks to have a random chance to ensnare zombies without consuming grenade ammo. The web slows zombies down momentarily and deals some damage to the zombies, but none to the player. The player will automatically detonate the grenades in their pocket when hurt by zombies, enabling them to make a quick escape when they would normally be cornered. It is important to note that being slapped by zombies will cause the player's Widow's Wine Grenade ammo to deplete without throwing one, and can also kill the last zombie of a round if they are trying to keep it alive. In this situation, it is preferable to throw all remaining grenades out of map to avoid accidentally detonating them. The player can replenish grenades all at once with a Max Ammo, two at a time by starting a new round similarly to frag grenades and Semtexes, or one at a time by killing zombies ensnared in a web, which have a random chance of creating a blue drop that looks like the spider on the perk icon. It is possible to melee zombies in an attempt to ensnare them and kill them for additional grenades without consuming any, or when the player is out of them. Its locations are:
- Located in the rift, next to the portal which leads between the Canal and the Rift in Shadows of Evil.
- Only obtainable via Der Wunderfizz in Der Eisendrache
- Can be obtained for free after defeating the Giant Spider in Zetsubou No Shima.
- Only obtainable via Der Wunderfizz in Gorod Krovi
- Where the Pack-a-Punch would be in the projector room in Kino der Toten on Revelations
Elemental Pop
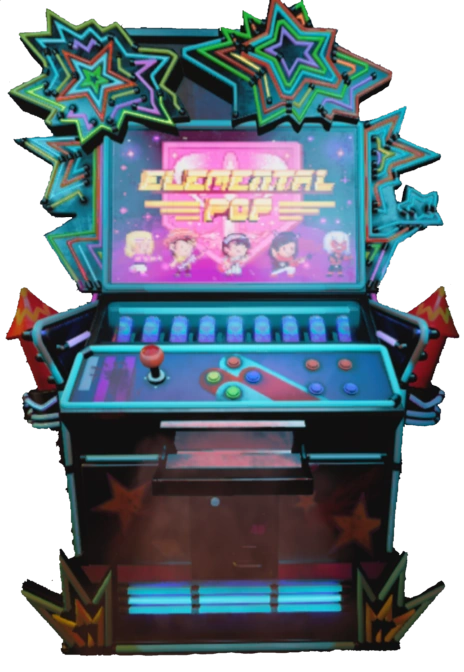

Elemental Pop
- "So many elements for you to consider when you're trying to fix yourself up to be sure you deliver. The kinda hint that no one in your sights can resist. The kinda hint that looks just like a sweet sober kiss. You bring out the best in me it's fundamental (it's fundamental). I'll bring out the best in you it's elemental (it's elemental) (x2). You bring out the best in me. I'll bring out the best in you (x2). "
- — Elemental Pop Jingle
- Main article: Elemental Pop
Every bullet fired by the player a small chance to apply a random base Ammo Mod effect at the base tier. Tier 1 enables equipment damage to also have a small chance of applying a random base Ammo Mode effect. Tier 2 reduces Ammo Mod cooldowns by 20%. Tier 3 allows for the Ammo Mod to utilize the Skill Tree level rather than the base level of the mod. Tier 4 increases the elemental damage weakness by 50%. Tier 5 causes electric damage when reloading. Its locations are:
- Next to the Power button inside the Main Power room in Die Maschine.
- Can be randomly acquired by the Random Perk power-up in Zombies Onslaught.
- It can only be obtained vía Der Wunderfizz in Firebase Z.
- Can be obtained through the Der Wunderfizz in Outbreak.
- Can also be obtained through a Distress call or a random loot source.
- In the Power Room, adjacent to the Power Switch and the Milano 821 in Mauer der Toten.
- In Burger Town, to the left of the FFAR 1 in Forsaken.
Death Perception
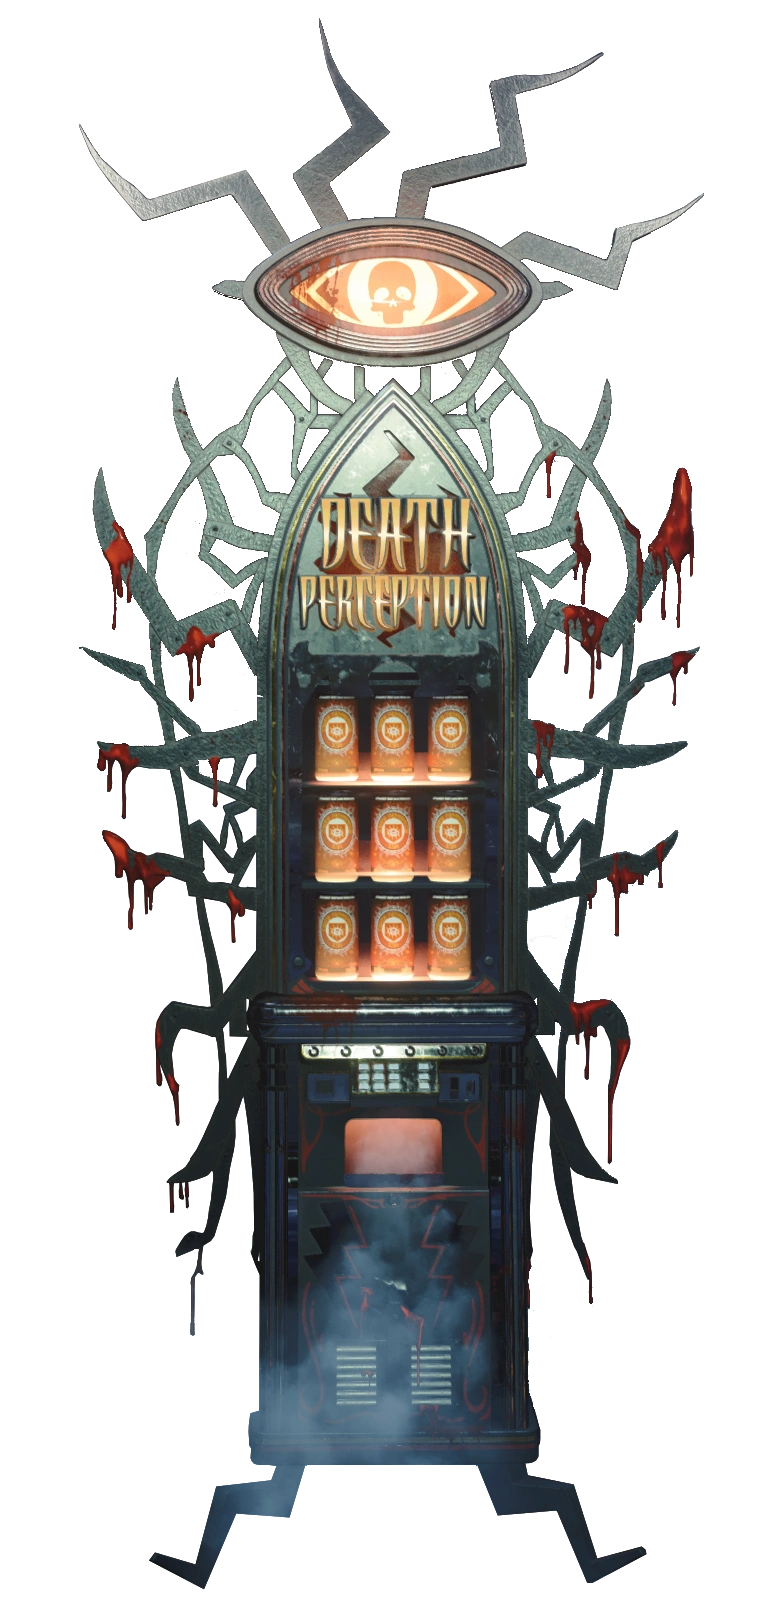
Death Perception
| “ | Some say seek and you will find. Just don't let this blow your mind. And when you need precision, we'll enhance your vision. Death Perception! Seek and you will find. Death Perception! Ohh, it just might save your life! Too many undead on your trail. Rest assured you can prevail. And when you need precision, we'll enhance your vision. Death Perception! See what you can find. Death Perception! But it might change your mind. Death Perception! Well it just might save your life!
— Death Perception's Jingle
|
” |
- Main article: Death Perception
Death Perception gives the player an outline of nearby enemies through walls, similar to a thermal optic. Tier 1 increases the update rate of the player's minimap. Tier 2 gives the player danger indicators when enemies are behind them. Tier 3 allows the player to gain 20% more looted Salvage and High-Grade Salvage. Tier 4 increases armor penetration damage by 25%, and Tier 5 allows nearby chests, resources, and item drops to be keylined through walls.
PhD Slider
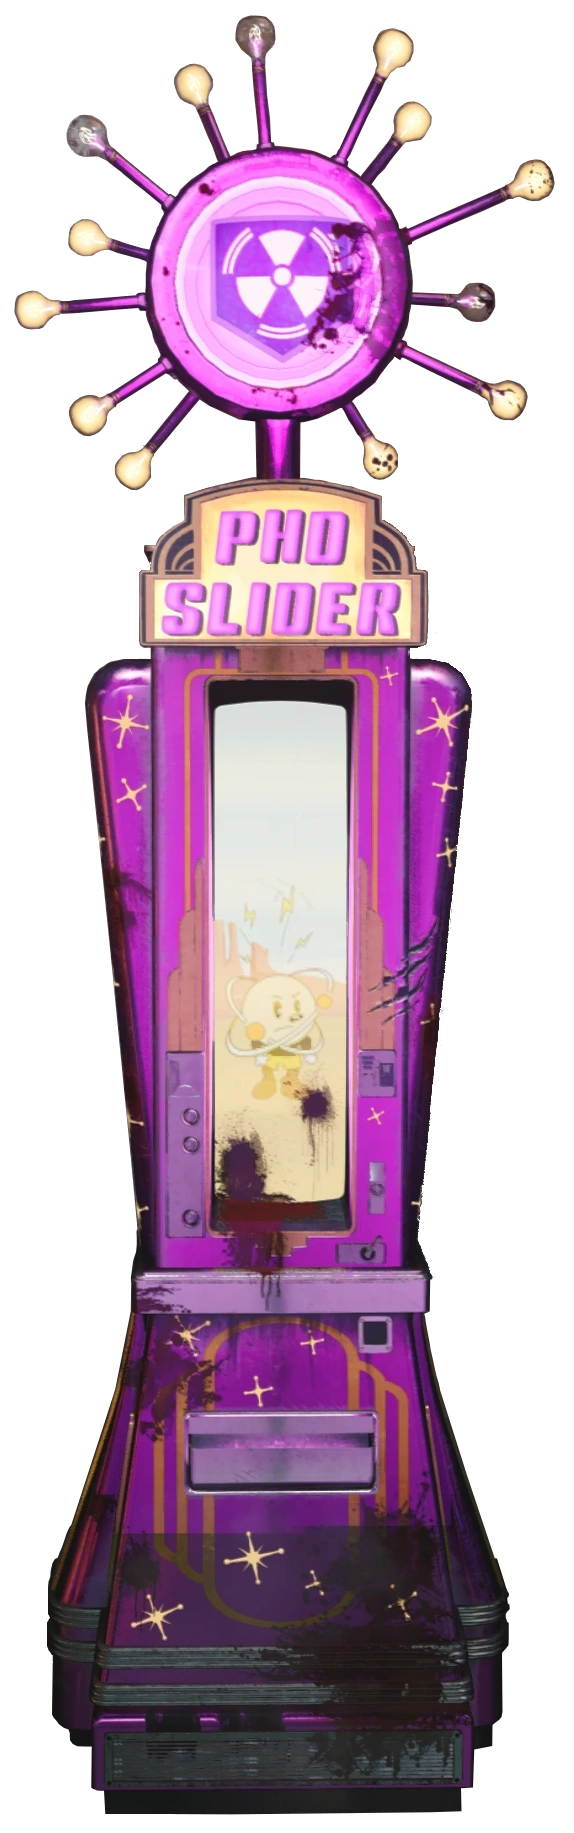
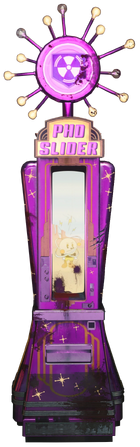
PhD Slider
| “ | (PhD) Night-time scene. (PhD) The streets are mean. (PhD) The things I have seen. The good, (PhD) the bad, and the in-between. When you dive to prone, you are surely gonna own, PhD (Flopper)! When you dive to prone, it's gonna shake ya to the bone, all the zombies gonna groan, 'cause of PhD! (PhD) The feelin's growing strong. (PhD) So right that it feels wrong. (PhD) Like the chorus of a song. (PhD) Not short but not too long. Slap your body to the floor, everybody needs some more, of your lovin', your explosive lovin'. When you dive to prone, it's gonna shake ya to the bone, all the zombies gonna groan, cause of PhD! (PhD) (Flopper)! Damn straight.
— Jingle
|
” |
- Main article: PhD Slider
PhD Slider is the successor to previously introduced Perk-a-Cola PhD Flopper. It will allow the player to generate an explosive burst of Aetherium energy upon sliding into a zombie, with the size and damage of the burst being dependent on the distance the player slid before impacting a target. Tier 1 gives the player immunity to environmental damage while sliding. Tier 2 gives the player an increased slide duration. Tier 3 gives the player immunity to self-inflicted explosive damage. Tier 4 gives the player increased slide speed, and Tier 5 makes it so that falling from a large height triggers an explosion, with the size and damage increasing the higher the player falls.
Call of Duty: Black Ops 4
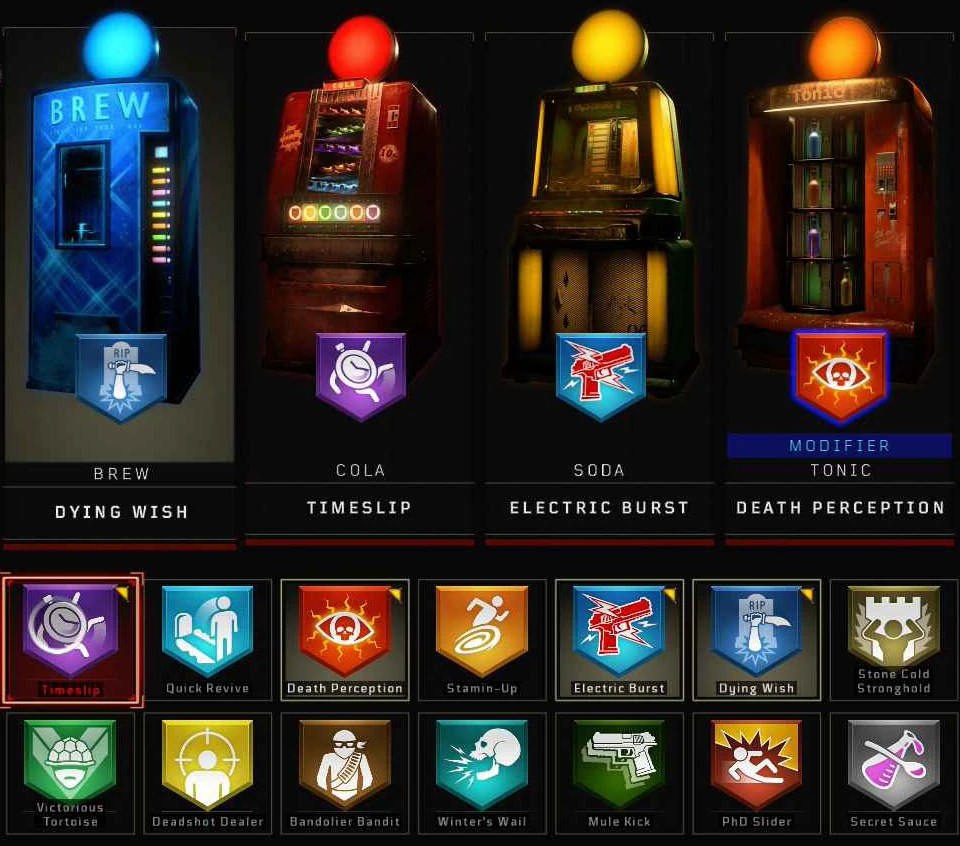
All of the launch Perk-a-Colas within Black Ops 4.
Call of Duty: Black Ops 4 Zombies completely reworks the classic Perk system.
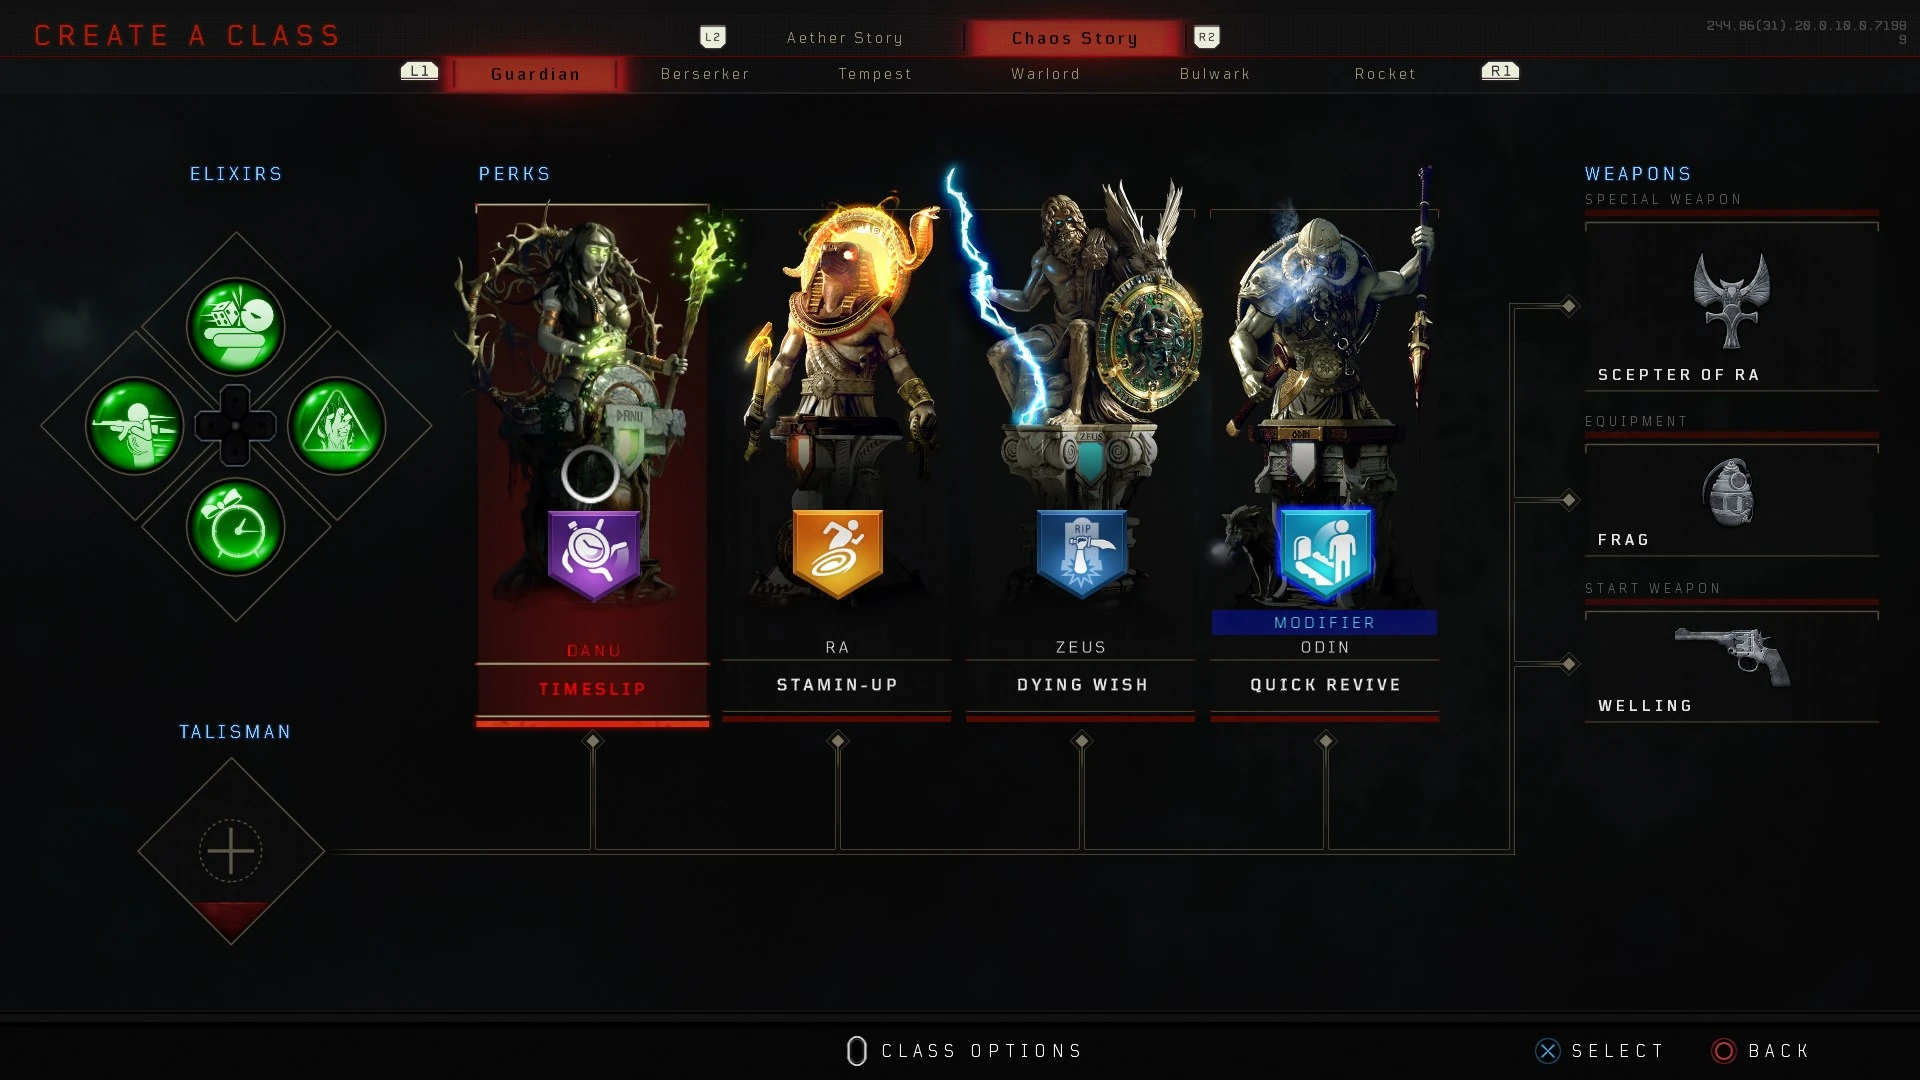
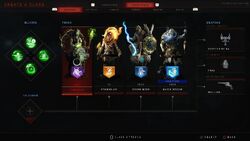
The Chaos Story Perk Altars.
In the Aether Story maps, there are four machines within the game corresponding to four distinct purchasing models, beverage names, and so on. They are Brew, Cola, Soda, and Tonic. However, in the Chaos Story, there are four unique statues corresponding to four deities from mythologies (Danu of Irish folklore, Ra of ancient Egypt, Zeus of classical mythology, and Odin of Norse mythology). Each machine/statue starts at a pre-determined area on each map and resides there permanently, but the Perk it holds can be modified in-game in Create-a-Class. Every machine/statue functions the same except for the Tonic machine in Aether and the Odin statue in Chaos, which enables the player to get a modifier for the Perk they get from it. This functions as an additional effect. To receive this effect, the player must have all four Perks. In addition to the modifier, when all 4 Perks are bought, the player's reload will increase. There are currently 18 Perks in-game to chose from.
Locations
Voyage of Despair
- Danu - Located on the bow of the ship in the starting area.
- Ra - Located in the dining hall.
- Zeus - Located in the first class lounge.
- Odin - Located in the engine room.
IX
- Danu - Located in the Danu shrine on the top floor.
- Ra - Located in the Ra shrine on the top floor.
- Zeus - Located in the Zeus shrine on the top floor.
- Odin - Located in the Odin shrine on the top floor.
Blood of the Dead
- Brew - Found next to the power building for New industries.
- Cola - Next to the gondolas where Juggernog was located in Mob of the Dead.
- Soda - In the room connecting the infirmary to the stairs leading to the roof.
- Tonic - In the warden's office.
Classified
- Brew - Main offices.
- Cola - Lower level of the War room next to the panic room entrance.
- Soda - Located in the Laboratories next to the power room.
- Tonic - Porcine research.
Dead of the Night
- Danu - Located in the Entrance Hall.
- Ra - Randomizes locations between the Forest Terrace, Wine Cellar, Gardens, and Mausoleum.
- Zeus - Randomizes locations between the Forest Terrace, Wine Cellar, Gardens, and Mausoleum.
- Odin - Randomizes locations between the Forest Terrace, Wine Cellar, Gardens, and Mausoleum.
Ancient Evil
- Danu - Located in the Offering of the Attilids.
- Ra - Located in the Gymnasium Bathhouse.
- Zeus - Located in the Spartan Monument next to the Pegasus.
- Odin - Located on the dark side of the world in the River of Sorrow.
Alpha Omega
- Brew - Center street next to the GKS wall buy.
- Cola - Garage of the Yellow House.
- Soda - Located in the Diner area of the bunker.
- Tonic - The Generator Room inside the bunker.
Tag der Toten
- Brew - Across from the bottom of the slide in the Lighthouse.
- Cola - In the hull of the ship, where Juggernog was originally located.
- Soda - On the opposite end of the ship, across from the Power Room.
- Tonic - In the shower room, located in the Facility.
List of Perks found in Black Ops 4
Timeslip
Equipment cooldown rate increased. Mystery Box and Pack-a-Punch weapons appear faster. Greatly reduce Trap and Fast Travel cooldowns.
Modifier: Special Weapon charge rate and Elixir cooldown rate are slightly increased.
Quick Revive
Shorter delay before regenerating health and increased regeneration rate. Revive players faster.
Modifier: Gain a movement speed boost after health regeneration starts. Reviving grants both players full health and a movement speed boost.
Death Perception
See nearby enemies through walls. Receive screen indicators when enemies approach the player from off screen.
Modifier: Deal increased damage to special enemy weak points.
Stamin-Up
Increased movement and sprint speed. Stamina regenerates faster.
Modifier: Unlimited sprint. Player can fire weapons while sprinting.
Ethereal Razor
Offhand melee swipes affect multiple enemies in an arc. Offhand swipe and lunge give bonus damage and restores a small amount of health.
Modifier: Offhand lunge attacks instantly kill basic zombies, do greater bonus damage to others.
Electric Burst
Reloading causes an electric discharge that damages and stuns nearby enemies. The more empty the magazine, the stronger the damage.
Modifier: Reloading stores an electric charge on the player's melee weapon. The next melee attack empower's the weapon to shock enemies for a limited time. The emptier the magazine, the longer the time.
Dying Wish
Instead of entering a downed state, the player goes Berserk for nine seconds. While Berserk, they are invulnerable and melee damage is greatly increased. Afterwards, the player is left with one health. Cooldown increases with every use.
Modifier: Player will receive full health when no longer Beserk.
Stone Cold Stronghold
Standing your ground creates a defensive circle which boosts damage and armor over time while inside.
Modifier: Enemies killed inside the defensive circle also boost damage and armor.
Victorious Tortoise
Shields block damage from all directions when held. When a Shield breaks it will trigger a defensive explosion.
Modifier: Shield bash attacks can knock down Heavy and Mini-Boss enemies.
Deadshot Dealer
Aiming down sight snaps to the enemy's head. Reduced hip-spread and recoil when firing. Removes scope sway.
Modifier: Gain a damage boost when on a headshot streak.
Bandolier Bandit
Carry increased ammo stock.
Modifier: Refill ammo of stowed weapons from ammo stock over time.
Winter's Wail
When hit by a melee attack generate, a frost explosion that will freeze or slow enemies nearby. Player can store two charges.
Modifier: Frost explosion triggers a slowing field around the player for a limited time. Store an additional charge.
Mule Kick
Carry an additional weapon.
Modifier: Switch weapons faster. The additional weapon will be saved and restored on next Mule Kick Perk purchase.
PhD Slider
Slide to build up a charge. Once fully charged slide into an enemy to trigger an explosion. Gain immunity to explosive damage.
Modifier: Improved slide distance. Trap immunity while sliding. Increased explosion damage when entering a slide from greater heights.
Zombshell
Creates a contamination field that lasts 5-10 seconds, slowing down zombies and increase damage done to them.
Modifier: When the player stands in the field, they will be ignored by zombies.
Blood Wolf Bite
Call in a Wolf to help the player when dealing a decent amount of damage for 45 seconds.
Modifier: Chances for zombies to drop small amounts of ammo and points, as well as special weapon charge when killed by the Wolf.
Blaze Phase
When the player crouches, they build up a charge. Uncrouching during this will send the user straight forward at extreme speeds, killing or knocking down zombies in the way.
Modifier: Allows the player to charge it into an additional state, which is infinite until hitting a surface.
Secret Sauce
Receive a random Perk not assigned to another slot.
Modifier: The modifier of the random Perk received.
Jingles
In the Aether Story maps, the Perk-a-Cola Machines will randomly play from a selection of "Wunderfizz" jingles due to the removal of unique Perk machines. All of the jingles are written by Jack Wall.
| “ | Wunderfizz! The wonderful sodas of Wunderfizz! They make you strong, they make you fast, they give you health, they bring you wealth! The marvelous wonderment, drinking the supplement, Wunderfizz. It'll make you tingle!
— 50's Girls
|
” |
| “ | Are you in the know? (I think so, yeah) You wanna go, go, go. (That sounds swell) What'll make you a whiz, ace every quiz, be the boss of your 'biz? (What'll do that?) Wunderfizz. (What'd you say?) Incredible Wunderfizz. (Where - Where can I get some?) Sensational Wunderfizz. (Should it be foaming?) Wonderful Wunder- (*soda cap popping* *gulp* Oh.) Fizz. Yeah, yeah, yeah! Wonderful Wunderfizz! It'll make you tingle!
— Are You In The Know?
|
” |
| “ | Old man Fringle, well, he sat up in his bed! He said: "Oh my stars, there's an idea in my head!" Don't know how it works, but it'll give you lots of Perks! It's dangerous & glowin', Wunderfizz. You won't know where you're goin', Wunderfizz. Drink yourself plenty of Wunderfizz! Wonderful Wunderfizz! It'll make you tingle! (Wunderfizz is banned in six states.)
— Origins
|
” |
| “ | Wonderful Wunder, Wunderfizz! (What's that?) Wonderful Wunder, it's Wunderfizz! (What's it called?) And if you don't know what that is, (I don't!) It's Wonderful Wunder, it's Wunderfizz! (Ohoh!) It's a soda pop that'll never stop! And it'll make you say: "Gee whiz, I'm gonna blow my top!" Wonderful Wunder, it's Wunderfizz! (What's that?) Wonderful Wunder, it's Wunderfizz! (What?) Wonderful Wunder, it's Wunderfizz! (One more time!) Wonderful Wunder, it's Wunderfizz! Hey, it's Wonderful Wunderfizz! Wonderful Wunderfizz! It'll make you tingle!
— Wonderful Wunderfizz
|
” |
| “ | Makes your hair full and thick! (Say, that's quite a trick) Makes you muscled & strong! (More right than wrong) Your math scores will soar! (Brains galore!) It'll straighten your tie! (My, oh my) It'll improve your IQ (Better than 102?) You'll be a real man... (She's talkin' about me, now) Be more popular at parties! (More un-stupid smarties!) It can clear up your pimples (Uh, those are dimples) Wunderfizz is more than a soda, but nobody really knows what Wunderfizz is... ha ha, Wonderful Wunderfizz Soda! (Wunderfizz may cause anal fissures, sexual side effects in men and women, may cause elephantitis[sic] of the uvula. Do not operate heavy machinery or consume pork or dairy products immediately after consuming Wunderfizz. And if you're over 50, please consult your physician before enjoying the Wonderful Wunderfizz family of sodas!) Wunderfizz is more than a soda, but nobody really knows what Wunderfizz is... Wonderful Wunderfizz! It'll make you tingle!
— Attributes
|
” |
Gallery
")
")
")
")
")
")
")
")
")
")
Call of Duty: Vanguard
In Call of Duty: Vanguard, the Perks are now known as Demonic Fountains, featuring new Perks which are similar to older, previously featured Perk-a-Colas. Perk Fountains feature 4 Tier Upgrades with the base Tier being free and every subsequent Tier having an increased cost: 2500 Essences for Tier 2, 5000 for Tier 3, and 7500 for Tier 4. When downed, the player will keep the Perk but will lose one Tier.
List of Demonic Fountains
Aethereal Haste
- Main article: Aethereal Haste

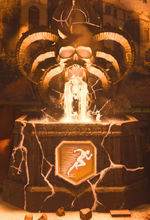
Aethereal Haste allows the player to increase their movement speed, similarly to Stamin-Up.
Demonic Frenzy
- Main article: Demonic Frenzy

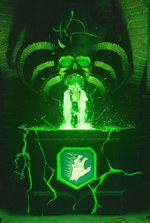
Demonic Frenzy allows the player to increase their reload speed, similarly to Speed Cola.
Diabolical Damage
- Main article: Diabolical Damage
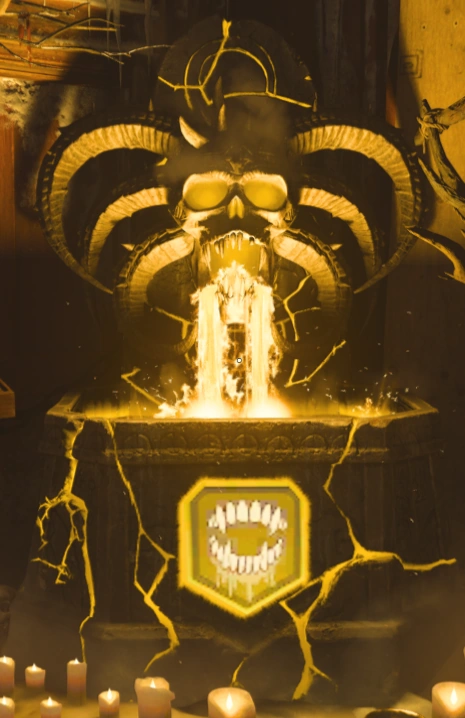
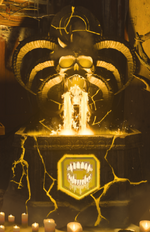
Diabolical Damage allows the player to increase the damage dealt while getting critical hits on enemies, similarly to Deadshot Daiquiri in Black Ops Cold War.
Fiendish Fortitude
- Main article: Fiendish Fortitude

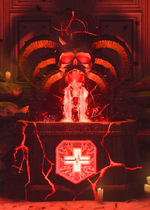
Fiendish Fortitude allows the player to increase their health, similarly to Juggernog.
Venomous Vigor
- Main article: Venomous Vigor
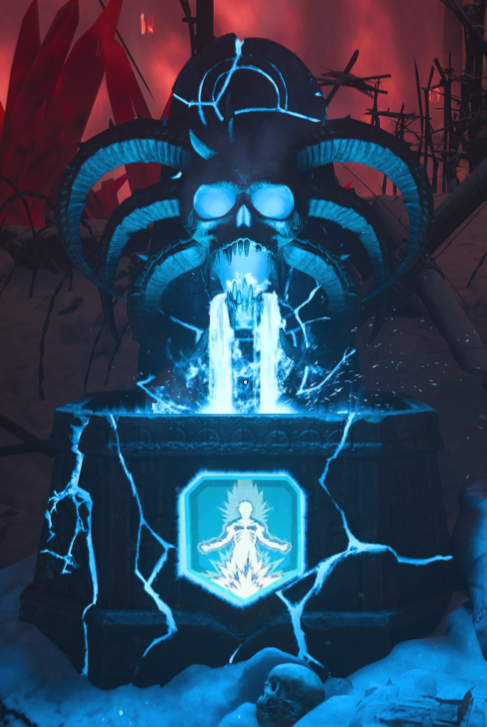

Venomous Vigor allows the player's health regeneration speed to increase, similarly to Quick Revive in Black Ops 4 and Black Ops Cold War.
Cut Perk-a-Colas
Amm-O-Matic
- Main article: Amm-O-Matic

The unused texture for the Amm-O-Matic
Amm-O-Matic is a cancelled vending machine in Der Riese. Although it cannot be seen or used in Der Riese, there is a stairway that leads up to it next to another cut perk called Candolier. The stairway is visible, but the player is unable to climb to the top of it. It is located somewhere near the next room to Double Tap. It seems that the idea was scrapped at the last second by Treyarch. Unused sound files that remain on the game's disc confirm that this machine was designed to give the player a Max Ammo upon purchase. The perk cost 10000 points and was only able to be used once. Its color is baby blue, similar to the Quick Revive machine, and its symbol resembles a bullet.
Candolier
- Main article: Candolier
Candolier is a Perk-a-Cola machine that was originally set to appear in Call of Duty: World at War, but was cut from the game. Not much is known about the machine, but it is most likely going to be the same function as the perk Bandolier from Call of Duty 4 and World at War by giving the player the ability to carry extra ammo. Its color is light green, and its symbol is a row of bullets, implying the idea of carrying extra ammo upon the perk being bought and used. This idea was eventually reimplimented in Call of Duty: Black Ops 4 as the perk Bandolier Bandit.
Tufbrew
- Main article: Tufbrew
Tufbrew is a cut Perk-a-Cola referenced in Ascension's game files. The name suggests the perk may have increased the player's strength in other ways than Juggernog would do.
Pronaide
- Main article: Pronaide
Pronaide was a cut perk in Ascension that would make the player go prone faster than normal. It can be assumed it was an early predecessor to PhD Flopper. Not much else is known about the perk.
Obtaining More than Four Perks
- Main article: Random Perk Bottle
Starting with the release of Ascension, the maps could contain more than four perks. However, the player can only buy four perks at one time: attempting to buy another when currently owning four will result in failure. To circumvent this, there are a few methods on maps after Ascension to obtain more than four, up to nine perks (with the release of Origins). The most commonplace is the Random Perk Bottle, a power-up that awards every living player with an extra random perk. Also, obtaining the Focusing Stone and completing Richtofen's Grand Scheme will award the player all perks that last until the end of the game. However, despite there being five with the release of Mule Kick in the Call of Duty: Black Ops versions of Verrückt, Shi No Numa, Der Riese, Kino der Toten and "Five", there is no way to obtain more than four.
In Tranzit, players can obtain over four perks by buying any three perks, then buying Tombstone Soda. The player must then down themselves, and "Not Feed the Zombies". After the player respawns, they will have to collect the other two perks they didn't have and buy Tombstone again. The player must be quick, otherwise their tombstone power-up will disappear. On TranZit, this can extremely difficult due to the large distances to travel. The only location to actually obtain enough perks to overcome the limit would be the Town, where Juggernog and Stamin-Up are located (provided the player was downed here so that the Tombstone would spawn here as well, and the player has bought all the other perks).
In Die Rise, killing all of the Jumping Jacks with 100% accuracy (or using the Trample Steam or knifing) during their respective round will award players a free perk bottle. The player is also able to obtain the six perks on the map by completing the easter egg.
In Buried, the player can obtain a free perk bottle by navigating through the Ghost's mansion when the lights are on, the lights should come back on after three to five rounds of the previous navigation. The player also acquires all seven perks upon completion of the "Mined Games" easter egg on Buried. Another way to get another free perk is to get a Ballistic Knife from the Mystery Box and then go to the Saloon. Once the player is at the Saloon, the player must then look on the floor for a white line. When they see the white line they must then be behind it and then shoot a knife at the dartboard. If the player's knife lands in the middle, they will get 100 points and then the piano behind them will play. This means that they triggered an Easter Egg. Go to the mansion, and then when you're at the entrance near the hedge maze, go to the opening to the mansion on the other side. Once the player is inside again, they will see the Ghost playing the piano, go to the right side of the piano and you will see an indicator saying to hold the action button and tip 10 points. Once you tip 10 points, you will get a free perk. You'll have 90 seconds to get a free perk using this method, if the player fails to get the perk, he/she must wait the next round and then attempt it again. Also, if the player can't shoot their knife at the dartboard in the middle, they must wait for the next round and try it again.
In Origins, the player can dig in orange spots if they have the Golden Shovel and are in Zombie Blood. Digging up an orange dig spot rewards the player with an empty perk bottle, which adds an extra perk slot. However, only four empty perk bottles can be acquired through digging through orange bone piles, the last perk should be Double Tap, for it comes free with one of the rewards at the stone chests at Generators 1 and 6.
In Call of Duty: Black Ops III Zombies, the player can use the Perkaholic, On The House, Soda Fountain, or Unquenchable GobbleGums to obtain more than four perks. With Soda Fountain, a player will obtain a free Perk-a-Cola with purchase of another Perk-a-Cola, provided that player does not have all existing Perk-a-Cola effects on the map. More than 4 perks can be obtained on Der Eisendrache, Zetsubou No Shima and Gorod Krovi by completing their respective Easter Eggs. More perks can be also be obtained on Zetsubou No Shima, Gorod Krovi and Revelations through completing challenges. Additionally, perks can be obtained on Zetsubou No Shima by growing fruit plants, or receiving a Blue Perk.Bottle Power-up from a plant. On Revelations, the player can obtain a random Perk by wall-running and jumping across a sequence of walls in the Der Eisendrache area of the map, when anti-gravity has been activated. Each player in the game can do this one time each, allowing every player to receive all 9 perks (providing they also complete the challenge on the map to get their ninth perk), without the use of GobbleGums.
In Call of Duty: Black Ops 4, there are 2 ways to get more perks in the map IX. The first involves completing challenges. After completing a certain amount of challenges, the player will be rewarded with a random Perk Vapor. The second involves gathering a Viking Helmet, Sword, and Mug and placing it on the corpse of a Viking found in the Odin Temple. Afterwards, the player must have Wraith Fire equipped in order to throw it on the corpse from the Zeus temple. When done correctly, the corpse should remain lit on fire. The player must then wait 7 rounds before a specific power-up drop will spawn which has a resemblance to Odin. When picking up the drop, the player will be automatically given a random perk that will stack on top of the pre-selected 4 perks (and the extra 5th perk from the challenge, if gained).
In Call of Duty: Black Ops Cold War, however, the Perk-limit is removed entirely, allowing the player to get more than 4 perks by default. This continues in Call of Duty: Vanguard, where the player can purchase all five Demonic Fountains.
Trivia
- The original four perk machines are based on old soft drink vending machines. Juggernog resembles an old Coca-Cola machine, Speed Cola resembles an old 7up machine, Quick Revive resembles an old Pepsi 5 cent machine, and Double Tap resembles an old 6 cent Coca-Cola machine.
- In Der Riese and Origins, going prone in front of the perk machines will give the player 25 points, although visually showing as 20 or 30 in Call of Duty: World at War, referring to finding change under vending machines in real life.
- In Call of Duty: Black Ops III and Call of Duty: Black Ops Cold War, going prone in front of the perk machines will give 100 points. This feature is known as "Loose Change" in Black Ops Cold War.
- On Shadows of Evil this method is harder to perform for Stamin-Up, as the machine is on a raised floor - it does work if the player goes prone before the machine and then crawls into it.
- On Die Maschine, it is harder to retrieve the Loose Change from Quick Revive because it is in the water of the Pond area. It will work if the player goes prone from an angle where they are on the wooden platform the perk is sitting on.
- The amount of points that the player will get by going to prone in front of perks is not affected by Double Points, except for in Call of Duty: Black Ops Cold War, where the player will receive 200 essence.
- Mule Kick doesn't give 100 points on Zetsubou No Shima due to the machine being partially submerged in water.
- In Call of Duty: Black Ops III and Call of Duty: Black Ops Cold War, going prone in front of the perk machines will give 100 points. This feature is known as "Loose Change" in Black Ops Cold War.
- Bumping into a Perk-a-Cola machine will make the sound of glass bottles clacking against each other.
- An unusable Juggernog bottle can be found on the table near the pool in the multiplayer map Villa in the Wii version of Call of Duty: Black Ops.
- An unusable Juggernog, Double Tap, Speed Cola and two Quick Revive bottles can be found in the glass case just in front of the Quick Revive vending machine in Kino der Toten.
- In Samantha Maxis's destroyed room, there are soda bottles for Juggernog, Quick Revive, Speed Cola and Double Tap Root Beer on the floor.
- When drinking in the Wii and iOS version, the bottle does not come close to the character's lips, however, in the iOS version, the bottle comes slightly closer.
- All Perk-a-Cola machines except for Mule Kick in Call of Duty: Black Ops have a bloody handprint on them.
- In Mob of the Dead, all the Perk-a-Colas and the Pack-a-Punch, with the exception of Electric Cherry, have a strange static effect on them.
- In Mob of the Dead, the perk machines play a heavily distorted version of their jingles, resembling a bell toll.
- As of the June 27, 2013 update, all Perk-a-Colas in Mob of the Dead and Buried have an updated HUD icon.
- In the map Metro, there are unusable perk bottles that can be found beside the yellow hut to the right of the red entrance (where the "A" flag spawns). Inside there is a glass cabinet that holds Tombstone, Quick Revive, Deadshot Daiquiri, Stamin-Up, and Juggernog.
- In Dr Monty's Factory, various Perk-a-Cola bottles can be seen on conveyor belts in the background. This is most visible on the sides of the screen.
- This is due to the fact that Monty helped create the Perk-a-Colas.
- In an Easter Egg on Revelations, Dr. Monty will sing an early version of the jingles. To hear these, the player must have both Widow's Wine and Electric Cherry and knife one of the original four perk machines.
- Unlike other perk machines, when standing next to the Quick Revive machine it will sometimes play glitched and garbled parts of its jingle.
- In Call of Duty: Black Ops 4, the Vapors dispensed by the Perk Altars are stated to smell extremely bad. All characters, with the exception of Stanton Shaw, hate the smells.
- According to Scarlett Rhodes, they smell like paint thinner.
- Bruno Delacroix states they smell like "gunpowder, dirt, blood, and screams".
- In Call of Duty: Black Ops Cold War, all of the perk machines have changes to them, ranging from minor color and material differences, to a full remake of the machine.
- While inside of the Dark Aether, all of the perk jingles are modified. They sound similar to that of a bent record, with a slowed, deeper sounding jingle. A similar effect is also applied to Pack-a-Punch.
- In Call of Duty: Vanguard, the Operators will comment that the Demonic Fountains taste terrible, and is frequently compared to urine.
- However, the Elder Gods seem to revere the demon blood of the Fountains as "nectar", according to Bellekar.
- Thomas Bolt will oddly, in a quote while drinking a Demonic Fountain, compare the flavor to that of "real maple syrup".
- Snoop Dogg compares the flavor to "cognac mixed with puke".
- A goblet for the Demonic Fountains first appeared in intel for Black Ops Cold War, where it was dubbed the "Archaic Goblet".