(→Trivia) |
(→Trivia) |
||
| Line 45: | Line 45: | ||
*This is the second time that a marine contact [[Major Gordon]] at the end of the mission. |
*This is the second time that a marine contact [[Major Gordon]] at the end of the mission. |
||
*If the player looks up towards the sky shortly before the tanks are attacked at the beginning of the level, the player can see five or so planes on the right side of the screen flying towards the opposite direction to which the player proceeds through the mission itself. |
*If the player looks up towards the sky shortly before the tanks are attacked at the beginning of the level, the player can see five or so planes on the right side of the screen flying towards the opposite direction to which the player proceeds through the mission itself. |
||
| + | *interestingly three M1897 TRENCHGUNS can be found one after the triple 25 go in to a cave there will be a M1919 and a TRENCHGUN the 2 is right after the cave (the one where the first is found) where banzai chargers come then look at the side there will be the 2 TRENCHGUN the 3 is after you go down the hill where the chargers game from look at the ground there will be the 3 TRENCHGUN |
||
==Weapon Loadout== |
==Weapon Loadout== |
||
Revision as of 18:44, 16 September 2012
"Relentless" is the seventh campaign mission in Call of Duty: World at War.
Characters
Plot
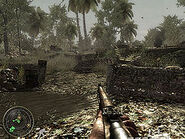
In this Mission Private Miller and his squad are tasked with taking out the Artillery positions on the Point and Miller starts out riding on a tank seen at the end of the previous level as Miller in a rain forest. After Roebuck gives a short briefing, the Japanese 200mm guns attacks the tank the player was riding on, forcing the player to get down and find cover.
The player starts out with a M1897 Trenchgun and the M1919 Browning Machine Gun. This is an excellent weapon combination, and there is no need to swap out for anything else. There is a lot of things to block out the players visibility, like leaves, as well as a lot of enemies with automatic weapons, so always stay near solid pieces of cover. Don't waste too much Browning ammo, as the player will find serious trouble if one is out-gunned while reloading. After the ambush, the player is told to get on a triple 25 AA gun in order to wipe out the first artillery position. Take care of any enemies near the AA gun before using the gun. After that, another AA gun is being used by Japanese infantry, but they scramble as soon as the squad arrives.
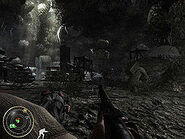
An M1 Garand w/ rifle grenade can be found in some of the weapons scattered around after the 1st AA gun. It is beneficial to wipe out enemies behind cover when unable to nail them with automatic fire. There is also a Scoped Springfield, which can be used to thin out Japanese troops. After killing even more enemies, the player moves along the path and soon follow a Flame Tank for cover, until they reach the entrance to the caves. The player then enters The Point (the place where artillery guns that shoot at the player in "Little Resistance") and wipe out infantry in the tunnels inside. After that, the player regroups with the squad and the mission ends.
Video Walkthrough
Achievements/Trophies
- Fearless (30
 / Bronze Trophy File:Trophy bronze.png) - Complete "Relentless" on Veteran difficulty.
Trivia
- In the beginning of the level all the marines will die except Pvt. Miller, Sgt. Roebuck, Pvt. Polonsky, Sgt. Penny, Sgt. Griffith and Sgt. Bojorguez.
- As the player gets off the tank, a Marine will get up, run towards the Japanese troops, completely ignoring them, and get killed by a rope.
- In this level there is a dead Japanese soldier face down in the tunnels. He strangely is not wearing a Japanese uniform, but instead a white T-shirt. If the player looks closely, he/she may notice his other side is all bloody, even though it shows he was only shot in the back. There are three Japanese soldiers in "Hard Landing" just like him. Their identities are unknown since their faces are blacked out.
- Miller will stumble as if he was hit even if he gets off the tank before the Flak impacts.
- When the player is on the tank at the start of the level, the player will appear to be sitting on air.
- In the end of this level, only four people (Miller, Roebuck, Polonsky and Rooker) will stand near the flare, the rest will disappear. The radar shows all of the other friendly soldiers at an unknown far side.
- Roebuck says the same thing as Reznov said in "Ring of Steel". When the player approaches the caves, Roebuck says "Stay with the tank! Use it for cover!"
- Under the map is a row of mounted Browning M1919's on a small chunk of wood.
- This is the second time that a marine contact Major Gordon at the end of the mission.
- If the player looks up towards the sky shortly before the tanks are attacked at the beginning of the level, the player can see five or so planes on the right side of the screen flying towards the opposite direction to which the player proceeds through the mission itself.
- interestingly three M1897 TRENCHGUNS can be found one after the triple 25 go in to a cave there will be a M1919 and a TRENCHGUN the 2 is right after the cave (the one where the first is found) where banzai chargers come then look at the side there will be the 2 TRENCHGUN the 3 is after you go down the hill where the chargers game from look at the ground there will be the 3 TRENCHGUN
Weapon Loadout
| Starting loadout |
|---|
| Found in level |
|---|
|
M1 Garand. Used by Marine Raiders and Polonsky Arisaka. Used by the IJA Thompson. Used by Roebuck and Marine Raiders Type 100. Used by the IJA BAR. Used by Marine Raiders M1919. Found throughout the level Type 99. Used by the IJA Springfield, scoped. Found by the first guns Nambu. Dropped by enemies in Last Stand |
Gallery
| |||||||||||


