No edit summary Tags: Visual edit Visual edit: Check |
No edit summary Tags: Visual edit Visual edit: Check |
||
| Line 204: | Line 204: | ||
== Trivia == |
== Trivia == |
||
| − | *The two MGs have no gunner if the player uses the "noclip" cheat (PC only). In addition, the player can control the MGs alone if getting to them via the "noclip" cheat. However, one will notice that the MGs will aim |
+ | *The two MGs have no gunner if the player uses the "noclip" cheat (PC only). In addition, the player can control the MGs alone if getting to them via the "noclip" cheat. However, one will notice that the MGs will aim and fire on their own, even while the player is using them. The player will also notice that the HUD icon which informs to press the "use" button to mount or dismount the MG is that of an [[MG42]]. |
*When the MGs at the end of the level are firing, the bullets seem to easily cut through the corrugated iron barriers. However if one takes cover behind one of these barriers, the player won't receive any damage. |
*When the MGs at the end of the level are firing, the bullets seem to easily cut through the corrugated iron barriers. However if one takes cover behind one of these barriers, the player won't receive any damage. |
||
*In the beginning of the level, if one turns around immediately and looks at the sky, the player can see two [[AH-1W Super Cobra]]s spawning out of nowhere. |
*In the beginning of the level, if one turns around immediately and looks at the sky, the player can see two [[AH-1W Super Cobra]]s spawning out of nowhere. |
||
| − | *The inside of the two Cobras at the end of the mission are very detailed |
+ | *The inside of the two Cobras at the end of the mission are very detailed. The user can actually see the pilots inside tapping each other on the shoulder and talking to each other. |
*After shooting the enemy tanks at the overpass with the Javelin, the player can hear M21's shooting in the distance. If the player uses the "noclip" cheat on the PC and goes to where the Abrams tank is, it is possible to see the Marines there shooting desert camouflaged M21s. The Marines themself are invincible and so are the enemies they are fighting. |
*After shooting the enemy tanks at the overpass with the Javelin, the player can hear M21's shooting in the distance. If the player uses the "noclip" cheat on the PC and goes to where the Abrams tank is, it is possible to see the Marines there shooting desert camouflaged M21s. The Marines themself are invincible and so are the enemies they are fighting. |
||
| − | *By using "give all" on the PC, one will get a desert camouflage M21 |
+ | *By using "give all" on the PC, one will get a desert camouflage M21 and a semi auto RPG with no rockets, but can still be fired. |
| − | *If the player |
+ | *If the player threw a flashbang in to the area where the ZPU-4 is, the gunner on the ZPU will die from the flashbang. Also, if the player tries to sneak up to the ZPU, the operator will jump down to the ground and will grab a [[W1200]]. |
| − | *If the player |
+ | *If the player turned backwards at the beginning of the level, he can see posters of [[Khaled Al-Asad|Al-Asad]] with Arabic text written on it. |
*If the player managed to climb up at several boxes after Alpha Team radioed Lt. Vasquez and keep jumping while peeking the tank (although there is a small chance for the player to look at it), the RPG that passed under the bridge was not operated by anyone as it was spawned suddenly under the bridge. |
*If the player managed to climb up at several boxes after Alpha Team radioed Lt. Vasquez and keep jumping while peeking the tank (although there is a small chance for the player to look at it), the RPG that passed under the bridge was not operated by anyone as it was spawned suddenly under the bridge. |
||
| − | *When looking at the minimap while en route to War Pig, there are eight Marines holding position at the tank. Once the player arrives all of them are suddenly killed and another four |
+ | *When looking at the minimap while en route to War Pig, there are eight Marines holding position at the tank. Once the player arrives, all of them are suddenly killed and another four Marines are spawned. |
*If the player looks at the M1A2 Abrams's right side after the squad regroups on the tank, it can be seen that Vasquez was not drawing the tactical map. It had been on the tank ever since the Marines arrived. |
*If the player looks at the M1A2 Abrams's right side after the squad regroups on the tank, it can be seen that Vasquez was not drawing the tactical map. It had been on the tank ever since the Marines arrived. |
||
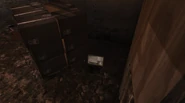
*By increasing the brightness on PC with the "r_fullbright 1" console command, the player can see that the water texture is actually of bunch of numbers and what appears to Arabic writing. |
*By increasing the brightness on PC with the "r_fullbright 1" console command, the player can see that the water texture is actually of bunch of numbers and what appears to Arabic writing. |
||
Revision as of 14:04, 26 July 2019
- For the multiplayer map, see Bog.
- "An Abrams tank is stranded on the outskirts. Al-Asad's forces are overrunning its position. Break through the enemy forces to provide support for the tank and its crew."
- — Call of Duty: Modern Warfare Remastered level description
- "Be advised, more enemy troops are converging on the tank. Get there A.S.A.P!"
- — Command
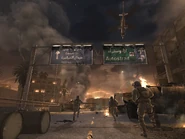
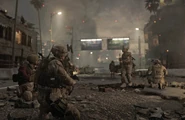
"The Bog" is the sixth level in Call of Duty 4: Modern Warfare and Call of Duty: Modern Warfare Remastered. In this level Lt. Vasquez's squad fight to reach and protect a disabled M1A2 Abrams tank.
Characters
- Paul Jackson (playable)
- Vasquez
- Griggs
- Roycewicz (Alive/K.I.A.) (player-determined)
- West (K.I.A.)
- War Pig
Plot
The Bog follows Sgt. Paul Jackson's squad (under Lt. Vasquez) as they fight through enemy lines to reach and defend a disabled M1A2 Abrams tank with the call sign of "War Pig". It starts out with Jackson's squad moving to the bog the tank is stranded in while encountering resistance. Jackson's squad is immediately ambushed by two heavily protected MGs. The squad splits in half: one squad advances on the enemies while the other provides fire support. Upon entering the half-destroyed building, Jackson can save Pvt. Roycewicz whilst going up a flight of stairs while also killing all of the OpFor by using their own MG against them. After the ambush, the Marine squad once again faces a large force of OpFor supported by T-72 tanks on the highway overpass, but using the FGM-148 Javelin, Jackson dispatches each of the enemy tanks in turn. With this threat neutralized, the squad then hurries over to War Pig, where they, as well as the surviving Marines of Alpha Company in the Bog, hold off attacks from the OpFor. Though the OpFor charge the M1 Abrams mercilessly with C4 packs, the Marines succeed in holding them off and driving them back further. After rescuing War Pig, Jackson is called upon to destroy a nearby ZPU-4 and plant a beacon to receive air support from an AH-1W Super Cobras, which clear a building the squad cannot attack. The arrival of air support finishes off the remaining OpFor resistance and sends the few survivors fleeing. With this done, the squad regroups and sets up a defensive perimeter, allowing the engineers to come in and repair the damaged tank.
Walkthrough
Getting Started
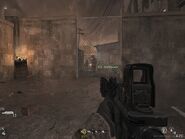
The player will spawn at the end of a street sometime near dawn, so it's a bit darker than usual. There's not much time to look around, so follow Vasquez and move up.
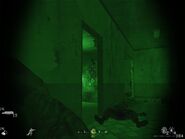
While moving up, the two machine guns in the building should rip apart a few members of the squad. On some of the higher difficulties, it may be advisable to take cover near a destroyed car to avoid the MG fire. Although many marines will take cover behind a non-destroyed car, they are scripted to run away as soon as it catches fire. It's easy for one of the cars to blow up in a matter of seconds, be aware. Feel free to pick up any fallen comrades' weapons. One of them is the W1200, which could come in handy in a few minutes. Get a few shots on the OpFor on the balcony and the MGs and move up to Vasquez. Head down the stairs and switch to Night Vision.
After putting on the goggles, go through the opening to the destroyed part of the building. There will be one hostile taking cover behind a wall piece straight ahead and two others to the right side. One of the OpFor to the side will drop a G3, so it's always an option to pick that up if one wants a full-auto secondary weapon. Be sure to take care of the tango high up behind a box before proceeding. Throw a flash up on the balcony where there's an machine gun and some RPGs before regrouping with the squad in the apartment.
The Apartment
Lt. Vasquez will order the player and Pvt. Roycewicz to sweep the second floor. While heading up the stairs, a hostile will come out of hiding and start to attack Roycewicz. Now, it's the player's choice to save him or not, but it is in the best interest of the user to have that extra ally. Either way, kill the tango. Head up the stairs and wait for Vasquez to come up the stairway. Take out a flash grenade and throw it in the hallway. Aim down sights and fire away. In a few shots, they should be all dead, but there's more to deal with. Before reaching the end of the hallway, throw another flash, this time through the last door so that it will hit the balcony where the rest of the OpFor is. Quickly run to the end of the hallway and spin to the left to gun down the stunned hostiles.
It's not quite over yet, one tango was able to hide in the open room near the balcony. He'll take cover behind a table and attempt to fire upon the player. At this point, Vasquez and some other marines should be behind the player to finish the enemy. If not, just shoot him and move on. The user will be ordered by Vasquez to get on the OpFor machine gun left on the balcony. It can be hard to spot, but it's on the edge of the balcony. Be advised that the MG has an unlimited amount of ammo. Gun down any hostiles left in the other building. Some will try to take cover behind wall edges, so just shoot the walls as the bullets will penetrate through. After a while, a command will buzz in informing Vasquez that more enemy troops are converging on the tank.
As the user is heading back to the ground floor, notice two marines breaching a locked room. One can choose to assist them and find an intel laptop and one tango hiding. Kill him and follow the squad back downstairs. At this stage, disable the night-vision goggles, as the rest of the mission provides more light. If one wishes a head-start on the next part of the mission, go into the last room on the left before the stairway. From there, the player can shoot the hostiles from a window with relative ease.
The Parking Lot And The Tanks
On the ground floor, head in to the now opened room. The player will find that the marines are trying to suppress the targets in the parking lot. Chuck a few grenades out there and watch the exploding cars. Keep an eye on the snipers and RPGs on the rooftop to the left, and the tango on the balcony to the right. It is possible that one member of the squad will drop an M249 SAW, which the user can pick up if so desired to demolish the enemy's ground. If one finds himself being pummeled with grenades near the windows, head over to the two other rooms to the left, to get a better angle of attack. Flanking the enemy by heading into the sniper building via the room to the far left is a good tactic. If one manages to get inside there, he/she can take out the hostiles from the balcony above. After a while, a squad member should scream "Contact on the overpass!". An OpFor force will then appear on the highway overpass ahead.
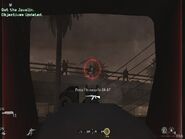
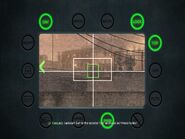
Vasquez will order Pvt. West to destroy the four tanks that have rolled in with the FGM-148 Javelin. The marine unfortunately gets shot down by enemy fire. While Vasquez tells the player to pick up the Javelin "now", the player will take a lot of damage by picking it up "now". Instead, head up to the balcony on the building to the left (if not already there), and take out some tangos on the overpass. One may even want to pick up the Dragunov if wishing to snipe the enemy. The wooden box provides adequate cover if under heavy fire. The player won't be able to hold off the hostile force for very long, but shoot at least shoot enough so that one can walk freely in the parking lot without severe fire. After doing so, go ahead and swap the secondary weapon out for the Javelin. Head back up to the second floor and get into position so that the character's body is almost outside the doorway to the balcony. One should be able to destroy the tanks without being under much fire. Line up the middle of the screen with the green box and pull the trigger. The character automatically reloads so don't worry about that. Be wary of grenades that might be thrown near the door. Only two of the tanks need to be destroyed, as the other two will drive off, but one can choose to destroy all of them if the player chooses to. After all of the tanks are gone, head back down to the parking lot.
The Marines, The Tank, and The Bog
The squad will break through the fence by making a hole in it. Head through and follow the squad to the next destination. A marine defending War Pig recently radioed in informing Vasquez that they were under some heavy fire, which one can see from the flying RPGs whizzing by. At the end of the route, there will be a wall which leads into the bog. The tank is understandably surrounded by enemies, so be careful. The player should be mainly concerned about the hostiles to the south, they will advance if not under fire. Use the dumpster where Vasquez is for cover, but keep an eye out for grenades. If the player has any grenades left, now is the time to use them. Stick to the south for awhile and then work around the flank to the southwest and then the flank to the west. It looks difficult, but if taken one step at a time, it's simple.
Vasquez will request air support from command, but a ZPU-4 to the west is preventing any choppers from flying in. Time to take it out.
Clearing The Way
Head to that area to the south that was formerly full of hostiles (and may still be) and head towards the open building. On the way, take out any remaining tangos on the rooftops to the left. Enter the building and crouch down. Slowly make way towards the doorway and open fire on the hostiles up on the roof. Next, head over to the wooden market stand to the right and use it as cover while gunning down any tangos inside the opposite building. Try and get a clear shot while heading over there, take out the ZPU gunner before he gets off. There's two hostiles hiding near the ZPU, and one can flank them pretty well by shooting them in the window overlooking the ZPU. Once they're down, plant the C4 on the ZPU by pressing the action button and head back towards the other two marines. Click the trigger and watch the fireworks.
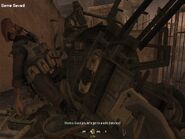
Vasquez and the rest of the squad will catch up, and start to fire upon the last building in the area. It's heavily armed with two MGs and a couple of balconies with hostiles. Since the ZPU is down, Vasquez called in air support but they need to know the squad's exact location. He will order the player to plant an IR beacon to signal the helicopters. Make way to the location by moving behind the storage containers. This way, the player can avoid the machine gun fire. Like with the C4, plant the IR beacon with the action button. Find some cover and wait for the choppers to fly in. The user can get involved by shooting some tangos on the balconies, but the two helicopters will take care of them. Once the building is demolished, regroup with the squad at the tank. This is the end of the mission after Vasquez explains the plan.
Videos
Weapon loadout
| Starting loadout |
|---|
| Found in level |
|---|
|
M16A4. Used by Lt. Vasquez M249 SAW. Used by Ssgt. Griggs and mounted W1200. Used by Marines and OpFor AK-47. Used by the OpFor AK-74u. Used by the OpFor G3. Used by the OpFor RPD. Used by the OpFor Dragunov. Used by OpFor snipers RPG-7. Used by the OpFor FGM-148 Javelin. Used to take out T-72s M9. Used by USMC and OpFor MP5. Only possible through commands Empty semi-auto RPG-7. Only possible through "give all" M21 with Alternate Desert Camouflage. Only possible through "give all" M1911 .45. Used by Marines ZPU-4. Used by the OpFor M4A1. Used by Marines |
Enemy Intelligence
- Laptop 8 is in the second level of the apartment that that is entered after being ambushed. The laptop is in a room that some friendly soldiers will break into after all the enemies have been eliminated with the mounted MG.
- Laptop 9 is in the marketplace just before entering the bog (after having used the Javelin). Following the path in the marketplace will lead to a low building with both the OpFor symbol and an AK-47 sprayed onto its front. Turning left from there and then turning left again will lead to a secluded corner where a stack of boxes hides the laptop from plain sight.
Achievements
- Save the Bacon (20
 ) - Complete "The Bog" on any difficulty.
 - Rescue Roycewicz (20
 ) - Save Pvt. Roycewicz on the stairs in "The Bog."
 - The Bog (40
 ) - Complete "The Bog" and "War Pig" on Veteran.
Gallery
Transcript
- Main article: The Bog/Transcript
Trivia
- The two MGs have no gunner if the player uses the "noclip" cheat (PC only). In addition, the player can control the MGs alone if getting to them via the "noclip" cheat. However, one will notice that the MGs will aim and fire on their own, even while the player is using them. The player will also notice that the HUD icon which informs to press the "use" button to mount or dismount the MG is that of an MG42.
- When the MGs at the end of the level are firing, the bullets seem to easily cut through the corrugated iron barriers. However if one takes cover behind one of these barriers, the player won't receive any damage.
- In the beginning of the level, if one turns around immediately and looks at the sky, the player can see two AH-1W Super Cobras spawning out of nowhere.
- The inside of the two Cobras at the end of the mission are very detailed. The user can actually see the pilots inside tapping each other on the shoulder and talking to each other.
- After shooting the enemy tanks at the overpass with the Javelin, the player can hear M21's shooting in the distance. If the player uses the "noclip" cheat on the PC and goes to where the Abrams tank is, it is possible to see the Marines there shooting desert camouflaged M21s. The Marines themself are invincible and so are the enemies they are fighting.
- By using "give all" on the PC, one will get a desert camouflage M21 and a semi auto RPG with no rockets, but can still be fired.
- If the player threw a flashbang in to the area where the ZPU-4 is, the gunner on the ZPU will die from the flashbang. Also, if the player tries to sneak up to the ZPU, the operator will jump down to the ground and will grab a W1200.
- If the player turned backwards at the beginning of the level, he can see posters of Al-Asad with Arabic text written on it.
- If the player managed to climb up at several boxes after Alpha Team radioed Lt. Vasquez and keep jumping while peeking the tank (although there is a small chance for the player to look at it), the RPG that passed under the bridge was not operated by anyone as it was spawned suddenly under the bridge.
- When looking at the minimap while en route to War Pig, there are eight Marines holding position at the tank. Once the player arrives, all of them are suddenly killed and another four Marines are spawned.
- If the player looks at the M1A2 Abrams's right side after the squad regroups on the tank, it can be seen that Vasquez was not drawing the tactical map. It had been on the tank ever since the Marines arrived.
- By increasing the brightness on PC with the "r_fullbright 1" console command, the player can see that the water texture is actually of bunch of numbers and what appears to Arabic writing.
- This mission was featured in the demo version of the game.
| ||||||||||||||||||||


