No edit summary |
No edit summary |
||
| (28 intermediate revisions by 5 users not shown) | |||
| Line 1: | Line 1: | ||
| − | {{Game|wwii|nz}} |
+ | {{Game|wwii|nz|featured}} |
{{Infobox/level |
{{Infobox/level |
||
|name = '''The Darkest Shore''' |
|name = '''The Darkest Shore''' |
||
| Line 6: | Line 6: | ||
|next = [[The Shadowed Throne]] |
|next = [[The Shadowed Throne]] |
||
|game = ''[[Call of Duty: WWII]]'' |
|game = ''[[Call of Duty: WWII]]'' |
||
| − | |character = <b>Main Cast</b><br />[[Drostan Hynd]], [[Olivia Durant]], [[Marie Fischer]], [[Jefferson Potts]]<br /><b>Other</b><br />[[B.A.T. Agent]], [[B.A.T. Elite]], [[ |
+ | |character = <b>Main Cast</b><br />[[Drostan Hynd]], [[Olivia Durant]], [[Marie Fischer]], [[Jefferson Potts]]<br /><b>Other</b><br />[[B.A.T. Agent]], [[B.A.T. Elite]], [[Sofia Del Toro|Hunter]], [[Mikhail Saburov|Mountaineer]], [[Asim Omari|Slayer]], [[Mai Nguyen|Survivalist]], [[Smuggler|Necromedic]], [[Stalker]], [[Skullbreaker (character)|Skullbreaker]], [[Cavalier]], [[Lady Death]], [[Iron Tiger]], [[Wayfarer]], [[Wicht Warden]] |
|team = [[Monuments, Fine Arts, and Archives Program|MFAA]] |
|team = [[Monuments, Fine Arts, and Archives Program|MFAA]] |
||
|place = [[Heligoland]], North Sea, [[Nazi Germany]] |
|place = [[Heligoland]], North Sea, [[Nazi Germany]] |
||
| − | |date = April 18- |
+ | |date = April 18-19th, 1945 |
| − | |objective = Survive against the limitless waves of the undead.<br>[[Black Winds to Darker Lands|Recover the pommel of]] [[ |
+ | |objective = Survive against the limitless waves of the undead.<br>[[Black Winds to Darker Lands|Recover the pommel of the]] [[Sword of Barbarossa]]. <small>(primary objective)</small><br>[[Making History (WWII)|Destroy and escape the island]]. <small>(secondary objective)</small> |
| − | |enemies = [[Zombie]]s, [[Pest]]s, [[Bomber (zombie)|Bombers]], [[Wüstling]]s, [[Brenner]]s, [[Meuchler]]s, [[Treasure Zombie]]s, [[Junkers Ju 87|Stukas]], [[Zerstörer]]s, [[Meistermeuchler]]s, [[Leprechaun Zombie]] <small>([[Operation Shamrock & Awe]])</small> |
+ | |enemies = [[Zombie]]s, [[Pest]]s, [[Bomber (zombie)|Bombers]], [[Wüstling]]s, [[Brenner]]s, [[Meuchler]]s, [[Treasure Zombie]]s, [[Junkers Ju 87|Stukas]], [[Zerstörer]]s, [[Meistermeuchler]]s, [[Leprechaun Zombie]] <small>([[Operation Shamrock & Awe]])</small>, [[Drowned Zombie]]s <small>([[Days of Summer]])</small> |
| − | |multiplayer = [[Pointe du Hoc (map)|Pointe du Hoc]], [[Operation Neptune]], [[HQ (map)|HQ]] |
+ | |multiplayer = [[Pointe du Hoc (map)|Pointe du Hoc]], [[Operation Neptune]], [[HQ (map)|HQ]], [[Sandbox (map)|Sandbox]] |
|campaign = [[D-Day (mission)|D-Day]] |
|campaign = [[D-Day (mission)|D-Day]] |
||
}} |
}} |
||
| Line 31: | Line 31: | ||
===Bluffs=== |
===Bluffs=== |
||
| − | The Bluffs connects a large portion of the map together. Immediately coming from the Beach Passage, the player will be in a small room. In this room is a [[Geistchild]] machine, the [[Type 100]] weapon locker for 750 Jolts, and a door leading into the U-Boat Pens for 1500 Jolts. |
+ | The Bluffs connects a large portion of the map together. Immediately coming from the Beach Passage, the player will be in a small room. In this room is a [[Geistchild]] machine, the [[Type 100]] weapon locker for 750 Jolts, and a door leading into the U-Boat Pens for 1500 Jolts. There is also a Mystery Box located here as well. |
Continuing along the Bluffs, the player will reach another opening, which contains a door leading to the Bunkers. On this pathway is the [[SVT-40]] weapon locker, which can be bought for 750 Jolts. Unlike most of the other doors in the map, this is one of a few which can only be opened once the main power switch is activated. |
Continuing along the Bluffs, the player will reach another opening, which contains a door leading to the Bunkers. On this pathway is the [[SVT-40]] weapon locker, which can be bought for 750 Jolts. Unlike most of the other doors in the map, this is one of a few which can only be opened once the main power switch is activated. |
||
| Line 43: | Line 43: | ||
===Overlook=== |
===Overlook=== |
||
| − | The Overlook is the area between the Bunkers and the Artillery Bunker. Within this area is the inital Mystery Box location, as well as the [[STG-44|STG44]] and [[M1941]] weapon lockers, both costing 1500 Jolts. There is also a couple Flak Guns the player can use as part of the easter egg. There are also two |
+ | The Overlook is the area between the Bunkers and the Artillery Bunker. Within this area is the inital Mystery Box location, as well as the [[STG-44|STG44]] and [[M1941]] weapon lockers, both costing 1500 Jolts. There is also a couple Flak Guns the player can use as part of the easter egg. There are also two separate doors that lead into the Artillery Bunker, both costing 1500 Jolts. |
===Artillery Bunker=== |
===Artillery Bunker=== |
||
| Line 63: | Line 63: | ||
===Underground Tunnels=== |
===Underground Tunnels=== |
||
This area of the map can only be accessed by riding the minecart, which can be found and called to either the Beach, Bunker 1, or the U-Boat Pens. In this area are the three Elektroschnalle, which are situated between the three destinations, as well as the [[PPSh-41]] weapon locker for 1000 Jolts, being located within the U-Boat Pens tunnel. Bombers also frequently spawn in this area when first riding the minecart. |
This area of the map can only be accessed by riding the minecart, which can be found and called to either the Beach, Bunker 1, or the U-Boat Pens. In this area are the three Elektroschnalle, which are situated between the three destinations, as well as the [[PPSh-41]] weapon locker for 1000 Jolts, being located within the U-Boat Pens tunnel. Bombers also frequently spawn in this area when first riding the minecart. |
||
| − | In the tunnels is also the entrance to the secret chamber that houses the pommel of |
+ | In the tunnels is also the entrance to the secret chamber that houses the pommel of the Sword of Barbarossa. To access this, the player must allow a Bomber to blow open a hole in the side of a wall on the junction track between Bunker 1 and the Beach. |
==Weapons== |
==Weapons== |
||
| Line 74: | Line 74: | ||
1911 menu icon WWII.png|[[M1911|1911]] (player-determined) |
1911 menu icon WWII.png|[[M1911|1911]] (player-determined) |
||
Machine Pistol menu icon WWII.png|[[Machine Pistol (WWII)|Machine Pistol]] (player-determined) |
Machine Pistol menu icon WWII.png|[[Machine Pistol (WWII)|Machine Pistol]] (player-determined) |
||
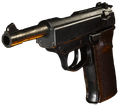
| + | 9mm SAP Model WWII.png|[[Walther P38|9mm SAP]] (player-determined) |
||
Reichsrevolver Model WWII.png|[[Reichsrevolver]] (player-determined) |
Reichsrevolver Model WWII.png|[[Reichsrevolver]] (player-determined) |
||
Enfield No. 2 Model WWII.png|[[Enfield No. 2]] (player-determined) |
Enfield No. 2 Model WWII.png|[[Enfield No. 2]] (player-determined) |
||
| + | M1 Garand menu icon WWII.png|[[M1 Garand]] (player-determined) |
||
Gewehr 43 Model WWII.png|[[Gewehr 43]] (player-determined) |
Gewehr 43 Model WWII.png|[[Gewehr 43]] (player-determined) |
||
M1A1 Carbine menu icon WWII.png|[[M1 Carbine|M1A1 Carbine]] (player-determined) |
M1A1 Carbine menu icon WWII.png|[[M1 Carbine|M1A1 Carbine]] (player-determined) |
||
Kar98k menu icon WWII.png|[[Kar98k]] (player-determined) |
Kar98k menu icon WWII.png|[[Kar98k]] (player-determined) |
||
| + | Combat Shotgun menu icon WWII.png|[[M1897 Trench Gun|Combat Shotgun]] (player-determined) |
||
Sawed-off Shotgun menu icon WWII.png|[[Double-Barreled Shotgun|Sawed-off Shotgun]] (player-determined) |
Sawed-off Shotgun menu icon WWII.png|[[Double-Barreled Shotgun|Sawed-off Shotgun]] (player-determined) |
||
M30 Luftwaffe Drilling menu icon WWII.png|[[M30 Luftwaffe Drilling]] (player-determined) |
M30 Luftwaffe Drilling menu icon WWII.png|[[M30 Luftwaffe Drilling]] (player-determined) |
||
| + | MP-40 menu icon WWII.png|[[MP40|MP-40]] (player-determined) |
||
| + | M1928 menu icon WWII.png|[[M1928]] (player-determined) |
||
Mk 2 Fragmentation menu icon WWII.png|[[Mk 2 Grenade|Mk 2 Fragmentation]] (player-determined) |
Mk 2 Fragmentation menu icon WWII.png|[[Mk 2 Grenade|Mk 2 Fragmentation]] (player-determined) |
||
N° 74 ST menu icon WWII.png|[[N° 74 ST]] (player-determined) |
N° 74 ST menu icon WWII.png|[[N° 74 ST]] (player-determined) |
||
| Line 132: | Line 137: | ||
ITRA Burst Model WWII.png|[[ITRA Burst]] ''(added via update)'' |
ITRA Burst Model WWII.png|[[ITRA Burst]] ''(added via update)'' |
||
M2 Carbine Model WWII.png|[[M2 Carbine]] ''(added via update)'' |
M2 Carbine Model WWII.png|[[M2 Carbine]] ''(added via update)'' |
||
| + | AVS-36 Model WWII.jpg|[[AVS-36]] ''(added via update)'' |
||
| + | Automaton Model WWII.png|[[Automaton]] ''(added via update)'' |
||
| + | AS-44 Model WWII.png|[[AS-44]] ''(added via update)'' |
||
Grease Gun menu icon WWII.png|[[Grease Gun]] |
Grease Gun menu icon WWII.png|[[Grease Gun]] |
||
PPSh-41 menu icon WWII.png|[[PPSh-41]] |
PPSh-41 menu icon WWII.png|[[PPSh-41]] |
||
| Line 142: | Line 150: | ||
M-38 Model WWII.png|[[MAS 38|M-38]] ''(added via update)'' |
M-38 Model WWII.png|[[MAS 38|M-38]] ''(added via update)'' |
||
Sterling Model WWII.png|[[Sterling]] ''(added via update)'' |
Sterling Model WWII.png|[[Sterling]] ''(added via update)'' |
||
| + | Nambu Type 2 Model WWII.png|[[Nambu Type 2]] ''(added via update)'' |
||
| + | ZK-383 Model WWII.jpg|[[ZK-383]] ''(added via update)'' |
||
| + | Ribeyrolles Model WWII.jpg|[[Ribeyrolles]] ''(added via update)'' |
||
| + | Proto-X1 Model WWII.jpg|[[Proto-X1]] ''(added via update)'' |
||
Lewis menu icon WWII.png|[[Lewis (weapon)|Lewis]] |
Lewis menu icon WWII.png|[[Lewis (weapon)|Lewis]] |
||
MG 15 menu icon WWII.png|[[MG 15]] |
MG 15 menu icon WWII.png|[[MG 15]] |
||
| Line 148: | Line 160: | ||
GPMG Model WWII.png|[[Breda M1930|GPMG]] |
GPMG Model WWII.png|[[Breda M1930|GPMG]] |
||
MG 81 Model WWII.png|[[MG 81]] ''(added via update)'' |
MG 81 Model WWII.png|[[MG 81]] ''(added via update)'' |
||
| + | Stinger Model WWII.png|[[Stinger (light machine gun)|Stinger]] ''(added via update)'' |
||
Karabin menu icon WWII.png|[[Karabin]] |
Karabin menu icon WWII.png|[[Karabin]] |
||
Lee Enfield menu icon WWII.png|[[Lee-Enfield|Lee Enfield]] |
Lee Enfield menu icon WWII.png|[[Lee-Enfield|Lee Enfield]] |
||
M1903 menu icon WWII.png|[[Springfield|M1903]] |
M1903 menu icon WWII.png|[[Springfield|M1903]] |
||
Type 38 Model WWII.png|[[Type 38]] ''(added via update)'' |
Type 38 Model WWII.png|[[Type 38]] ''(added via update)'' |
||
| + | Lever Action Model WWII.png|[[Lever Action]] ''(added via update)'' |
||
| + | PTRS-41 Model WWII.jpg|[[PTRS-41]] ''(added via update)'' |
||
| + | De Lisle Model WWII.jpg|[[De Lisle]] ''(added via update)'' |
||
| + | 3-Line Rifle Model WWII.png|[[Mosin-Nagant|3-Line Rifle]] ''(added via update)'' |
||
Combat Shotgun menu icon WWII.png|[[M1897 Trench Gun|Combat Shotgun]] |
Combat Shotgun menu icon WWII.png|[[M1897 Trench Gun|Combat Shotgun]] |
||
Toggle Action menu icon WWII.png|[[Toggle Action]] |
Toggle Action menu icon WWII.png|[[Toggle Action]] |
||
| + | Blunderbuss Model WWII.jpg|[[Blunderbuss]] ''(added via update)'' |
||
1911 menu icon WWII.png|[[M1911|1911]] |
1911 menu icon WWII.png|[[M1911|1911]] |
||
9mm SAP Model WWII.png|[[Walther P38|9mm SAP]] |
9mm SAP Model WWII.png|[[Walther P38|9mm SAP]] |
||
| Line 169: | Line 187: | ||
<gallery widths="120" bordercolor="transparent"> |
<gallery widths="120" bordercolor="transparent"> |
||
Ripsaw WWII.png|[[Ripsaw]] |
Ripsaw WWII.png|[[Ripsaw]] |
||
| − | Barbarossa's Sword Pommel WWII.png|[[ |
+ | Barbarossa's Sword Pommel WWII.png|[[Pommel of Barbarossa]] |
Flak 38 HQ WWII.png|[[Flakvierling]]s - 750 points |
Flak 38 HQ WWII.png|[[Flakvierling]]s - 750 points |
||
</gallery> |
</gallery> |
||
|} |
|} |
||
| − | ==Blitz== |
+ | == Blitz == |
{| class="wikitable collapsible autocollapse" style="background: transparent;" |
{| class="wikitable collapsible autocollapse" style="background: transparent;" |
||
| − | ! style="background: transparent;" | [[ |
+ | ! style="background: transparent;" | [[Blitz Machines]] |
|- |
|- |
||
| style="background: transparent; border: 1px solid transparent;" | |
| style="background: transparent; border: 1px solid transparent;" | |
||
| Line 187: | Line 205: | ||
Schnellblitz Ingame WWII.png|[[Schnellblitz]] - 3000 Jolts |
Schnellblitz Ingame WWII.png|[[Schnellblitz]] - 3000 Jolts |
||
</gallery> |
</gallery> |
||
| + | |} |
||
| + | |||
| + | ==Intro Cutscene Transcript== |
||
| + | {| class="wikitable collapsible autocollapse" style="background: transparent;" |
||
| + | ! style="background: transparent;" | Intro Cutscene Transcript |
||
| + | |- |
||
| + | | style="background: transparent; border: 1px solid transparent;" | |
||
| + | ''Three infloatable boats are coming out of the fog as they approaching the island of Heligoland.'' |
||
| + | |||
| + | '''[[Marie Fischer]]:''' It's too soon for us to be back in the field. [[Hank Rideau|Rideau]] was wrong to send us out. |
||
| + | |||
| + | ''The [[Raven (callsign)|Raven team]], composed of Marie Fischer, [[Drostan Hynd]], [[Olivia Durant]] and [[Jefferson Potts]], is seen paddling in one of the inflatable boats.'' |
||
| + | |||
| + | '''Drostan:''' Yeah, anybody else wish he hadn't survived the [[Prologue (map)|train wreck]]? |
||
| + | |||
| + | '''Drostan:''' Oh shit... |
||
| + | |||
| + | ''A giant sea stack appears out of the fog.'' |
||
| + | |||
| + | '''Olivia Durant:''' I watched you at the briefing. You don't like this place. |
||
| + | |||
| + | '''Jefferson Potts:''' What is it? Rideau said you've been here before. |
||
| + | |||
| + | '''Drostan:''' Yeah, well... this place has got some history. |
||
| + | |||
| + | ''A shot of the team approaching the island can be seen.'' |
||
| + | |||
| + | '''Drostan:''' Poking out of the sea like Lucifer's middle finger. I'm not surprised [[Peter Straub|Straub]] came here to this piece of shit island. I'm just wondering why we followed him. |
||
| + | |||
| + | ''The soldiers in the other two boats can be seen loading their weapons before disappearing into the fog.'' |
||
| + | |||
| + | '''Marie:''' We need to find the rest of the [[Sword of Barbarossa|sword]] before he does. We need to... |
||
| + | |||
| + | '''Olivia:''' We know why you're here, Marie. At least this time you're not pretending to care about our cause. |
||
| + | |||
| + | '''Marie:''' This is different. We should have heavy fog all morning. If everything goes well, nobody will fire a shot. |
||
| + | |||
| + | '''Drostan:''' Yeah, when have things ever gone well for our little tea party? |
||
| + | |||
| + | '''Drostan:''' Oh shit. |
||
| + | |||
| + | ''One of the inflatable boats can be seen coming out of the fog covered in blood. The team's Elektroschnalle devices begin to beep as they land on the shore indicating the presence of zombies.'' |
||
| + | |||
| + | '''Drostan:''' Oh shit! |
||
| + | |||
| + | '''Jefferson:''' Stay close. Let's move people. |
||
| + | |||
| + | '''Olivia:''' Where is the other boat? |
||
| + | |||
| + | ''The last boat can be seen behind the team, empty.'' |
||
| + | |||
| + | '''Drostan:''' This damn island. This goddamn island! |
||
| + | |||
| + | '''Olivia''' Shh calme-toi (''calm down'') |
||
| + | |||
| + | ''Zombies can be seen coming out of the water and marching towards the characters.'' |
||
| + | |||
| + | '''Drostan:''' Still feeling optimistic, darlin'? I can't believe I'm saying this but I wish we were back in Germany! |
||
| + | |} |
||
| + | |||
| + | == Ending Cutscene Transcript == |
||
| + | {| class="wikitable collapsible autocollapse" style="background: transparent;" |
||
| + | ! style="background: transparent;" | Ending Cutscene Transcript |
||
| + | |- |
||
| + | | style="background: transparent; border: 1px solid transparent;" | |
||
| + | ''Dozens of bombers are seen flying over Heligoland and releasing bombs with a zombie looking at the bombs as they drop.'' |
||
| + | |||
| + | '''Jefferson:''' Now, people. Now! |
||
| + | |||
| + | ''The Raven team is seen running away from the bombing and towards the cliffs as a zeppeling starts to leave the island.'' |
||
| + | |||
| + | '''Marie:''' Straub! He's escaping! |
||
| + | |||
| + | ''The zeppelin is seen flying near a sea stack which is about to fall down.'' |
||
| + | |||
| + | '''Olivia:''' Not without us, he isn't! |
||
| + | |||
| + | '''Jefferson:''' You've got to be kidding me! |
||
| + | |||
| + | '''Drostan:''' I told ya we were fucked. Drostan told ya! |
||
| + | |||
| + | ''The Raven team jumped on the falling stack before landing on the side of the zeppelin. Once on the zeppelin, the team watchs the bombing of the island.'' |
||
| + | |||
| + | '''Jefferson:''' Well there goes the cavalry... |
||
| + | |||
| + | '''Drostan:''' Yeah, we've gone from bad to worse mate. |
||
| + | |||
| + | ''The teams notices several zeppelins flying over the clouds.'' |
||
| + | |||
| + | '''Marie:''' He's bringing his army to Britain! |
||
| + | |||
| + | '''Olivia:''' No, something's wrong. We're not going to England. Straub has other plans. |
||
|} |
|} |
||
Revision as of 18:36, 2 January 2019
- "A sea fortress and keystone to the power of the Nazi Kriegsmarine, this mist-shrouded island hides secrets both ancient and terrifying."
- — Mission Briefing
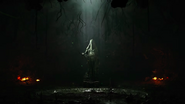
The Darkest Shore is the third Nazi Zombies map in Call of Duty: WWII. It is part of the game's first DLC, The Resistance.
Overview
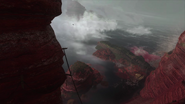
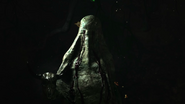
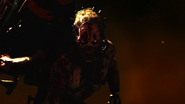
The Darkest Shore is a medium-sized map, ranging from cliffside bunkers to an underground sub pen. The map features many returning features, as well as new features such as the Minecart system, a new wonder weapon, and the introduction of a new enemy, the Meuchler, a deadly combination of the Bomber and Wüstling.
Beach
Players will spawn on the beach, which is being assaulted by a large swarm of zombies. The player must kill all of the attacking zombies by any means necessary. There are several things in this area that can help the player, such as two turreted MG 42s which the player can use against the swarm. Once the swarm is killed, Wave 1 will begin.
In this area is a Mystery Box location, Lebenblitz, and the Machine Pistol and M1A1 Carbine weapon lockers, both costing 500 Jolts. To the right of the M1A1 Carbine is the Beach exit of the mine system. To the left of the Machine Pistol is the doorway leading through the Beach Passage, which cost 750 Jolts to open.
Beach Passage
This area of the map is relatively small, acting as a connector between the Beach and the Bluffs. Within this room is the Sawed-off Shotgun weapon locker, which can be bought for 500 Jolts. At the top of the staircase is the door leading to the Bluffs, costing 1000 Jolts.
Bluffs
The Bluffs connects a large portion of the map together. Immediately coming from the Beach Passage, the player will be in a small room. In this room is a Geistchild machine, the Type 100 weapon locker for 750 Jolts, and a door leading into the U-Boat Pens for 1500 Jolts. There is also a Mystery Box located here as well.
Continuing along the Bluffs, the player will reach another opening, which contains a door leading to the Bunkers. On this pathway is the SVT-40 weapon locker, which can be bought for 750 Jolts. Unlike most of the other doors in the map, this is one of a few which can only be opened once the main power switch is activated.
Advancing further down the Bluffs is a small overlook area, containing Schildblitz, the Waffe 28 for 1000 Jolts and a door leading to Bunker 3 for 1000 Jolts.
Bunkers
The Bunkers is a small outside area that connects Bunker 1, the Bluffs, and the Overlook together. Within this area is the Combat Shotgun weapon locker for 1000 points, which is located near the Bluffs entrance. The M1 Garand is also in this area, to the right of the doorway leading to Bunker 1. Laufenblitz is also found here as well, next to the doorway leading to the Overlook, which costs 1250 Jolts to open.
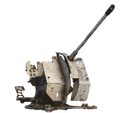
Within this area as well are several Flak Guns, which the player can use to defend against the Stukas during the easter egg.
Overlook
The Overlook is the area between the Bunkers and the Artillery Bunker. Within this area is the inital Mystery Box location, as well as the STG44 and M1941 weapon lockers, both costing 1500 Jolts. There is also a couple Flak Guns the player can use as part of the easter egg. There are also two separate doors that lead into the Artillery Bunker, both costing 1500 Jolts.
Artillery Bunker
The Artillery Bunker contains a few things of interest to the player. Within the room contains a large cannon, which the player can use during the easter egg. There is also Faustblitz near the cannon, as well as the FG 42 for 1600 Jolts. In the bunker area is the BAR for 1500 Jolts, another Geistchild machine, and one of the two power switches in the map. Within this area is where the handle for the Ripsaw is located, being situated in three locations around the bunker. There is also a switch for the Spike Trap located near the power switch within the bunker, the other being directly outside of the bunker, on a wall between the bunker and a Flak Cannon.
Bunker 1
Bunker 1 is a small area that contains a couple things for the player. It can be accessed from the 1250 Jolts door in the Bunkers or the 1250 Jolts door coming up from Bunker 3. Within this area is the Bunker 1 exit for the mine system, the Lee Enfield weapon locker, which can be bought for 1600 Jolts, and Kugelblitz.
Bunker 3
Bunker 3 houses a couple of important items for the player. Within this area is the sawblade part for the Ripsaw, which is situated on top of a corpse, the MP-40 weapon locker for 1000 Jolts, and the Ubersprengen, which can be unlocked once the player has turned on both power switches and has obtained all three Elektroschnalle from the mines.
Bunker 3 can be accessed from a couple ways, either from the staircase by the Ubersprengen, the 1000 Jolt door from the Bluffs, or from the U-Boat Pens. Within the bunker is another Mystery Box location and the Grease Gun weapon locker for 1000 Jolts. There is also a door leading into the U-Boat Pens for 1000 Jolts here as well.
U-Boat Pens
The U-Boat Pens houses the main power switch of the map, which is located in the hallway connecting the main pen area with the Bluffs and Bunker 3. In this hallway is Schnellblitz, another Geistchild machine, and the assembly station for the Ripsaw.
Inside the main sub pen are a few things for the player, such as the U-Boat Pens exit for the mines, the M1928 weapon locker for 1000 Jolts and the Propeller Trap for 1000 Jolts as well. There is also a Corpse Gate featured in the room, which when opened, will give the players access to the "Freezer" a room where Straub houses his creations.
Underground Tunnels
This area of the map can only be accessed by riding the minecart, which can be found and called to either the Beach, Bunker 1, or the U-Boat Pens. In this area are the three Elektroschnalle, which are situated between the three destinations, as well as the PPSh-41 weapon locker for 1000 Jolts, being located within the U-Boat Pens tunnel. Bombers also frequently spawn in this area when first riding the minecart. In the tunnels is also the entrance to the secret chamber that houses the pommel of the Sword of Barbarossa. To access this, the player must allow a Bomber to blow open a hole in the side of a wall on the junction track between Bunker 1 and the Beach.
Weapons
| Starting Weapons |
|---|
|
P-08 (player-determined) 1911 (player-determined) Machine Pistol (player-determined) 9mm SAP (player-determined) Reichsrevolver (player-determined) Enfield No. 2 (player-determined) M1 Garand (player-determined) Gewehr 43 (player-determined) M1A1 Carbine (player-determined) Kar98k (player-determined) Combat Shotgun (player-determined) Sawed-off Shotgun (player-determined) M30 Luftwaffe Drilling (player-determined) MP-40 (player-determined) M1928 (player-determined) Mk 2 Fragmentation (player-determined) N° 74 ST (player-determined) Satchel Charge (player-determined) S-Mine 44 (player-determined) Throwing Knife (player-determined) |
| Weapon Lockers |
|---|
|
Machine Pistol - 500 Jolts M1A1 Carbine - 500 Jolts Sawed-off Shotgun - 500 Jolts SVT-40 - 750 Jolts Type 100 - 750 Jolts Grease Gun - 1000 Jolts Waffe 28 - 1000 Jolts PPSh-41 - 1000 Jolts M1928 - 1000 Jolts MP-40 - 1000 Jolts Combat Shotgun - 1000 Jolts M1 Garand - 1250 Jolts M1941 - 1500 Jolts STG44 - 1500 Jolts BAR - 1500 Jolts FG 42 - 1600 Jolts Lee Enfield - 1600 Jolts |
| Mystery Box |
|---|
|
Type 5 (added via update) ITRA Burst (added via update) M2 Carbine (added via update) AVS-36 (added via update) Automaton (added via update) AS-44 (added via update) M-38 (added via update) Sterling (added via update) Nambu Type 2 (added via update) ZK-383 (added via update) Ribeyrolles (added via update) Proto-X1 (added via update) MG 81 (added via update) Stinger (added via update) Type 38 (added via update) Lever Action (added via update) PTRS-41 (added via update) De Lisle (added via update) 3-Line Rifle (added via update) Blunderbuss (added via update) Reichsrevolver (added via update) Enfield No. 2 (added via update) |
| Other |
|---|
Blitz
| Blitz Machines |
|---|
|
Lebenblitz - 1500 Jolts (co-op), 500 Jolts (solo) Kugelblitz - 2000 Jolts Laufenblitz - 2000 Jolts Faustblitz - 2000 Jolts Schildblitz - 2000 Jolts Schnellblitz - 3000 Jolts |
Intro Cutscene Transcript
| Intro Cutscene Transcript |
|---|
|
Three infloatable boats are coming out of the fog as they approaching the island of Heligoland. Marie Fischer: It's too soon for us to be back in the field. Rideau was wrong to send us out. The Raven team, composed of Marie Fischer, Drostan Hynd, Olivia Durant and Jefferson Potts, is seen paddling in one of the inflatable boats. Drostan: Yeah, anybody else wish he hadn't survived the train wreck? Drostan: Oh shit... A giant sea stack appears out of the fog. Olivia Durant: I watched you at the briefing. You don't like this place. Jefferson Potts: What is it? Rideau said you've been here before. Drostan: Yeah, well... this place has got some history. A shot of the team approaching the island can be seen. Drostan: Poking out of the sea like Lucifer's middle finger. I'm not surprised Straub came here to this piece of shit island. I'm just wondering why we followed him. The soldiers in the other two boats can be seen loading their weapons before disappearing into the fog. Marie: We need to find the rest of the sword before he does. We need to... Olivia: We know why you're here, Marie. At least this time you're not pretending to care about our cause. Marie: This is different. We should have heavy fog all morning. If everything goes well, nobody will fire a shot. Drostan: Yeah, when have things ever gone well for our little tea party? Drostan: Oh shit. One of the inflatable boats can be seen coming out of the fog covered in blood. The team's Elektroschnalle devices begin to beep as they land on the shore indicating the presence of zombies. Drostan: Oh shit! Jefferson: Stay close. Let's move people. Olivia: Where is the other boat? The last boat can be seen behind the team, empty. Drostan: This damn island. This goddamn island! Olivia Shh calme-toi (calm down) Zombies can be seen coming out of the water and marching towards the characters. Drostan: Still feeling optimistic, darlin'? I can't believe I'm saying this but I wish we were back in Germany! |
Ending Cutscene Transcript
| Ending Cutscene Transcript |
|---|
|
Dozens of bombers are seen flying over Heligoland and releasing bombs with a zombie looking at the bombs as they drop. Jefferson: Now, people. Now! The Raven team is seen running away from the bombing and towards the cliffs as a zeppeling starts to leave the island. Marie: Straub! He's escaping! The zeppelin is seen flying near a sea stack which is about to fall down. Olivia: Not without us, he isn't! Jefferson: You've got to be kidding me! Drostan: I told ya we were fucked. Drostan told ya! The Raven team jumped on the falling stack before landing on the side of the zeppelin. Once on the zeppelin, the team watchs the bombing of the island. Jefferson: Well there goes the cavalry... Drostan: Yeah, we've gone from bad to worse mate. The teams notices several zeppelins flying over the clouds. Marie: He's bringing his army to Britain! Olivia: No, something's wrong. We're not going to England. Straub has other plans. |
Recordings
- Main article: The Darkest Shore/Recordings
Achievements/Trophies
| Name | Description | Points | Trophy Level | Image |
|---|---|---|---|---|
| Making History | In The Darkest Shore, escape from the island before the bombing starts. | 80 |
Silver |
|
| Black Winds to Darker Lands | In The Darkest Shore, retrieve Barbarossa's Pommel. | 100 |
Silver |
|
| Severe Pommeling | In The Darkest Shore, kill 250 zombies with Barbarossa's pommel in one match. | 50 |
Bronze |

|
| Own the Fog, Be the Fog | In The Darkest Shore, kill a Meuchler in the fog. | 30 |
Bronze |
|
| The Bakers Dozen Massacre | In The Darkest Shore, line up and kill 13 zombies with one Ripsaw shot. | 50 |
Bronze |
|
| Going Up... | In The Darkest Shore, unlock the Ubersprengen. | 30 |
Bronze |
|
| Still Lurking | In The Darkest Shore, find and shoot Dr. Straub. | 30 |
Bronze |
|
| Always on Spine | In The Darkest Shore, rip out the spine of every Zombie type. | 50 |
Bronze |
|
| I Got This | In The Darkest Shore, survive the initial beach rush without using any machine gun turrets. | 30 |
Bronze |
|
| This Damn Island | In The Darkest Shore, explore the entire island. | 50 |
Silver |
Gallery
Videos
| ||||||||||||||||||||||||||


