No edit summary |
Aldo012345 (talk | contribs) No edit summary |
||
| (26 intermediate revisions by 13 users not shown) | |||
| Line 1: | Line 1: | ||
| − | {{game|cod1}} |
+ | {{game|cod1|codc}} |
{{Infobox/level |
{{Infobox/level |
||
|prev = [[Warsaw Factory]] |
|prev = [[Warsaw Factory]] |
||
| Line 9: | Line 9: | ||
|character = [[Alexei Ivanovich Voronin]] |
|character = [[Alexei Ivanovich Voronin]] |
||
|team = [[Red Army]] |
|team = [[Red Army]] |
||
| − | |weapons = Whatever the player had in [[Warsaw Factory]] |
||
| − | |enemyweapons= [[MP40]], [[Kar98k]], [[MP44]], [[Panzerfaust]] |
||
|place = Warsaw, Poland |
|place = Warsaw, Poland |
||
| − | |date = January |
+ | |date = January 17, 1945 |
|objective = Clear Out the Factory, Get to the Exit |
|objective = Clear Out the Factory, Get to the Exit |
||
|enemies = [[German Military]] |
|enemies = [[German Military]] |
||
| − | |multiplayer = [[Railyard (Map)| |
+ | |multiplayer = [[Railyard (Map)|Railyard]]}} |
| ⚫ | |||
| ⚫ | |||
| + | == Characters == |
||
| + | * [[Alexei Ivanovich Voronin]] (playable) |
||
| + | ==Walkthrough== |
||
| ⚫ | |||
| ⚫ | |||
| ⚫ | As soon as the player gets outside, take out the rifle, crouch, and turn right. There are three troops hiding and near the crates to the far right. At least one of them has an [[MP-40]], get rid of them as quickly as possible. At least one likes to hide behind a crate, and pops up occasionally, so the player may have to wait. |
||
| ⚫ | |||
| − | |||
| − | The following sections are a walkthrough. |
||
| − | |||
| ⚫ | |||
| − | |||
| ⚫ | |||
| − | |||
| ⚫ | As soon as the player gets outside, take out the rifle, crouch and turn right. There are three troops hiding and near the crates to the far right. At least one of them has an [ |
||
When all of the troops on the right are down, go prone, look at the small area between the boxcars and the ground, and snipe the troops that can be seen. When enemy threats have been vanquished, go to the left and keep the sniper rifle out in case any other troops emerge. |
When all of the troops on the right are down, go prone, look at the small area between the boxcars and the ground, and snipe the troops that can be seen. When enemy threats have been vanquished, go to the left and keep the sniper rifle out in case any other troops emerge. |
||
| − | Get past the boxcars and get to the station at the opposite end of the field. There may be troops hiding behind the boxes, so take them out. Go right, and the player will see a raised area with an [ |
+ | Get past the boxcars and get to the station at the opposite end of the field. There may be troops hiding behind the boxes, so take them out. Go right, and the player will see a raised area with an [[MG42]] and sandbags on it. Grab the [[Submachine Gun|SMG]] and take out the gunner. Right after, some troops will come from the front. Take them out with the SMG, grab the two medium medikits near the stairs, and go forward then right. There are more troops, eliminate these threats. This time, go back to the area with the MG42. The path in front of the player isn't the best way to approach the next area, despite how tempting it looks. |
When back in the MG42 area, go into the ruined building. and get to the end of the building. The cracks at the wall will reveal another area. This is the area previously warned not to go to. The enemies will notice the player soon, so try to get one or two kills, then duck and pop back up. This throws off their firing and allows a surprise shot in. |
When back in the MG42 area, go into the ruined building. and get to the end of the building. The cracks at the wall will reveal another area. This is the area previously warned not to go to. The enemies will notice the player soon, so try to get one or two kills, then duck and pop back up. This throws off their firing and allows a surprise shot in. |
||
| − | When the field has few enemies, jump into it |
+ | When the field has few enemies, jump into it; the hangar to the left has a respawner just before the door, and it'll shut off when getting on the field. The field has a [[Panzerfaust 60|Panzerfaust]] box on the left sandbag formation and an MG42 on the right. Keep the box in mind, it will be needed shortly. |
Crouch and get near the hangar until two enemy troops on a Tiger 1E tank are seen. Kill the guy on the side, then at the one sticking out from the cockpit. When achieved two kills, the tank will begin to move and will stop at the entrance to the hangar. When he begins to move, grab a rocket and stay on the left wall just outside the hanger until he stops. When he does, take a few steps back, then fire the rocket at his side. The tank will be destroyed, and the player can pick up the weapon that was dropped. |
Crouch and get near the hangar until two enemy troops on a Tiger 1E tank are seen. Kill the guy on the side, then at the one sticking out from the cockpit. When achieved two kills, the tank will begin to move and will stop at the entrance to the hangar. When he begins to move, grab a rocket and stay on the left wall just outside the hanger until he stops. When he does, take a few steps back, then fire the rocket at his side. The tank will be destroyed, and the player can pick up the weapon that was dropped. |
||
There's a small crack between the wall and the tank at the entrance on the other side, so find and get near the crack, but don't go through! |
There's a small crack between the wall and the tank at the entrance on the other side, so find and get near the crack, but don't go through! |
||
| − | |||
<gallery> |
<gallery> |
||
Image:railspawn.png|Spawn |
Image:railspawn.png|Spawn |
||
| Line 51: | Line 45: | ||
Image:railtankout.png|Fire a rocket at the side of the tank to destroy it |
Image:railtankout.png|Fire a rocket at the side of the tank to destroy it |
||
</gallery> |
</gallery> |
||
| ⚫ | |||
| − | |||
| ⚫ | |||
| − | |||
There are many enemies in the hangar, sniping would be the best bet in this scenario. Make sure to be crouched at all times, and try to lean form the left wall if possible. Don't throw grenades at them, they tend to lump into large clusters naturally, allowing the player to take out two in one hit. Some may try to hide behind Tiger 1E tanks and/or go prone. |
There are many enemies in the hangar, sniping would be the best bet in this scenario. Make sure to be crouched at all times, and try to lean form the left wall if possible. Don't throw grenades at them, they tend to lump into large clusters naturally, allowing the player to take out two in one hit. Some may try to hide behind Tiger 1E tanks and/or go prone. |
||
| Line 61: | Line 53: | ||
Go inside the room they were in, and there will be two large medikits in a corner and a medium medikit on a table. Grab whatever is needed, then go up and go right into a hall that leads outside. |
Go inside the room they were in, and there will be two large medikits in a corner and a medium medikit on a table. Grab whatever is needed, then go up and go right into a hall that leads outside. |
||
| − | |||
<gallery> |
<gallery> |
||
Image:railhangar.png|This is why you don't want to rush into the hangar |
Image:railhangar.png|This is why you don't want to rush into the hangar |
||
| Line 68: | Line 59: | ||
Image:railroomhealth.png|The medikits in the room |
Image:railroomhealth.png|The medikits in the room |
||
</gallery> |
</gallery> |
||
| ⚫ | |||
| − | |||
| ⚫ | Get into the hall, but do not go outside! There's a troop just to the right of the entrance to the outside area, toss a grenade so that it bounces off the nearby sandbags and gets near him. Hopefully, the grenade will kill him. Lean left near the doorway to make sure that it did. If not, finish him off with the [[Submachine Gun|SMG]]. |
||
| ⚫ | |||
| − | |||
| ⚫ | Get into the hall, but do not go outside! There's a troop just to the right of the entrance to the outside area, toss a grenade so that it bounces off the nearby sandbags and gets near him. Hopefully, the grenade will kill him. Lean left near the doorway to make sure that it did. If not, finish him off with the SMG. |
||
Go outside, and two troops will try to approach from the right. Go back and use the grenade trick to get them. When they're dead, go out and snipe everybody else. |
Go outside, and two troops will try to approach from the right. Go back and use the grenade trick to get them. When they're dead, go out and snipe everybody else. |
||
| Line 78: | Line 67: | ||
The exit is at the truck. |
The exit is at the truck. |
||
| − | |||
<gallery> |
<gallery> |
||
Image:railoutside1.png|Don't run outside ASAP, or you'll get butchered |
Image:railoutside1.png|Don't run outside ASAP, or you'll get butchered |
||
Image:railexit.png|Exit |
Image:railexit.png|Exit |
||
</gallery> |
</gallery> |
||
| + | ==Weapon Loadout== |
||
| − | |||
| + | {|class= "wikitable collapsible autocollapse" style= "background: transparent;" |
||
| + | ! style= "background: transparent;" | Starting Loadout |
||
| + | |- |
||
| + | | style= "background: transparent; border: 1px solid transparent;" | |
||
| + | <gallery widths="120" bordercolor="transparent"> |
||
| + | PPSh-41 menu icon CoD1.png|[[PPSh-41]] |
||
| + | Mosin-Nagant scoped menu icon CoD1.png|Scoped [[Mosin-Nagant]] |
||
| + | </gallery> |
||
| ⚫ | |||
| + | {|class= "wikitable collapsible autocollapse" style= "background: transparent;" |
||
| + | ! style= "background: transparent;" | Obtainable |
||
| + | |- |
||
| + | | style= "background: transparent; border: 1px solid transparent;" | |
||
| + | <gallery widths="120" bordercolor="transparent"> |
||
| + | Kar98k menu icon CoD1.png|[[Kar98k]] |
||
| + | MP40 menu icon CoD1.png|[[MP40]] |
||
| + | MP44 menu icon CoD1.png|[[MP44]] |
||
| + | Panzerfaust Third Person CoD.png|[[Panzerfaust 60]] |
||
| + | </gallery> |
||
| + | |} |
||
== Video == |
== Video == |
||
| + | [[File:Call of Duty - Mission 21 - Railyard|425px]] |
||
| − | <youtube>http://www.youtube.com/watch?v=MXXQ_Dio9Xw&feature=PlayList&p=26F63F2CBE593B8D&index=24</youtube> |
||
| + | ==Transcript== |
||
| − | |||
| + | {{Main|Warsaw Railyard/Transcript}} |
||
{{CoD Campagin}} |
{{CoD Campagin}} |
||
[[Category:Call of Duty Single Player Levels]] |
[[Category:Call of Duty Single Player Levels]] |
||
| − | [[Category:Levels]] |
||
| − | [[Category:Singleplayer]] |
||
Revision as of 10:59, 5 November 2019
"Warsaw Railyard" is the twenty-first campaign mission in Call of Duty. After securing the tank facility, the player must exit the factory complex.
Characters
- Alexei Ivanovich Voronin (playable)
Walkthrough
Getting Started
The player will spawn in a small room with four large medikits to the right and a path outside. Grab the medikits and go outside.
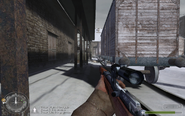
As soon as the player gets outside, take out the rifle, crouch, and turn right. There are three troops hiding and near the crates to the far right. At least one of them has an MP-40, get rid of them as quickly as possible. At least one likes to hide behind a crate, and pops up occasionally, so the player may have to wait.
When all of the troops on the right are down, go prone, look at the small area between the boxcars and the ground, and snipe the troops that can be seen. When enemy threats have been vanquished, go to the left and keep the sniper rifle out in case any other troops emerge.
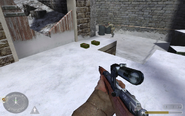
Get past the boxcars and get to the station at the opposite end of the field. There may be troops hiding behind the boxes, so take them out. Go right, and the player will see a raised area with an MG42 and sandbags on it. Grab the SMG and take out the gunner. Right after, some troops will come from the front. Take them out with the SMG, grab the two medium medikits near the stairs, and go forward then right. There are more troops, eliminate these threats. This time, go back to the area with the MG42. The path in front of the player isn't the best way to approach the next area, despite how tempting it looks.
When back in the MG42 area, go into the ruined building. and get to the end of the building. The cracks at the wall will reveal another area. This is the area previously warned not to go to. The enemies will notice the player soon, so try to get one or two kills, then duck and pop back up. This throws off their firing and allows a surprise shot in.
When the field has few enemies, jump into it; the hangar to the left has a respawner just before the door, and it'll shut off when getting on the field. The field has a Panzerfaust box on the left sandbag formation and an MG42 on the right. Keep the box in mind, it will be needed shortly.
Crouch and get near the hangar until two enemy troops on a Tiger 1E tank are seen. Kill the guy on the side, then at the one sticking out from the cockpit. When achieved two kills, the tank will begin to move and will stop at the entrance to the hangar. When he begins to move, grab a rocket and stay on the left wall just outside the hanger until he stops. When he does, take a few steps back, then fire the rocket at his side. The tank will be destroyed, and the player can pick up the weapon that was dropped.
There's a small crack between the wall and the tank at the entrance on the other side, so find and get near the crack, but don't go through!
The Hangar
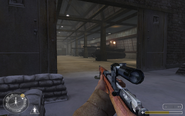
There are many enemies in the hangar, sniping would be the best bet in this scenario. Make sure to be crouched at all times, and try to lean form the left wall if possible. Don't throw grenades at them, they tend to lump into large clusters naturally, allowing the player to take out two in one hit. Some may try to hide behind Tiger 1E tanks and/or go prone.
Once the area has been cleared out, stand up, go inside, take a left and weave through the tanks just to be sure that everybody is dead. Go near the end of the hangar and look right. There is a doorway that leads to another room.
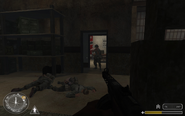
This room has two troops in it, with one behind a desk, so throw a grenade near the desk guy in order to kill and/or scatter both of them, then finish off who's left.
Go inside the room they were in, and there will be two large medikits in a corner and a medium medikit on a table. Grab whatever is needed, then go up and go right into a hall that leads outside.
Near the Exit
Get into the hall, but do not go outside! There's a troop just to the right of the entrance to the outside area, toss a grenade so that it bounces off the nearby sandbags and gets near him. Hopefully, the grenade will kill him. Lean left near the doorway to make sure that it did. If not, finish him off with the SMG.
Go outside, and two troops will try to approach from the right. Go back and use the grenade trick to get them. When they're dead, go out and snipe everybody else.
When the field appears to be clear, run out near to the Opel Blitz truck at the far right. Troops will respawn from the warehouse entrance, but only one or two come out at a time, so let the allies near the truck deal with them.
The exit is at the truck.
Weapon Loadout
| Starting Loadout |
|---|
|
Scoped Mosin-Nagant |
| Obtainable |
|---|
Video
Transcript
- Main article: Warsaw Railyard/Transcript
| ||||||||||||||


